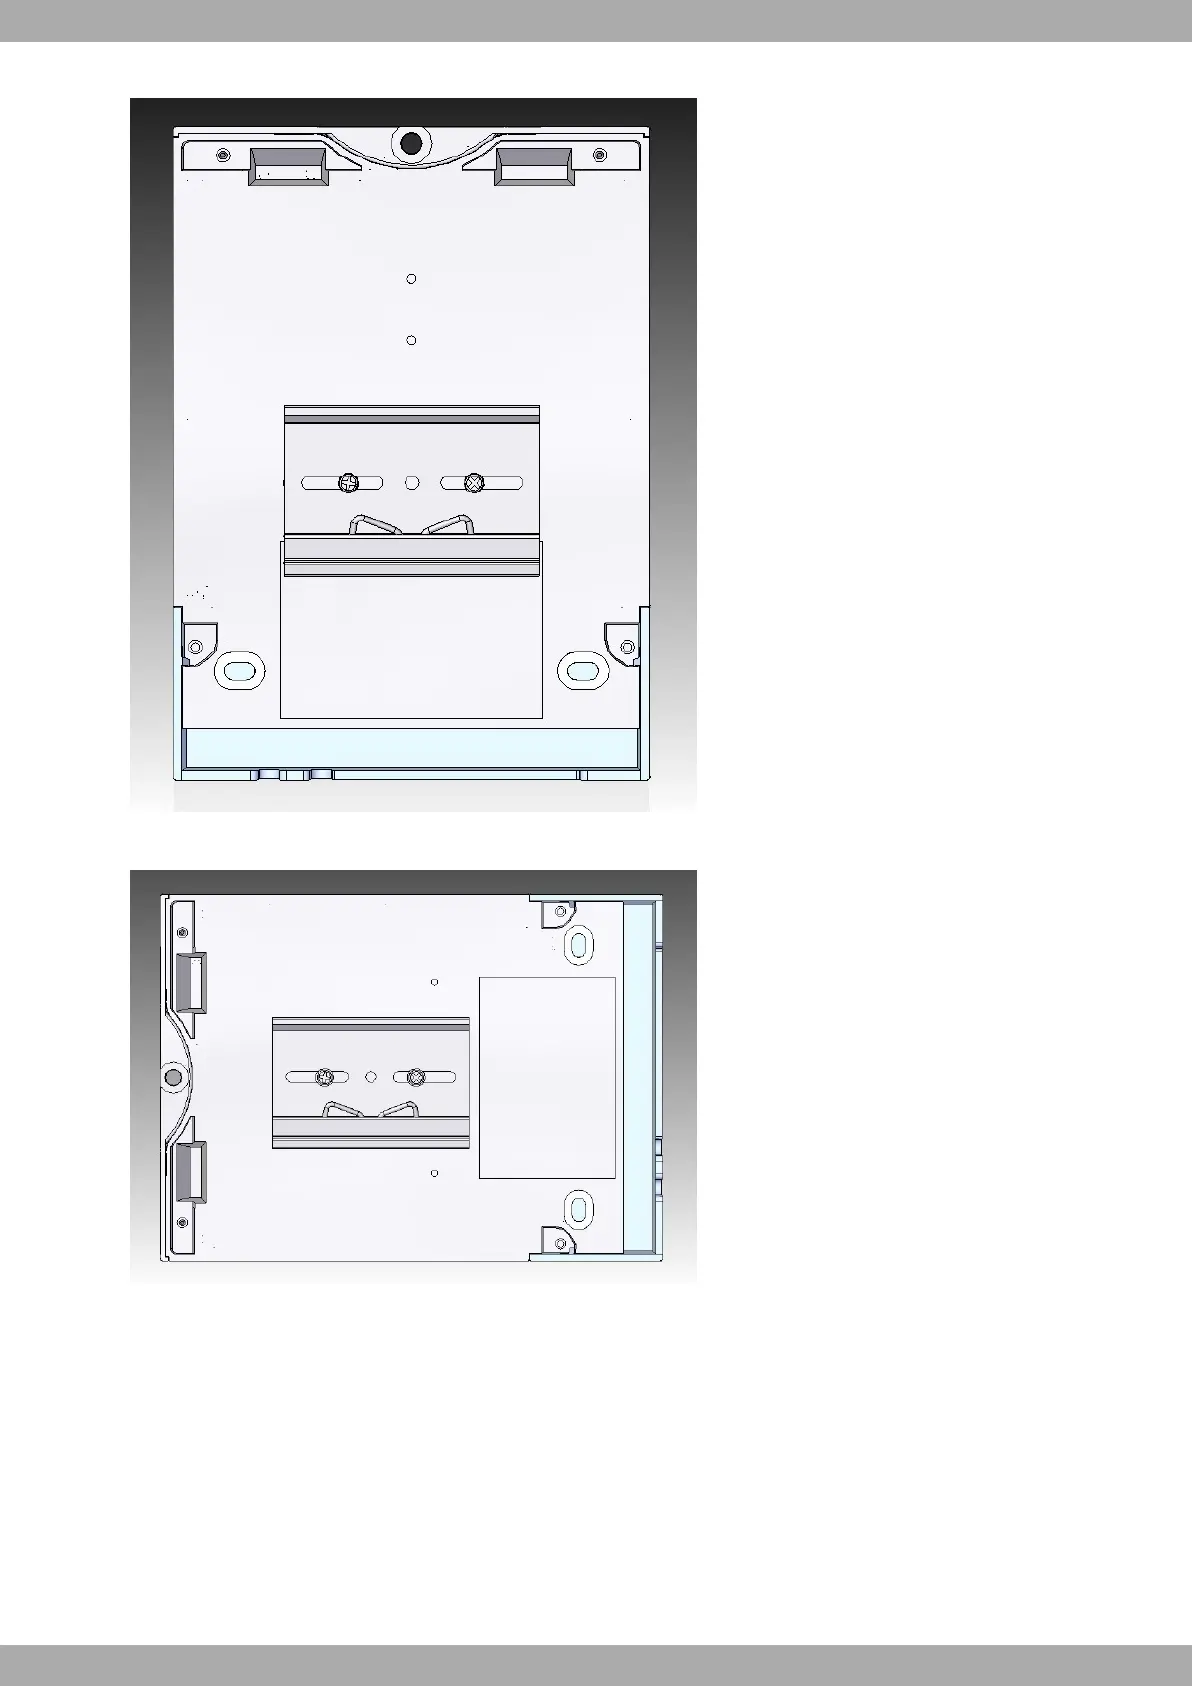
Fig. 5: DIN rail mount: Position 1
Fig. 6: DIN rail mount: Position 2
3.4 Wall mounting
The Regesta Smart PRO features 3 wall mounting holes. To ensure a secure attachment, it is necessary to install
screws into these holes. Before mounting the device on the wall, please remove the protective casing.
Please refer to the image below for the exact location of the fastening holes:
3 Installing the Router Teldat S.A.
18 Regesta Smart PRO
 Loading...