EasyManua.ls Logo

Teleco TVRGBDU868ST24 - User Manual

Teleco TVRGBDU868ST24
12 pages
Print Icon
To Next Page IconTo Next Page
Loading...
TELECO AUTOMATION SRL - Via dell’Artigianato, 16 - 31014 Colle Umberto (TV) ITALY
TELEPHONE: ++39.0438.388511 FAX: ++39.0438.388536 - www.telecoautomation.com
This document is the property of Teleco Automation Srl who reserves all reproduction and copying rights
IT - RICEVITORE RADIO PER IL CONTROLLO DI STRIP LED RGB ANODO COMUNE
EN - RADIO RECEIVER CONTROLLING RGB LED STRIPS COMMON ANODE
FR - RECEPTEUR RADIO POUR LE CONTROLE DES LEDS RGB AVEC ANODE COMMUNE
DE - EMPFÄNGER ZUR ANSTEUERUNG VON RGB LED STRIPES – GEMEINSAME ANODE
IT - Codice prodotto
EN - Product code
FR - Code du produit
DE - Artikelnummer
T1T2T3
Led 1
P1
P2
P3
Led 2
Led 3
Led 4
9
10
11
12
13
14
12-24V
IN
12-24V
OUT
COM
SLAVE OUT
(max. 5 slaves)
1
2
3
4
5
6
7
8
COM
B -
G -
R -
DOC.: T411.06
TVRGBDUxxxST24 - TVRGBDUxxxBST24
DATE: 26/09/16
IT - Attenzione: l’alimentazione fornita al ricevitore deve corrispondere al voltaggio del carico!
EN - Attention: the power supply connected to the receiver must correspond to the voltage of the load!
FR - Attention: l’alimentation fournie au récepteur doit correspondre à la tension de la charge!
DE - Achtung: Die Stromversorgung des Empfängers muss mit der Spannung der Last übereinstimmen!
IT - Ingressi lari
EN - Wired input
FR - Entrées laires
DE - Verdrahtete Eingänge
TVRGBDU868ST24 Master 3x4A (868.3Mhz)
TVRGBDU916ST24 Master 3x4A (916Mhz)
TVRGBDU868BST24 Master 3x4A, Box IP54 (868.3Mhz)
TVRGBDU916BST24 Master 3x4A, Box IP54 (916Mhz)
TVRGBD000xST24
Slave 3x4A
165 mm
IT - Foro per il fissaggio con vite (sotto lo sportello)
EN - Hole for fixing with screw (under the cover)
FR - Trou pour fixation avec vis (sous le couvercle)
DE - Loch für die Montage mit Schraube (unter dem Deckel)
IT - Montaggio su superficie piana
EN - Flat surface mounting
FR - Fixation sur surface plate
DE - Montage auf ebene Oberfläche
70 mm
185 mm
IT - Foro per il fissaggio con vite (sotto lo sportello)
EN - Hole for fixing with screw (under the cover)
FR - Trou pour fixation avec vis (sous le couvercle)
DE - Loch für die Montage mit Schraube (unter dem Deckel)
IT - Montaggio su superficie piana
EN - Flat surface mounting
FR - Fixation sur surface plate
DE - Montage auf ebene Oberfläche
74 mm (50 mm)
56 mm
151 mm
47 mm
40 mm
IT - Montaggio EN - Mounting FR - Fixation DE - Montage
Question and Answer IconNeed help?

Do you have a question about the Teleco TVRGBDU868ST24 and is the answer not in the manual?

Overview

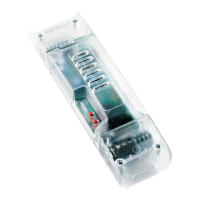
This document describes the TVRGBDUxxx(B)ST24 device, a receiver for controlling RGB LED strips, and its associated remote control system.

Function Description

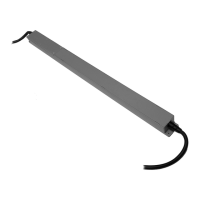
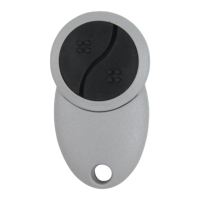
The TVRGBDUxxx(B)ST24 is an RGB LED strip receiver designed for managing ambient RGB lighting. It allows for the creation of various lighting scenarios and effects, including color selection, automatic color cycles, and dimming. The system supports both local control via buttons on the device and remote control using dedicated transmitters (either 4/7/42 channel transmitters or USB transmitters).

The device can operate in two main modes:

  1. Single Command Channel Mode: In this mode, individual functions (color selection, ON/OFF, warm white, cold white) can be assigned to specific buttons on a transmitter. This allows for granular control over the LED strips.
  2. Scene Creation Mode (with FREELED software): For more advanced control, the device can be connected to a PC via a USB cable. Using the FREELED software, users can create complex lighting scenarios and effects, which can then be saved and triggered by a transmitter. This mode allows for a high degree of customization and the creation of dynamic lighting sequences.

The device supports a "slave" configuration, meaning multiple TVRGBDUxxx(B)ST24 units can be interconnected to control a larger lighting installation, with one unit acting as a master and up to five others as slaves.

Important Technical Specifications

Receiver (TVRGBDUxxx(B)ST24)

  • Power Supply: 12-24V
  • Outputs: 3 (for RGB channels)
  • Max Power per Each Output: 4A (50W @ 12V, 100W @ 24V)
  • Operating Temperature Range: -20°C / +50°C
  • Section of Input Cable (Maximum Load): 2.5 mm²
  • Reception Frequency:
    • 868.3 MHz (TVRGBDU868xST24)
    • 916 MHz (TVRGBDU916xST24)
  • Radio Memory Capability (Transmitters): 42
  • Protection Rating: IP20 / IP54 (depending on the model, the document shows both)

Transmitter (7 Channels)

  • Channels: 7 (CH1-CH7)
  • Functions per Channel:
    • CH1-CH3: Speed control for color cycles (3 levels)
    • CH4: Pause/Play for cycles
    • CH5: Warm white / Cold white selection
    • CH6: Cycle activation/direction inversion
    • CH7: OFF (AUS)
  • Dimming: CH1-CH4 can be pressed and held to dim the light intensity of selected colors.

Usage Features

Installation

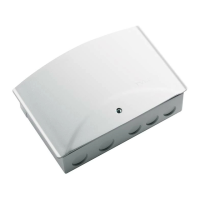
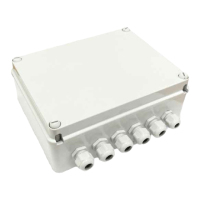
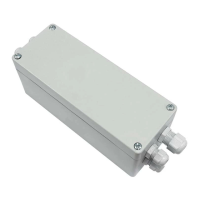
The device is designed for surface mounting. It includes instructions for fixing with screws (under cover) or with a fisaggio (with cover). Important: Do not invert the polarity of the LEDs!

Basic Operation (Local Control)

  • Power ON/OFF: The device is powered by a 12-24V supply.
  • Color Selection: Pressing P2 (on the device) cycles through colors. Subsequent presses select colors in sequence.
  • Automatic Color Cycle: Holding P2 for more than 2 seconds activates an automatic color cycle. Subsequent presses pause/resume the cycle. Holding P2 for more than 2 seconds again reverses the cycle direction.
  • Test LED Wiring: Pressing P3 (on the device) for less than 10 seconds allows for testing the LED wiring.

Remote Control (Transmitter)

Pairing Transmitters
  • 4/7/42 Channel Transmitters:
    1. Press and hold P1 on the receiver until a continuous sound is heard.
    2. Press any button on the 4/7/42 channel transmitter. An intermittent sound confirms pairing.
  • USB Transmitters (without ID codes):
    1. Press and hold P1 on the receiver until a continuous sound is heard.
    2. Press a button on the USB transmitter. An intermittent sound confirms pairing.
Deleting Transmitters
  • Deleting a single USB transmitter:
    1. Press and hold P1 on the receiver until a continuous sound is heard.
    2. Press the button on the USB transmitter to be deleted. A continuous sound confirms deletion.
  • Deleting all USB transmitters:
    1. Press and hold P1 on the receiver until a continuous sound is heard.
    2. Hold P1 for 10 seconds until an intermittent sound is heard, then a continuous sound. This deletes all paired USB transmitters.
Single Command Channel Mode (for 7-channel transmitter)

To memorize a single command channel:

  1. Press and hold P2 on the receiver until a continuous sound is heard.
  2. Press the desired button on the 7-channel transmitter (e.g., CH1 for color selection). An intermittent sound confirms memorization.
  3. Repeat for other functions (ON/OFF, Warm White, Cold White).
Color Selection and Cycle Control (using 7-channel transmitter)
  • Color Selection: Use CH1-CH3 to select speed for color cycles.
    • CH1: Red, Green, Blue (colors 1) / Cyan, Yellow, Magenta (colors 2)
    • CH2: Green, Yellow, Blue (colors 1) / Cyan, Yellow, Magenta (colors 2)
    • CH3: Blue, Magenta, Warm White (colors 1) / Cyan, Yellow, Cold White (colors 2)
  • Pause/Play: CH4
  • Cycle Activation/Direction: CH6
  • OFF: CH7
  • Dimming: Press and hold CH1-CH4 to adjust the intensity of the selected colors.

Scene Creation with FREELED Software

  1. Connect the receiver to a PC via USB.
  2. Use the FREELED software to create custom lighting scenarios.
  3. Memorize a transmitter to command these created scenes (see "Pairing Transmitters" section above).

Maintenance Features

Deleting Radio Codes

  • Deleting a single radio code:
    1. Press and hold P3 on the receiver until a continuous sound is heard.
    2. Press the button on the transmitter to be deleted. An intermittent sound confirms deletion.
  • Deleting all radio codes:
    1. Press and hold P3 on the receiver until a continuous sound is heard.
    2. Hold P3 for 10 seconds until an intermittent sound is heard. This deletes all paired transmitters.

Remote Memorization of Further Radio Codes

This feature allows adding new transmitters to an existing installation without direct access to the receiver.

  1. Press P3 on an already memorized transmitter for less than 5 seconds. The receiver will emit a continuous sound.
  2. Press P3 on the new transmitter for less than 5 seconds. The receiver will emit an intermittent sound, confirming memorization.
  3. Repeat for other new transmitters.

Remote Deletion of a Radio Code

  1. Press P3 on an already memorized transmitter three times. The receiver will emit a continuous sound.
  2. Press P3 on the transmitter to be deleted for less than 5 seconds. The receiver will emit a continuous sound, confirming deletion.

Memory of Light Intensity Value

The device stores the last light intensity value for each preset color. This means that when a color is selected, it will recall its previously set brightness level. This feature is active by default.

Teleco TVRGBDU868ST24 Specifications

General IconGeneral
BrandTeleco
ModelTVRGBDU868ST24
CategoryReceiver
LanguageEnglish

Related product manuals