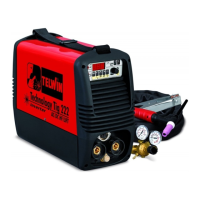
Tungsten-Th 2% electrode diam. 1,6; Tungsten-Th 2% installation site.
electrode diam. 1 and relevant accessories are
PLUG:
provided.
- It is necessary to connect the terminals of the mains
- Gas regulator with manometer.
cable to a standardized 3p plug + ( ) with capacity
- Welding current return cable with earth terminal
of 20 ÷ 25A. PAY THE UTMOST ATTENTION that the
- Gas pipe fitting and gas tube for connection with Argon
yellow/green conductor of the cable is correctly
cylinder.
connected to the terminal of the plug ( ).
- The mains must be protected with delayed fuses or an
TECHNICAL DATA
automatic differential switch, for the correct dimensions
Technical data relative to the performance of the machine
of the mains (power/current fuse capacity), refer to data
may be found on a plate (back panel) with the following
on machine's identification plate.
symbols, whose meaning is explained below.
WARNING
Fig. D
Failure to observe the above rules will make ineffective the
1- EUROPEAN Norm of reference, for safety and
safety system installed by the manufacturer (Class 1) with
construction of arc welding machines.
resulting risks for persons (eg. electric shock) and objects
2- Symbol for internal machine structure: inverter
(eg. Fires).
transformer -rectifier.
3- Symbol for welding procedure provided: manual arc
welding with covered electrode, Tig.
CONNECTION OF THE WELDING CABLES
ALL CONNECTIONS TO THE WELDING CIRCUIT MUST
4- Symbol S: indicates that welding operations may be
BE CARRIED OUT WITH THE MACHINE STRICTLY
carried out in environments with heightened risk of
ISOLATED FROM THE MAINS.
electric shock (e.g. very close to large metallic
volumes).
- Welding cable - electrode holder: this is normally
5- Symbol for power supply line: threephase alternating
voltage.
6- Protection degree: IP 23. Protected against solid
foreign bodies of diam.³24.5mm (e.g. fingers) and
against vertical fall of water drops with inclination up to
60° from the vertical.
7 - Performance of welding circuit:
- U : maximum peak no-load voltage (welding circuit
0
open).
- I/U: current and corresponding normalised voltage
22
[U2 = (20+0.04 I2) V] that the machine can deliver
during welding.
- X: Duty cycle: indicates the time for which the machine
can deliver the corresponding current (same column).
Expressed in %,on the basis of a 10min cycle (e.g. 60%
= 6 minutes work, 4 minutes wait; and so on).
- A/V-A/V: Indicates the welding current adjustment
range (minimum - maximum) at the corresponding arc
voltage.
8- Technical specifications for power supply line:
- U : Alternating voltage and power supply frequency of
1
machine (limit allowed ±15%):
- I : Maximum current consumed by the line.
1max
- I : maximum effective current consumed
1eff
9- Manufacturer’s serial number. Machine identification
(indispensable for technical assistance, requesting
spare parts, discovering product origin).
Note: The plate example given shows the meaning
of the symbols and figures; the exact rating values
for the machine in your possession should be read
directly on the rating plate of the machine it self.
INSTALLATION
SITE
Locate the machine in an area where openings for cooling
air are not obstructed (forced circulation with fan); check that
conductive dusts, corrosive vapours, humidity etc., will not
enter machine.
CONNECTION TO MAINS
- Before making any electrical connection check that the
technical data (on machine's back panel) corresponds
to the voltage and frequency of the mains at the
connected to the positive pole (+), (see paragraph
'welding'').
- Return cable - work: this is normally connected to the
negative pole (-) the work clamp, at the opposite end,
must be connected to the work piece or a metallic work
bench, AS CLOSE AS POSSIBLE TO THE JOINT TO
BE MADE.
TIG WELDING WITH DIRECT CURRENT:
- "TIG" torch : the torch cable must be connected to the
correct pole (-); Connect then the three pole connector
(torch pushbutton) pushing properly and rotating it
clockwise; connect the gas tube to the suitable
connection, tightening it carefully and manually, avoid
the use of wrenches.
- Work cable: it must be connected to the pole (+); the
work clamp, at the other end, is to be connected to the
workpiece to be welded or to a metallic board, as close
as possible to the joint.
WARNING:
- Connecting cables must be turned fully into the quick
plugs to ensure a good electrical contact, loose
connections will cause overheating, rapid deterioration
and loss in efficiency.
- Avoid using welding cables of length over 10m.
- Avoid using metal structures which are not part of the
workpiece to substitute the return cable of the welding
current: this could jeopardise safety and result in poor
welding.
PROTECTIVE GAS CYLINDER CONNECTION (Argon
99,5%)
Screw the pressure reducer to the valve of the argon
cylinder.
Set the flexible tube for the protective gas supply,
connecting it on one side to the relevant output connection
of the pressure reducer and on the other to the connection
placed on the rear of the machine, ensuring tightening with
the correct bands.
Loosen the regulating ring nut of the pressure reducer
before opening the cylinder valve.
Open the cylinder and set the quantity of gas (l/m) according
to the welding parameters (see table). If necessary gasflow
may be adjusted during welding using the regulating ring nut
12