www.temcoline.com
DIGITAL PID CONTROLLER
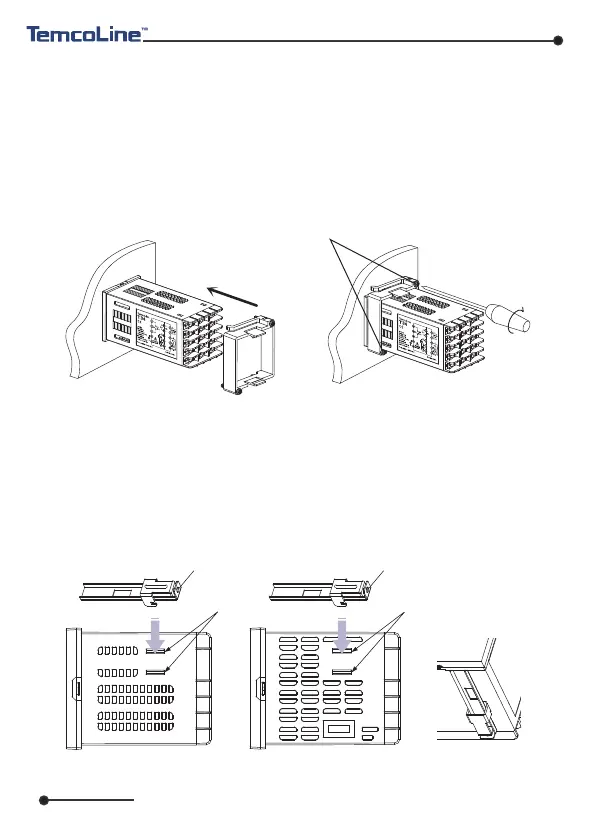
6) Installation
(1) T34-SERIES
(2) T32 / T33 / T37 / T39-SERIES
①
Bore a hole in the panel, referring to the panel cutouts on the previous page.
② Insert this device into the front of the panel.
③ From the rear of controller, slide the bracket over the housing.
④
Push the bracket in until the device has been fixed securely onto the panel.
⑤
Secure using screws on the two locations at top and bottom as shown on
Figure 2.
①
Bore a hole in the panel, referring to the panel cutouts on the previous page.
② Insert this device into the front of the panel.
③
Insert 2 brackets, one each on the B/K holes on the top and the bottom
of the device.
④ Secure using screws on the two locations at top and bottom.
11
[ figure 1 ] [ figure 2 ]
[ figure 1 ] Top side [ figure 2 ] Bottom side
[ figure 3 ] Fixing completion
Hole of fixing screwHole of fixing screw
Bracket hole
Bracket hole
Turn the screw
2-3 times after
contact with panel.
Turn the screw 3-4
times after contact
with panel.
Fixing screw
Direction

 Loading...