29
12.2Safetydistancetoinammable(Insulatedpipes) 38
13.0 Drawings with explanation 39
13.1 Replacement of insulation plates 39
13.2 Adjusting the doors auto lock 39
13.3 Adjusting the feet 39
13.4 Adjusting the spring power in the handle 39
13.5 Adjusting the top plate 39
14.0 Declaration of performance (DOP) 40
15.0 Supplementary Inst. Instructions UK 41
16.0 Drawing concerning smoke control kit (smoke control areas) 45
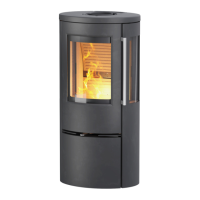
1.0. New TermaTech wood-burning stove
Congratulations on your wood-burning stove.
We thank you for choosing a TermaTech wood-burning stove and hope that you will have many
cosy and warm moments in the future.
You have chosen an TT80 from Termatech. The TT80 series uphold the most demanding norms,
andatthesametimeitfulllsthewishtobeabletostoreandaccumulateheat.TT80canfunc-
tion as a normal convection stove, or you can easily chose the setting that turns it into an Heat
storage stove. When set to Heat storage, a part of the heat is stored in the special Heat storage
stones hidden in the top of stove. You can read more about this in section 8.4
Before using the stove you should read the user and mounting manual so that you are familiar
with the legal requirements as well as the instructions regarding maintenance. By this it is ensu-
red that the product functions as intended and you get the most out of your investment for many
years to come.
2.0. Installation instruction
INSTALLATION INSTRUCTIONS IN SMOKE CONTROL AREAS
Installation in a smoke control area requires the additional assembling / installation of the ”Dam-
per control unit” which must be installed by the installer. See drawing and picture on page 47.
The stove is intended for ”intermittent combustion” it is not meant to ”heat over” night. By fol-
lowing the instruction below in ”lighting instruction” the best and most environmentally friendly
combustion is achieved.
The wood-burning stove is delivered ready for Installation (ensure the correct outlet socket is
used,sealedandsecured)andmustbeconnectedtothechimneywithasmoke(ue)pipe.The
connection between stove and chimney must, as far as possible, be mounted in one straight piece
(with as few bends as possible) any horizontal section must be kept to a maximum of 150mm,
but preferably rising vertically from the stove to the chimney (all Joints must be tight) with an ac-
cessforsweepingsmoke(ue)pipe.
EN15287-1 allows an ‘Acceptable Alternative method’ e.g. 450mm horizontal section of connec-
tingsmoke(ue)pipeintoachimneysystem,pleaseaskyoursupplierfordetails.
2.1. Placement of the stove
Distancetowallsandammablematerial.Seesection12.1&12.2.
2.2. Floor requirements
Theoorunderneathmustbeabletosupportthecombinedweightofthestoveandpossiblythe
chimney.
Thestovemustbemountedonanonammablesurface.Thesurfaceshouldatleastcover
150mm to each side of the stove and 300mm in front of the stove opening.
2.3. If the stove is to be mounted with a rear outlet, then do the following
Remove(possiblybreako)thecoverplateattherearofthestove,allthewaytotheburning
chamber which provides free passage to the chimney. Subsequently remove the cover plate which
is screwed on the burning chamber. The universal nozzle which is mounted on the top of the stove
is removed and mounted on the rear of the stove. The cover plate which was mounted at the rear
of the stove is now at the top of the stove. The chimney is now ready to be installed.
2.4. Requirements for the chimney
Thechimneymustbeofsucientheightsothatthedraughtconditionsaregoodandsothatthe
smoke does not bother any neighbours. Good draught in the chimney is crucial to the stove work-
ing as intended and burns as environmentally friendly as possible. All joints and connections must
be tight and the chimney must be able to provide a draft of at least 1,2mm water gauge (12Pa)