Do you have a question about the TESA TESA-hite plus M 400 and is the answer not in the manual?
Procedures for unpacking and preparing the instrument for use.
Step-by-step guide to power on and initialize the height gauge.
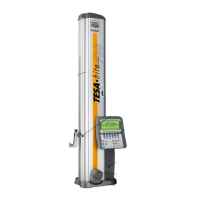
Details about the base structure and stability features.
Explanation of the air-cushion system for easy movement.
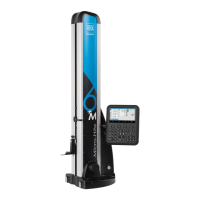
Description of the column, head, and their electro-motorised movement.
Explanation of the rotary power control's functions and intuitive operation.
Overview of value acquisition methods and measurement applications.
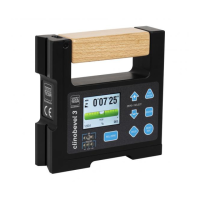
Introduction to the instrument's control panel and its layout.
Detailed explanation of the function keys and their operations.
Description of the LCD display's structure and information presented.
Detailed steps for powering on the instrument and initiating measurement.
Step-by-step guide for accurate probe contact and value acquisition.
Procedure for calibrating the probe for accurate length measurements.
How to set the probe's automatic retraction distance.
Steps for capturing a reference value for measurements without probe direction inversion.
How to enter and use the PRESET mode for specific measurements.
Techniques for measuring flat and cylindrical workpiece features.
How to measure thread center distances using a barrel-shaped contact pin.
Overview of the configuration menu and how to navigate its submenus.
How to select units and resolution for length and angle measurements.
How to choose the preferred language for the instrument interface.
Setting probe speed and stabilization times for optimal measurements.
Configuring automatic storage, display modes, printing, and beep settings.
Setting up RS 232 communication for data transfer.
Activating and configuring the built-in printer settings.
Enabling temperature compensation for accurate measurements in varying conditions.
Setting the instrument's date and time.
Resetting configuration parameters to their default factory values.
Setting an access code to enter configuration and managing files menus.
How to perform measurements using reference C.
Procedure for measuring grooves on a workpiece.
Procedure for measuring bores using the height gauge.
Procedure for measuring shafts on a workpiece.
How to calculate the median value from measured data.
How to calculate the distance between two measured points.
Procedure for measuring the diameter or width of a workpiece feature.
How to measure and capture parallelism errors on a surface.
How to measure angles between surfaces or features.
How to measure perpendicularity and straightness deviations.
How to access and perform 2D measurements.
Steps for performing 2D measurements along the Y-axis.
Steps for performing 2D measurements along the X-axis.
How to view and verify captured 2D measurement data.
Overview of executing 2D analysis operations.
How to set the bore axis as the origin for coordinate systems.
Shifting values between main and auxiliary displays for analysis.
Aligning the coordinate system to a specific bore axis.
Converting measured data into polar coordinate format.
Saving measured dimensions into the constant table M.
Overview of available auxiliary geometric functions.
Shifting the coordinate system from a reference axis to a new one.
Rotating the coordinate system around its origin point.
Defining coordinates for a fictitious point.
Calculating a regression circle based on multiple features.
Determining the angle between three geometric elements.
Calculating distance between two points in Cartesian or polar coordinates.
Guide to creating a 'Learn' program by recording measurements.
How to run pre-defined measurement programs.
How to create programs for angle, perpendicularity, and 2D measurements.
How to manage, edit, delete, and access program and data files.
Loading previously saved measurement programs and data.
Modifying tolerance and printing options in measurement programs.
Procedure for deleting measurement programs and associated data files.
Accessing and managing result files, including statistics.
Accessing and viewing statistical data for measurements.
How to perform one-way data transfer using the function key.
Setting up PC control and communication via RS 232.
Details on the internal printer's output and format.
Describes the data sent via RS 232 port in measuring and program modes.
Specifies the format of result files created on the PC.
Instructions for cleaning the instrument's guides and glass rule.
Procedures and tips for charging the instrument's battery.
Details on compatible optional accessories for the TESA-Hite plus M.
| Resolution | 0.001 mm |
|---|---|
| Display Type | LCD |
| Repeatability | 2 μm |
| Power Supply | Battery |
| Operating Temperature | +10 to +40 °C |
| Storage Temperature | -10°C to 60°C |
| Measuring Range | 0-400 mm |