EN
3
UNPACKING AND ASSEMBLY
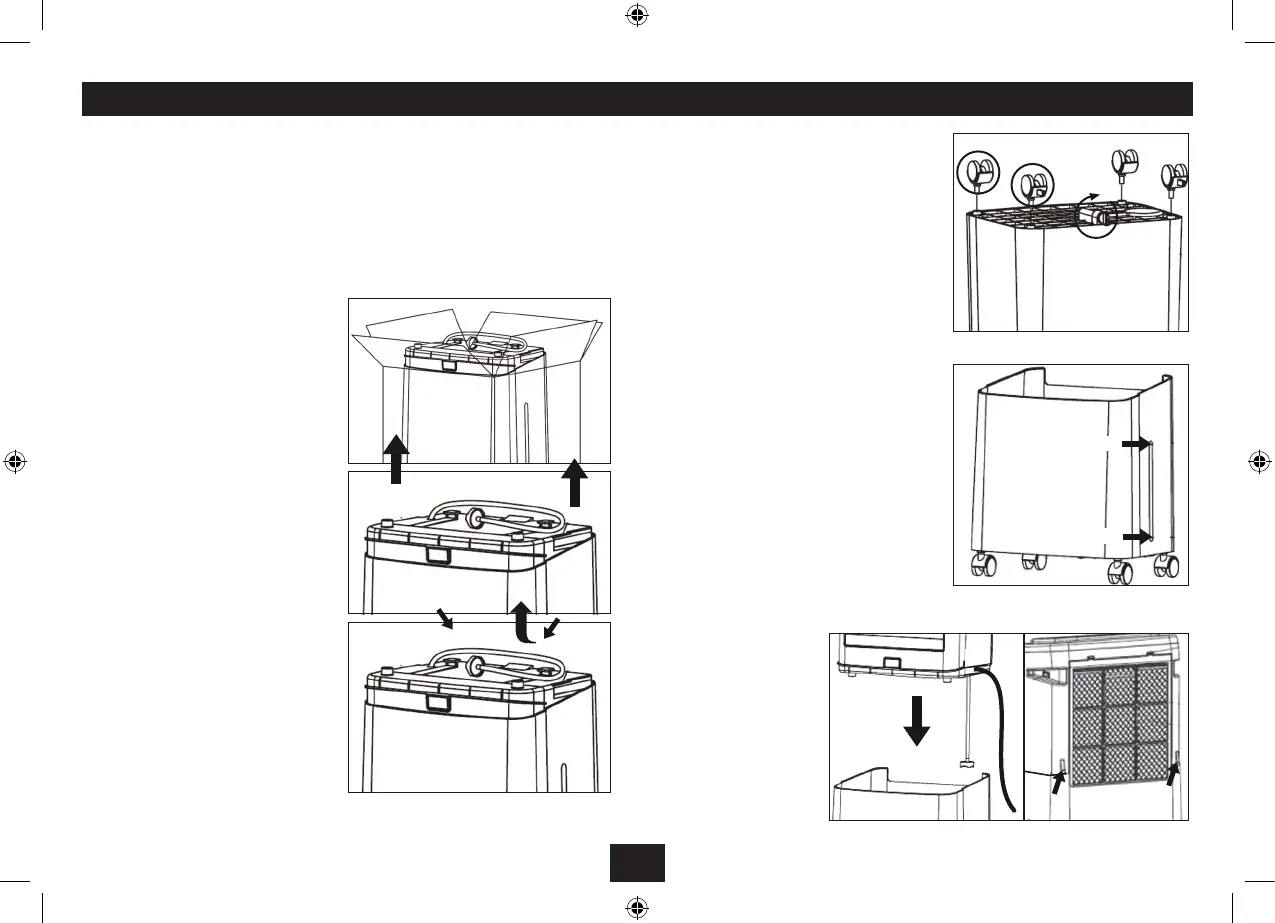
Stage 4:
Invert the water tank.
Insert the two free wheel casters into the mounts
at the front of the tank and the two locking
casters into the mounts at the rear of the tank.
Push the casters fully in and check that they are
securely xed.
Check that the drain plug is fully tightened. Turn
the plug clockwise to tighten, anti-clockwise to
loosen.
Stage 5: Filling the Water Tank (Optional)
Set the water tank upright.
Fill the water tank with cold clean water. Do
not use scents or other additives. Check that
the water level is between the maximum and
minimum marks. You should always be able to
see the water level in the window.
DO NOT OVERFILL.
The packing contains
The cooler unit and water tank•
Four casters, two freewheel, two locking.•
Remote Handset.•
If any item is missing or damaged, contact your nearest Tesco store for assistance.
Please read all the instructions before using this appliance. Read all the safety notes
carefully. If you pass the unit on to a third party, include these instructions.
Stage 1:
Open the top aps and remove the accessory
tray.
Remove the unit from the packing.
Retain the packaging for future use. If you
dispose of it do so in accordance with any
recycling regulations in your area.
Stage 2:
The cooler unit is packed upside down inside
the water tank.
Hold the unit by the carrying handles at the
side and carefully lift it out.
Stage3:
Place a towel on the oor.
Invert the cooler unit and place it on the
towel.
Carefully detach the inlet hose from the two
storage clips and let it hang free.
Stage 6:
Hold the cooler unit by the
handles and lower it onto
the water tank. Make sure
the lter hose is inside the
tank.
Check that the two units
are secured by the two
lock pins at the rear of the
cooler unit.
The cooler is now ready
for use.
Freewheel
Locking
Drain plug
MAXIMUM
MINIMUM