Fuse replacement
9-7Roadside emergencies
Fuse replacement
Replacing a fuse
WARNING: Use replacement fuses of
the same rating and type or fuses of
matching specification. Incorrect fuse ratings
can overload a system and cause a fire or
malfunction. Blown fuses should be replaced
and no attempt should be made to repair a
blown fuse.
S
Fuses protect the vehicle’s electrical systems
from damage. The failure of any fuse will
render the equipment it protects inoperative.
1. Before removing a fuse, turn off all
electrical equipment and remove the key.
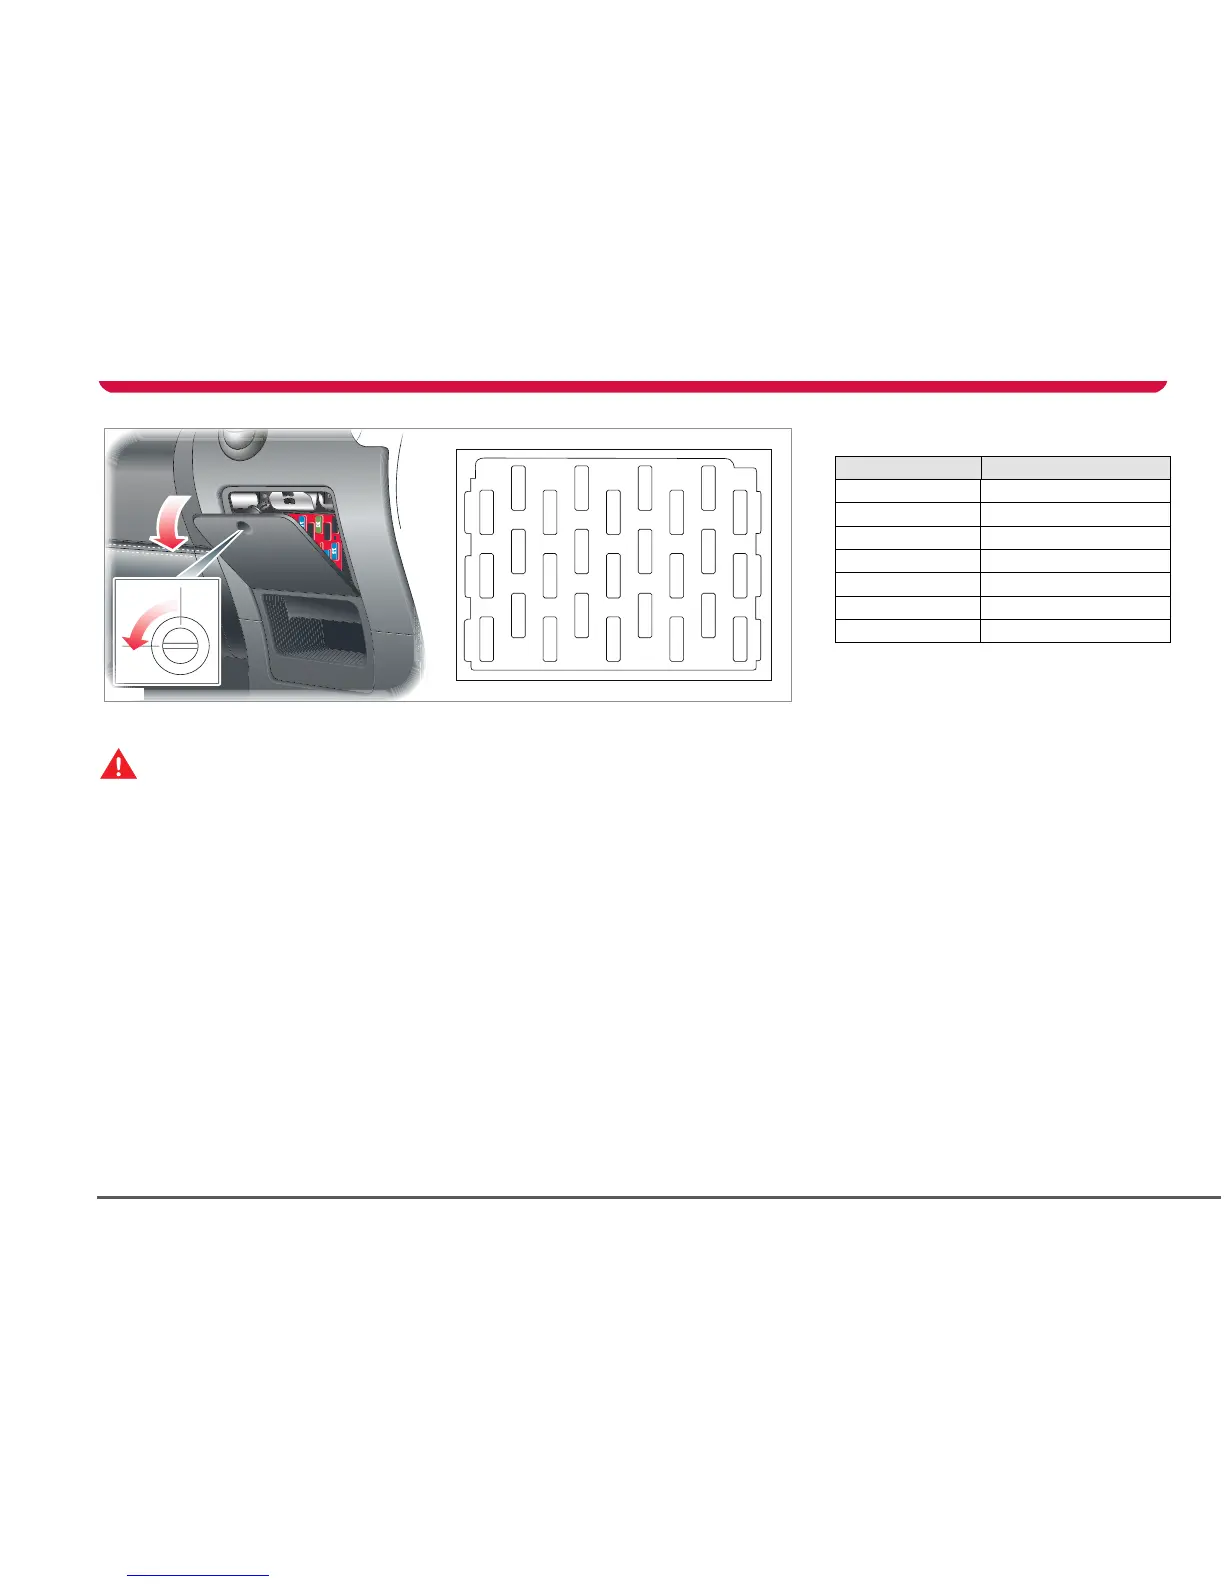
2. Locate the fuse box. The fuse box is
located behind the access panel on the
passenger side of the dashboard.
3. Open the panel to access the fuses.
Remove the panel by using the
screwdriver supplied in the toolkit to
rotate the fastener 90° counterclockwise,
then release the panel from the
dashboard.
4. Consult the fuse specification chart to
determine which fuse is protecting the
non-functioning electrical system.
Note: A label is also affixed to the inside
of the panel.
5. Remove the appropriate fuse and replace
with a fuse of the same amperage as the
original. If in doubt, check the fuse
specification chart on the following
pages.
6. Re-install the fuse panel by aligning the
hinges at the bottom of the panel with
the slots on the surrounding dashboard
area. Secure the panel by rotating the
fastener 90° clockwise.
If a replacement fuse fails to solve an
electrical failure, or the replacement fuse fails
prematurely, contact Tesla Motors.