6 Using the product
24
With frozen images, the crosshair can be moved and the
min/max value is displayed. The min/max values are not saved
with the image.
With saved images, the Coldspot/Hotspot must be activated
via the menu for the respective opened picture.
1. [OK] | Measurement | [OK]| Coldspot/Hotspot | [OK].
2. Select left or right quick select button to activate the
respective function.
3. Confirm the settings with Apply.
Moisture (testo 880-2/-3 only)
The surface moisture is calculated from the ambient humidity
value, either manually entered or measured by the radio
humidity probe (optional, testo 880-3 only), and the measured
surface temperatures. In the display, the areas that are at risk of
developing mould are shown using a special colour palette:
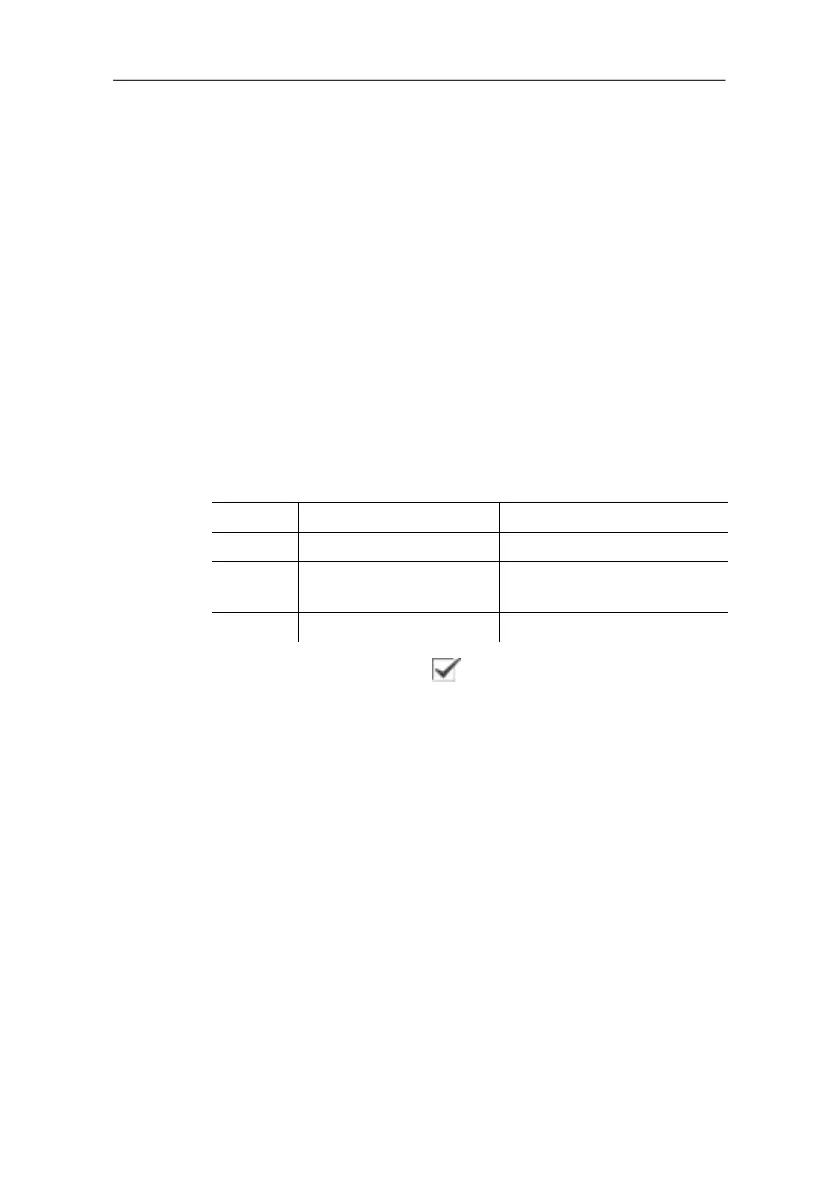
Colour Surface moisture Assessment
green 0…64% noncritical
yellow-
orange
65…80% potentially critical
red >80% critical
If this function is activated ( ), the quick select buttons are
fixed with the functions Humidity (with testo 880-3: only if no
radio humidity probe is logged on, see Radio… (testo 880-3
only) page 32) and Emissivity….
At the upper edge of the display, the relative air humidity, air
temperature and calculated dewpoint temperature are shown.
1. [OK] | Measurement | [OK] | Humidity | [OK].
- If a radio humidity probe is logged on (testo 880-3 only): The
measuring function is opened. No further entries are
required.
- If no radio humidity probe is logged on: The Humidity
dialogue is opened. The values for the ambient humidity and
temperature can be entered.
2. Move Joystick up/down to select the desired option.
- The selected option has an orange border.
3. Confirm the selection with [OK].
- The selected number is highlighted orange.