Texi Joy 1382
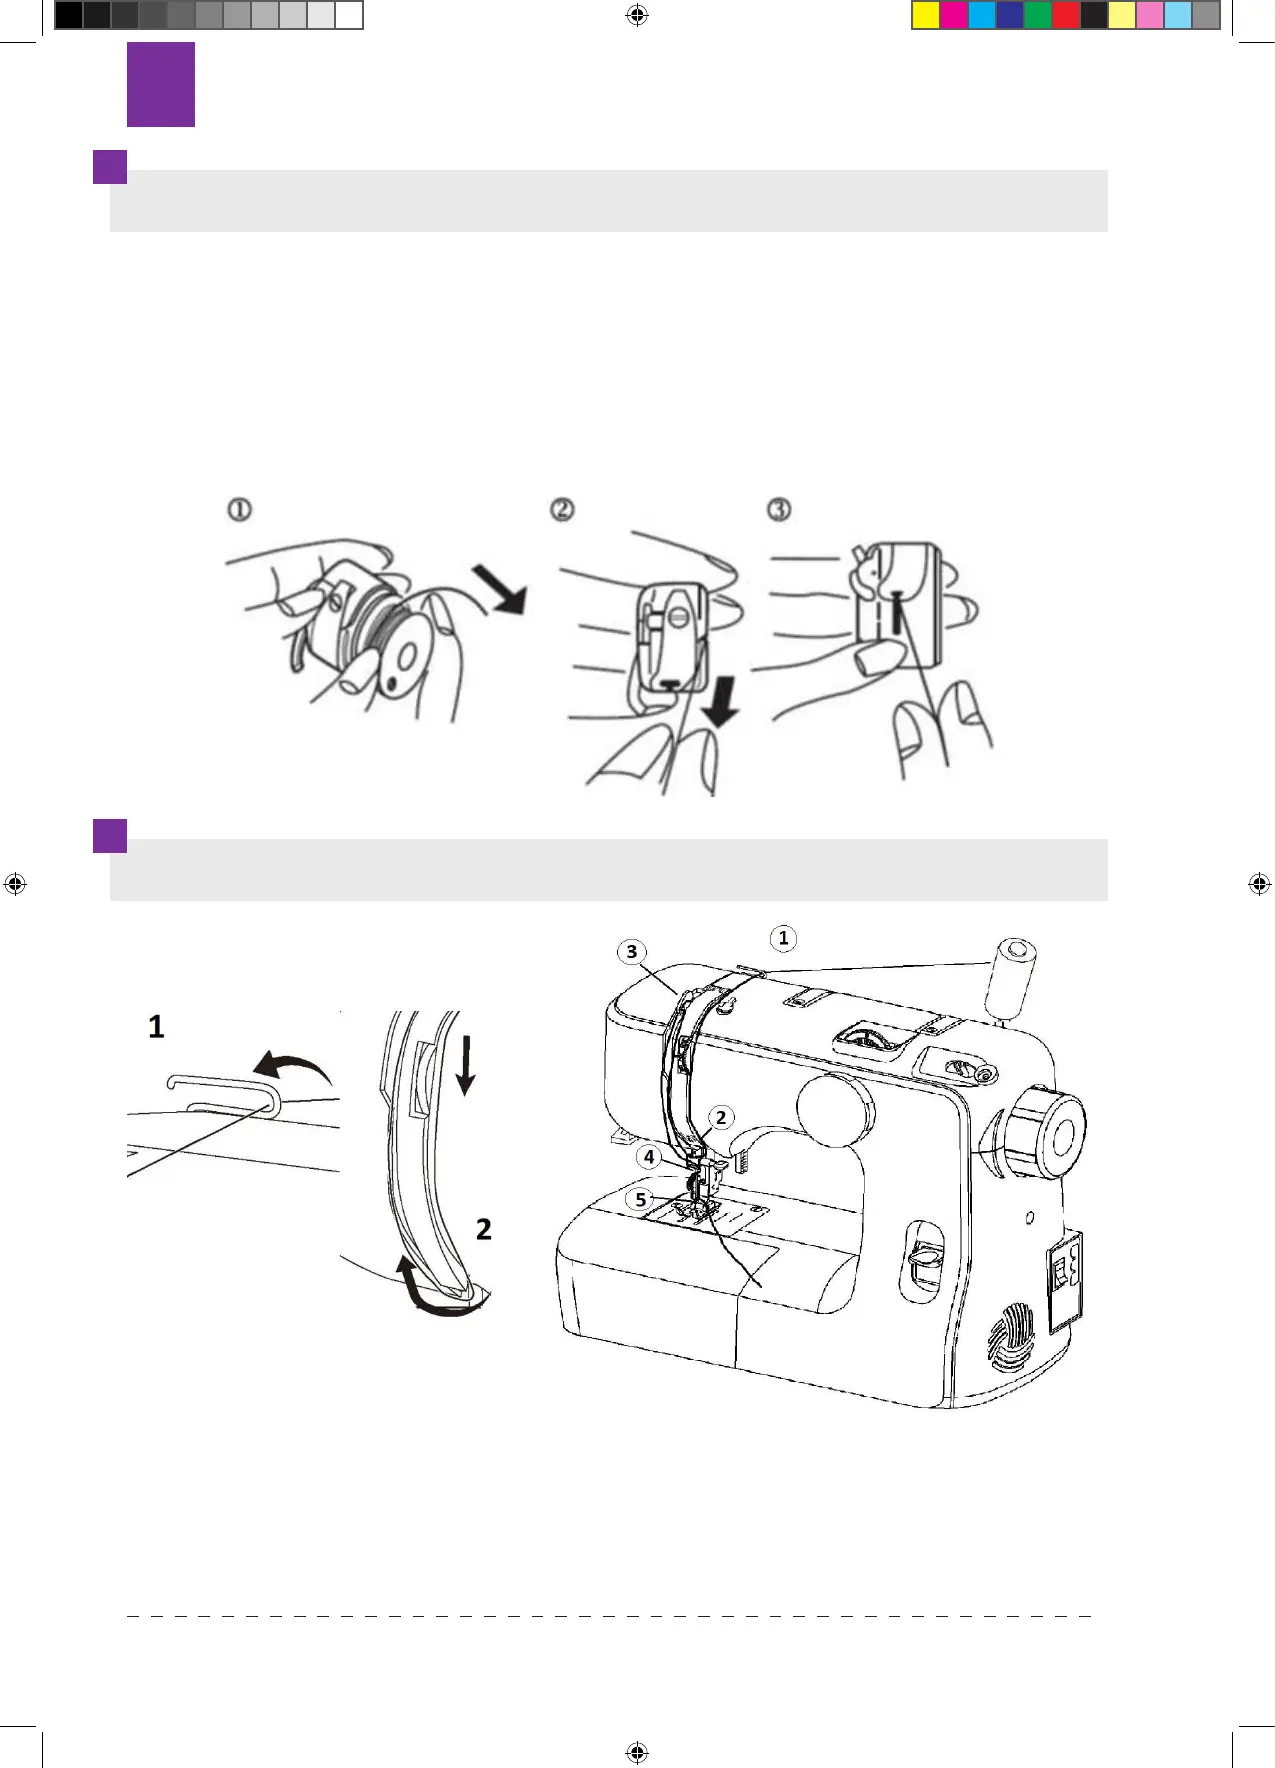
COLOCACIÓN DE LA CANILLA EN EL CARRETE
1. Coloque la canilla previamente enhebrada en el carrete. Asegúrese de que el
hilo se embobina en dirección de las manillas del reloj, siguiendo la echa -
como se muestra en el dibujo.
2. Pase el hilo a través de la ranura del carrete.
3. A continuación, pase el hilo por los muelles de regulación de tensión del hilo
hasta el oricio de salida.
4. Saque el hilo un mínimo de 10 cm fuera del carrete.
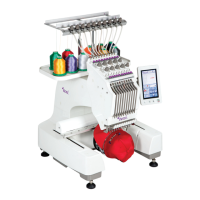
ENHEBRADO DE HILO SUPERIOR
1. Ajuste la aguja en la posición
más alta girando a mano el
volante hacia usted y levante el
pie prensatelas.
2. Coloque la canilla con el hilo en el soporte, de tal forma que el hilo se
desembobine desde atrás - tal y como se muestra en el dibujo.
3. Pase el hilo por el guía hilos (1), pasando el hilo desde la derecha.
Texi Joy 13 instrukcja 2017 + PT.indd 82Texi Joy 13 instrukcja 2017 + PT.indd 82 18.09.2020 11:3118.09.2020 11:31