THREADING YOUR MACHINE
SWITCH OFF THE MACHINE. DISCONNECT MACHINE FROM POWER SUPPLY BY REMOVING
PLUG FROM SOCKET-OUTLET.
Wrong threading may cause shipped stitches, breaking threads, or other problems. Try to
master the correct threading before moving on to test sewing. Threading must be carried
out in the sequence of Lower Looper – Upper Looper – Needle. Open the front cover and the
working table. Raise needle to its highest point by turning hand wheel towards you, and raise
the presser foot. Before re-threading lower looper, remove thread from needle eye first, then
re-thread the lower looper. This will prevent tangling.
NOTE: Thread tension is released when the presser foot is lifted up.
Understand the rules of color:
1. Upper looper - green
2. Lower looper - purple
3. Right needle - blue
4. Left needle - yellow
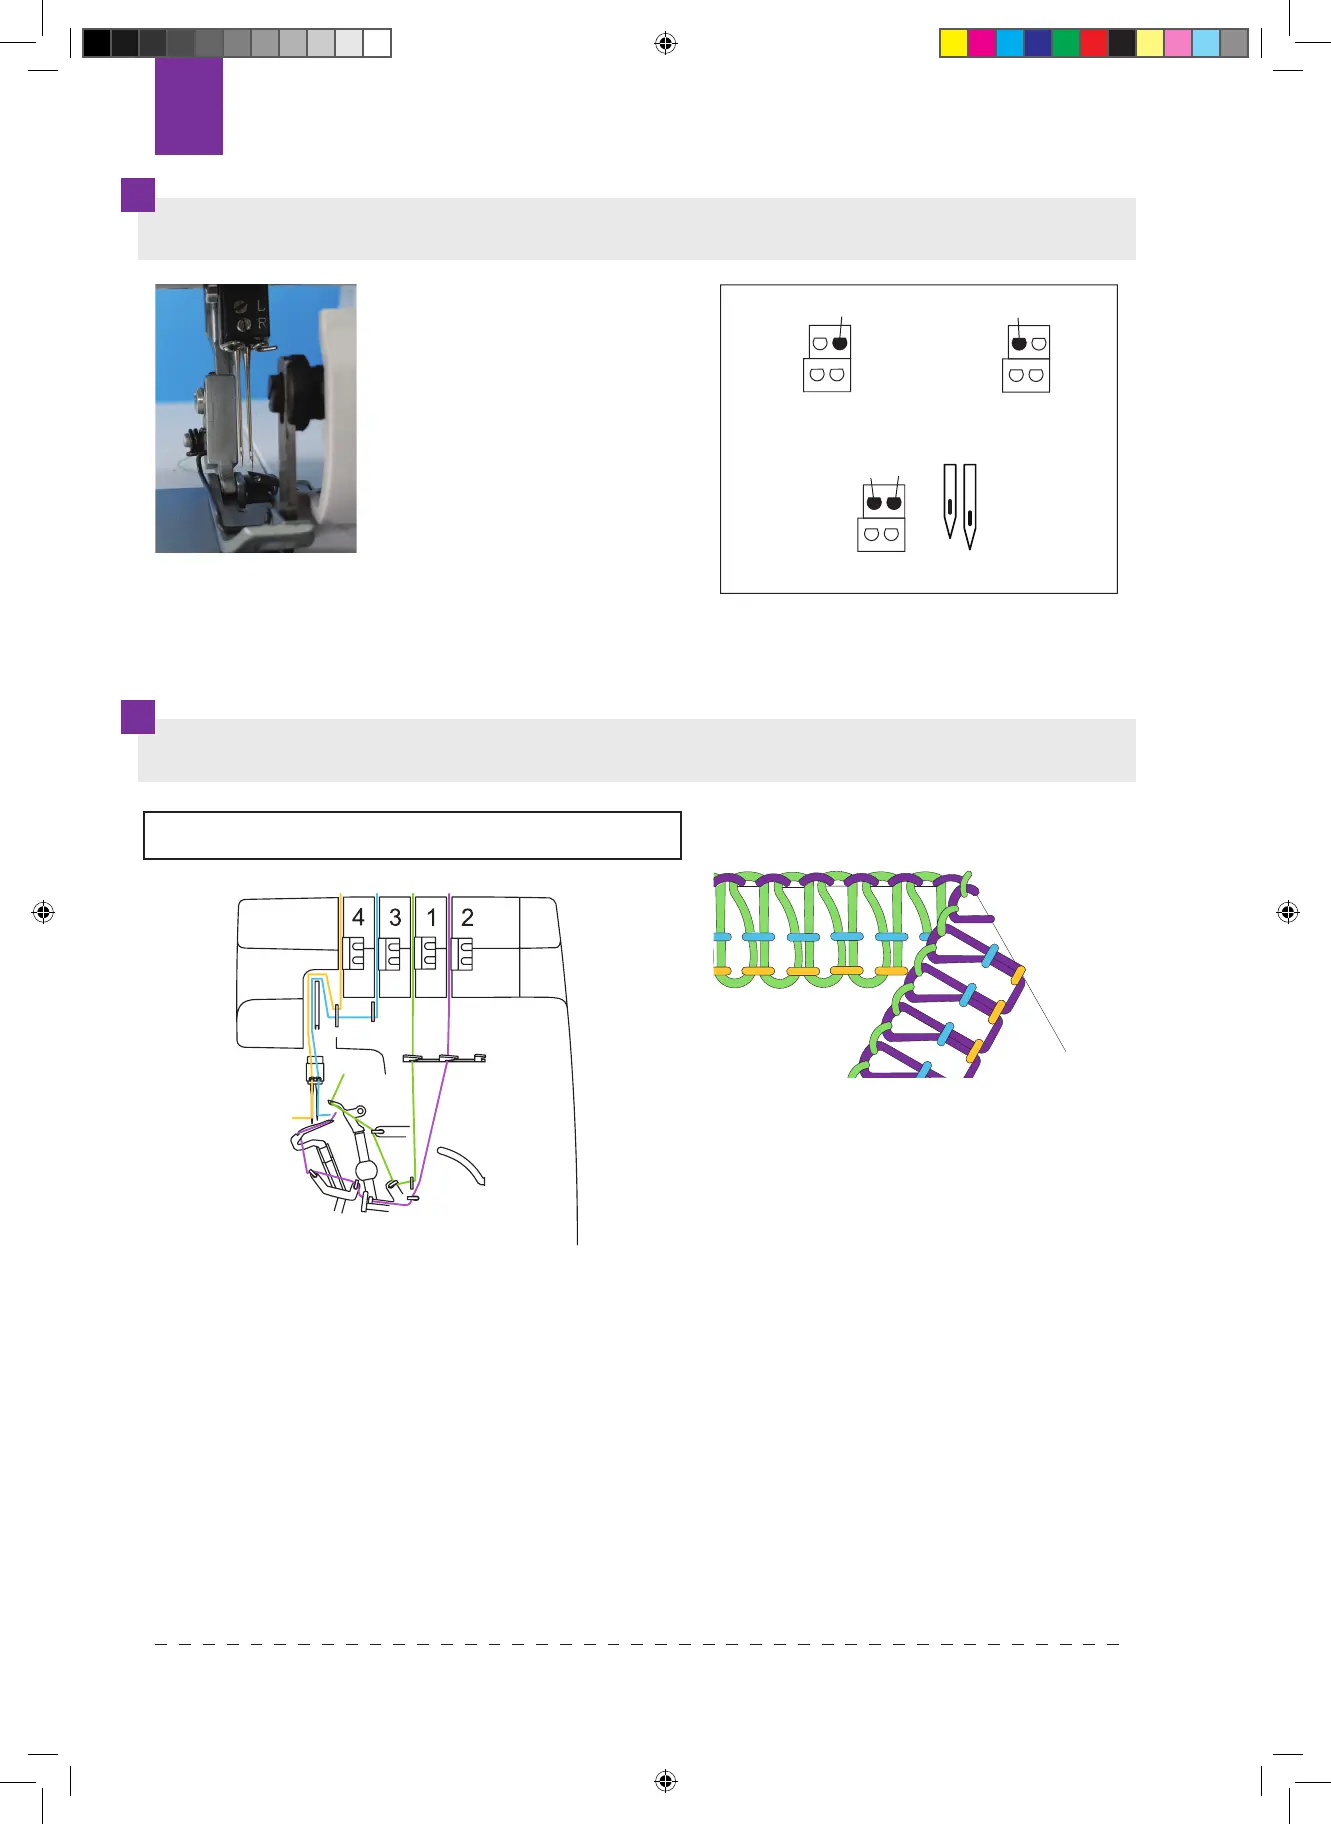
NEEDLE POSITION
This machine has two
dierent needle positions.
Up to two needles can be
stitched at the same time.
Fixed screw A belongs to
the right side of the needle.
Fixed screw B belongs to the
left side of the needle.
As shown on the gure, installing the needles in dierent positions will aect in a
dierent stitch.
A
B
A
B
NOTE: For safety, please turn o the power.
Right overlock
needle thread
Left overlock
needle thread
Left and right overlock needles thread
80
Texi Tegra 4 INSTRUKCJA 2019.indb 80Texi Tegra 4 INSTRUKCJA 2019.indb 80 18.09.2020 09:4218.09.2020 09:42