TEXI Tronic 7 NF operation manual
22. Needle bar and hook regulation
Warning: Turn OFF the power before starting the work as to prevent accident caused by abrupt start of the
sewing machine.
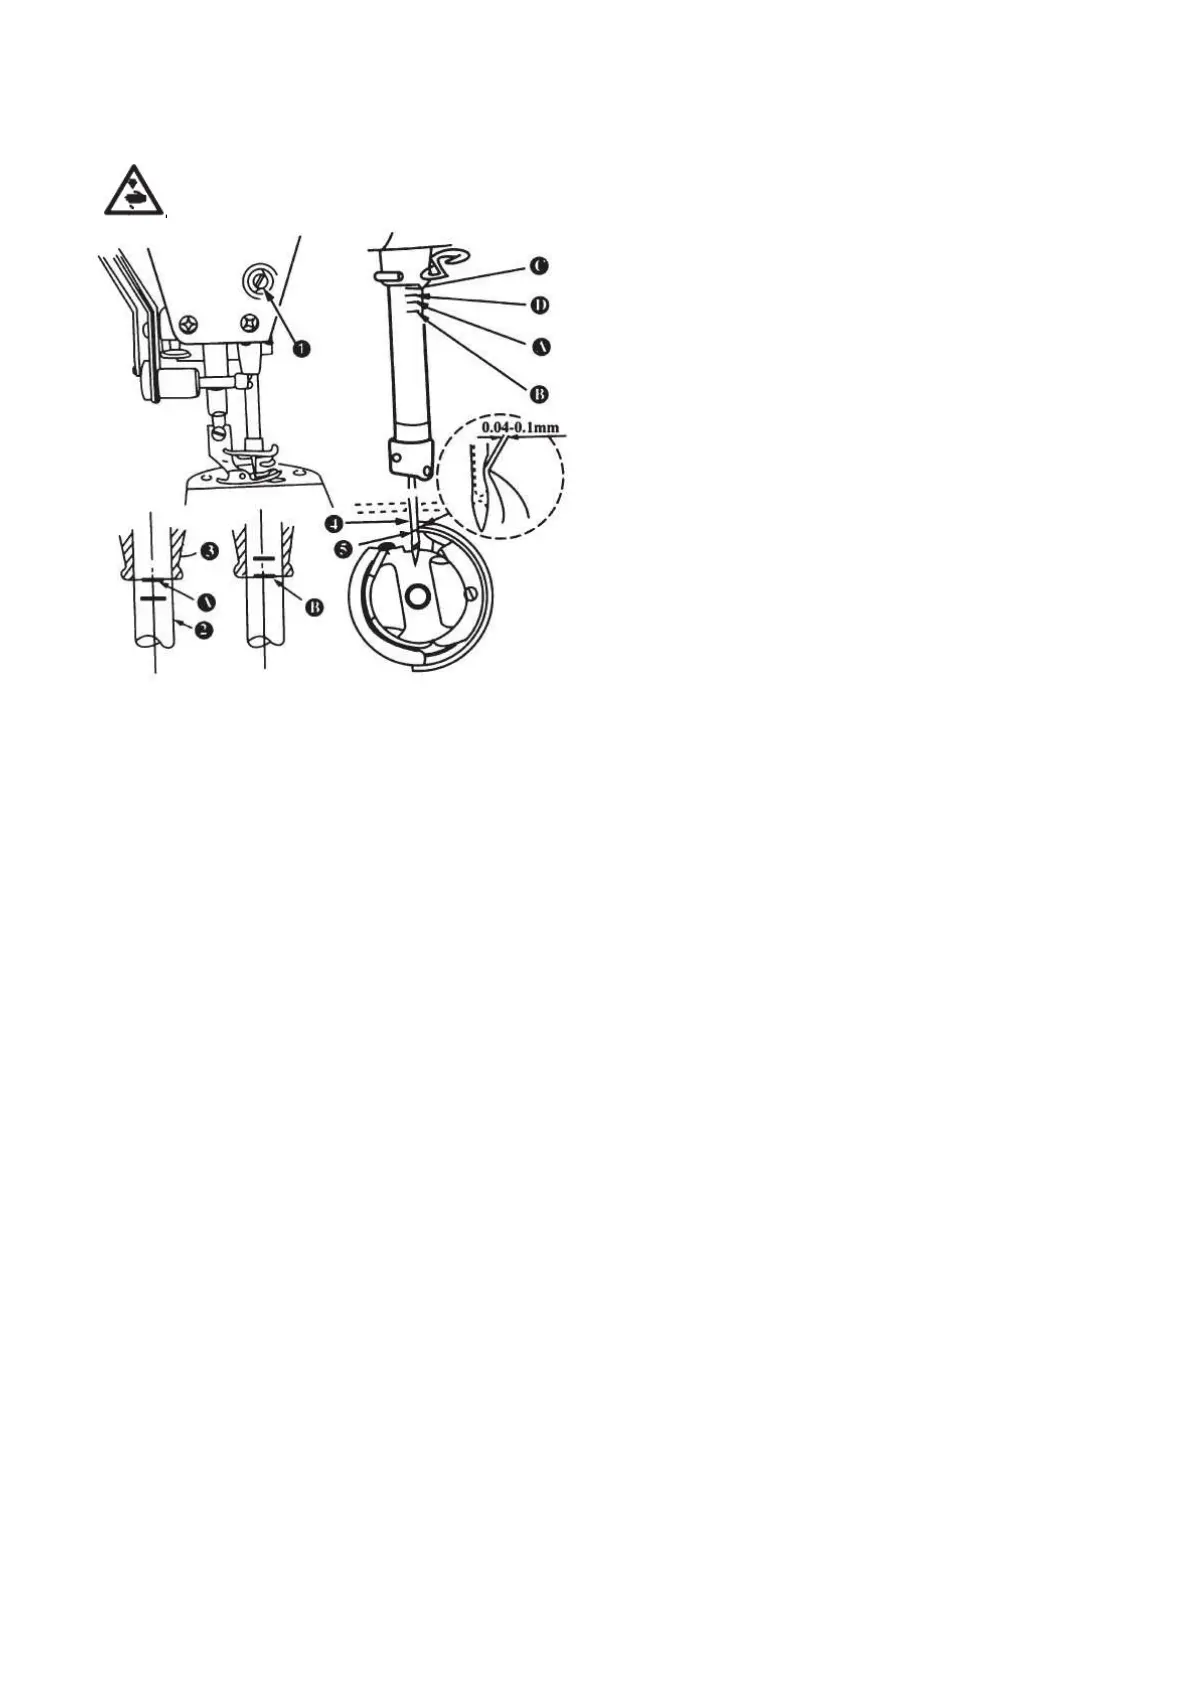
1. Turn the hand-wheel to bright the needle bar down to the
lowest point of its stroke, and loosen setscrew (1).
2. Adjusting the needle bar height:
1) While using DB needle, align marker line A with the
bottom end of needle bar lower bushing (3), then
tighten setscrew (1).
2) While using DA needle, align marker line C with the
bottom end of needle bar lower bushing (3), then
tighten setscrew (1).
3. Locate the hook position:
1) While using DB needle, loosen the three hook set
screw, turn the hand-wheel, and align marker line B
on ascending needle bar 2 with the bottom end of
needle bar lower bushing (3).
2) While using DA needle, loosen the three hook set
screw, turn the hand-wheel, and align marker line D
on ascending needle bar 2 with the bottom end of
needle bar lower bushing (3).
4. After making the adjustments mentioned in the above
steps, align hook blade point (5) with the center of
needle (4). Provide a clearance of 0.04mm to 0.10 mm
(reference value) between the needle and the hook, then
securely tighten setscrews in the hook.
Caution: If the clearance between the blade point of hook and
the needle is smaller than the specified value , the blade point
of hook will be damaged. If the clearance is larger, stitch skip-
ping will result. Use a hook of the same part No. when
replacing your hook with a new one.
14
 Loading...