C-2
3-POINT HITCH appendix C-2
3-POINT HITCH INSTALLATION INSTRUCTIONS (continued)
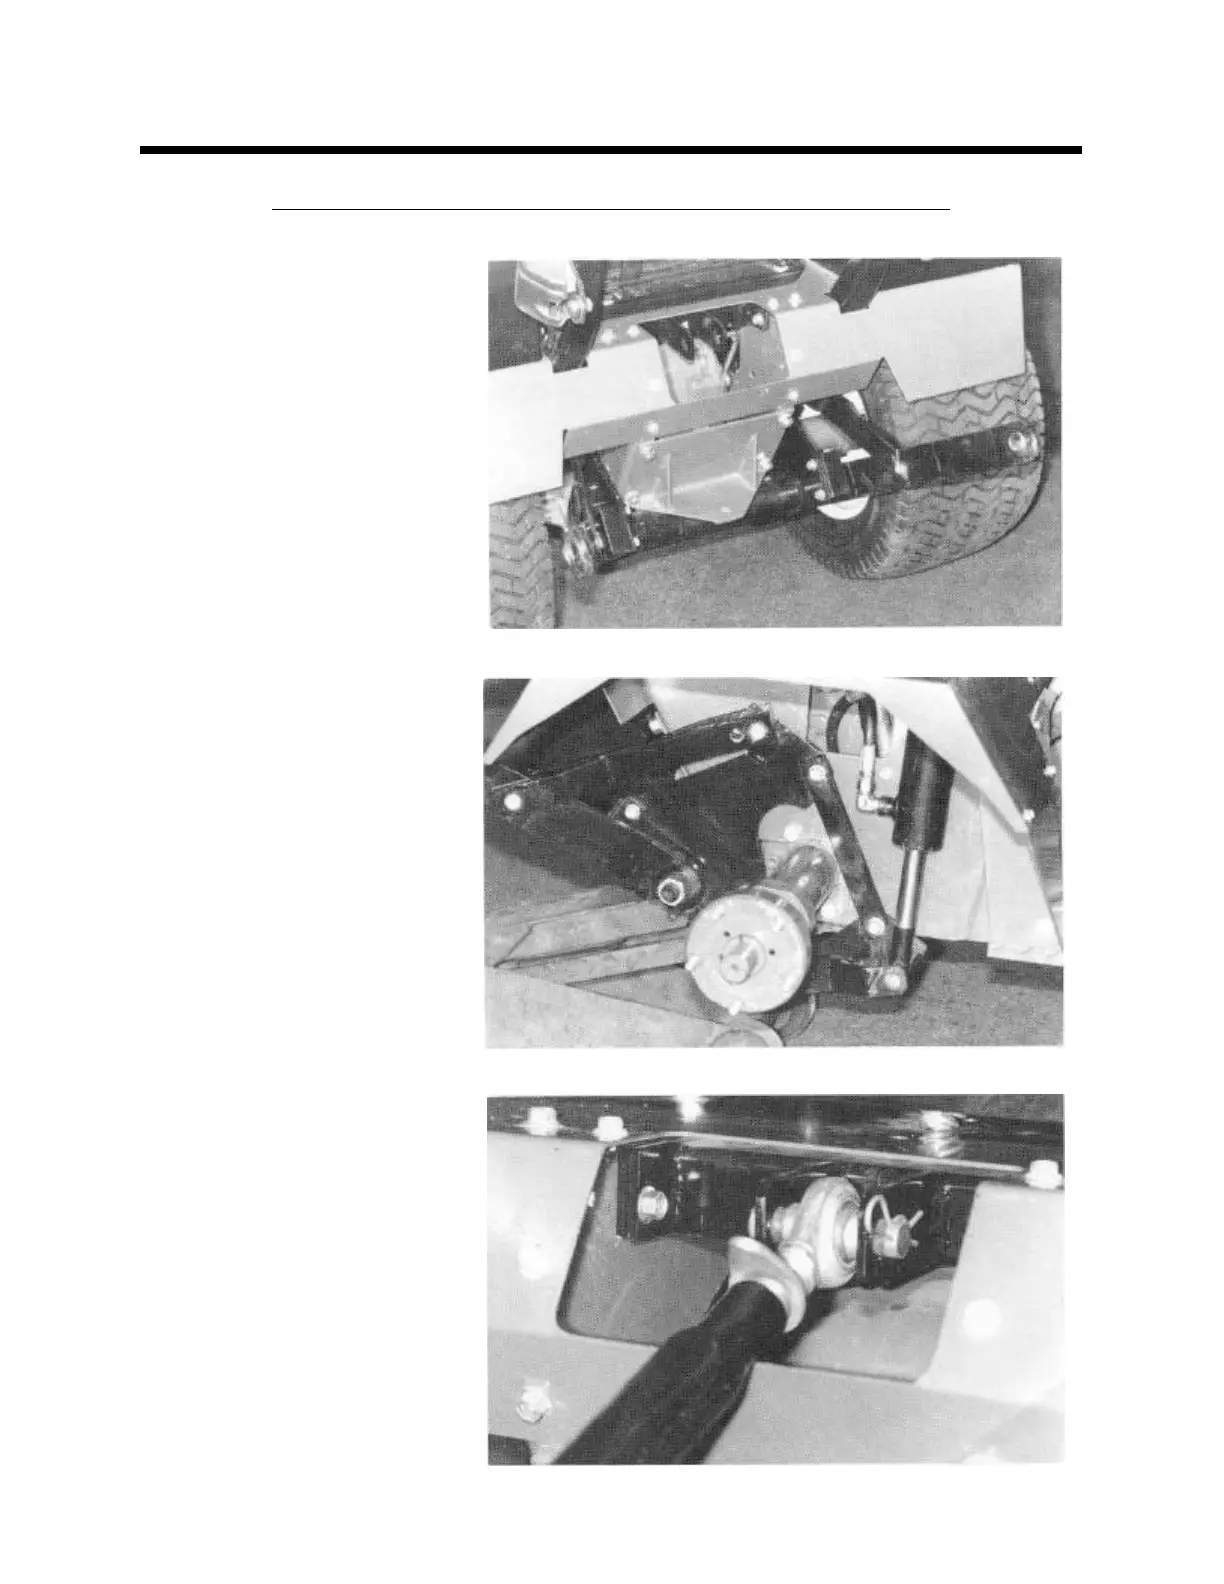
8. Attach sway bumper angles to the
frame as shown in Photo C--4
with 3/8 x 1 flange bolts and
flange nuts.
9. Install the draft links to the 3--point
main frame with 7/8 locknuts.
Both draft links are identical.
10. Attach the lift links to the draft
links and the 3--point main frame
with 5/8 x 1--1/2 clevis pins and
cotter pins. The end with 2 holes
goes to the top. (See Photo C--5)
11. The top link mounting is installed
through the center fender
opening. Position the mount with
the mounting holes down and
attaching links to the rear. (See
Photo C--6) Insert the right end
first and carefully move it into
position inside the frame. Spacer
plates are used between the
mount and the frame at both
ends. Fasten with 3/8 x 1--1/4
flange bolts and flange nuts.
12. The top link is attached with 3/4 x
3 clevis pin and presto pin.
Photo C-5
Photo C-6
Photo C-4