Macho Direct
The Ultimate Cooling Solutions!
www.thermalright.com
8
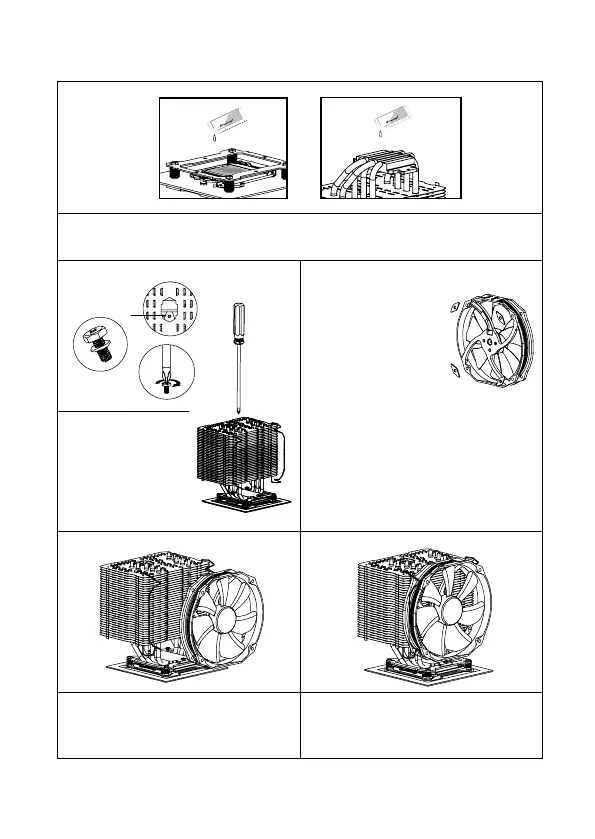
Step 4:
Step 5:
Step 7: Step 8:
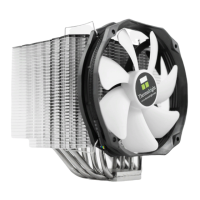
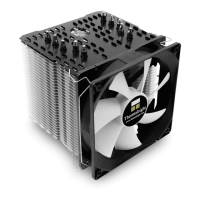
Step 7 : Fan Installation
Place the included TY-140 Black onto the Heatsink
Body. And then secure it with the Fan Clips, by
pulling the Fan Clips to place the four ends at the
four holes on the TY-140 Black.
Step 4 : Applying Thermal Paste
Apply the Thermal Paste to the base of the heat-sink and the surface of the CPU evenly. (A at edge,
like a business card or an old credit card would be benecial in spreading the thermal paste.)
Step 8 : Installation completed
Plug in the fan connector to the CPU PWM Fan
socket on the motherboard. Installation complete.
Step 5: Easy Access
Pass the supplied Screw
Driver through the central
hole of the Heatsink Body,
for easier access to the
M3L7 Screw with washer
underneath the cooler.
Chill Factor
2g
Chill Factor
2g
Chill Factor
2g
Chill Factor
2g
Step 6:
Step 7: Apply fan cushion pads
Among the parts you will
find four pads that look like
elongated diamonds with a
whole in the center. Apply one
of the pads over each of the
four holes in the fan, please
take care to put them over the
holes on the fan according to
your choice of airow. For push conguration (air
owing thru the heat sink, apply as shown in the
drawing. For pull conguration (air being sucked
out of the heat sink), place them on the opposite
side of the fan. Then install the fan in your choice
of conguration, with the pads on the fan facing
the heat sink.