Disassembly and Beassembly
(Rev.
7, 12l01)
'7.
8.
Renrovc the sealinstillation tool. l.
Removc lhe orange
proteclive
cap. Clean the
hard nng
and the primary nng
(bronze
ring) with the rlcohol
wipes
fbund
in package labelcd l . Thcn clean thc
polished
maling
surfaces
of
both rings with the lint frcc
dry
wipes
liom
package
number
":
.
Apply
clean
comprcssor oil ro the
polixh€d
surfaces of $e seal. the
Iip scal. and thc sc.
plnte g.rsket
lrom
packnge
number
'':]'
bcforc nsscmbling.
CAUTION:
Oil applied to the seal
laces
nust
be absolutelr clean,
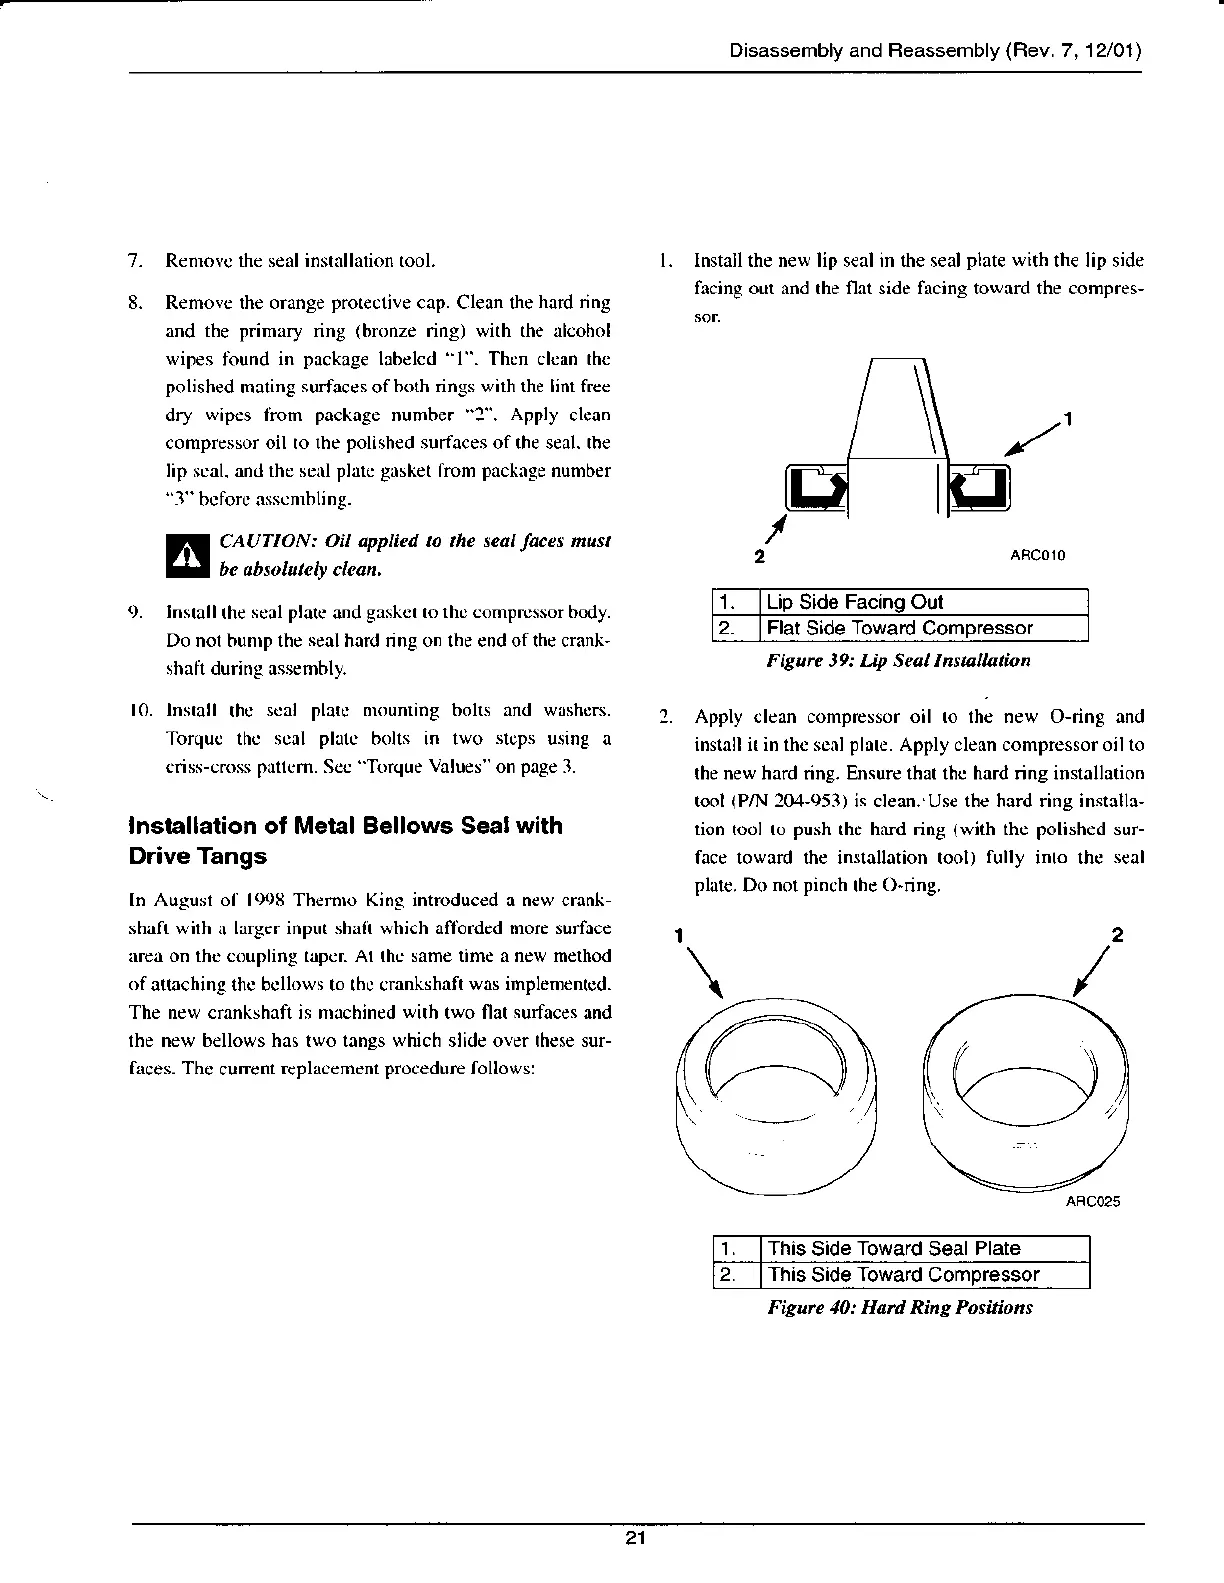
lnstall the new lip seal in the seal
plate with
the lip side
facing our and rhe flat side frcing toward the compren
1. Lio
Side
Facino Out
2. Flat
Side
Toward
Compressor
Figun 39: Up Seal Instalation
9. Install
the
scal plalc
and
gaskct to tht! comprussor body.
Do nol bunrp the
seal
hard ring on lhe end of lhe crank'
shafi during assembly.
f0. lnstall
thc
scai plalc n$unling bolls rnd wdshc6.
2.
Tor.tuc th,:
\(fl1 plrl( h,'ll' in rsu
n(p' using a
crisrcrcss
prtlcm.
Sec Torque
Values
on
page
3.
lnstallation ot Metal Bellows Seal
vvith
Drive Tangs
In Augusi ol 1998 ThemD King introduced a new cmnk-
shdt wirh
r
lrrgcr input shrli which afibrded more surfice
arc.r on th. coupling tdpen Al thc same time a new merhod
ofatiaching
thc bcllows to rhc crankshaft
was implemcnrcd.
The new crankshafl is machincd
with
two flat
surfaces
and
lhe new bellows has two langs which slide over these sur-
faces. Thc
curcnl
rcplacencnl
procedure
follows:
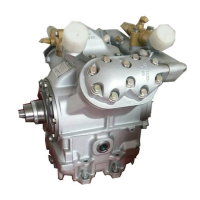
Apply €lean compressor oil ro lhc new O-ring and
inshll ir in thc scnl
plare.
Apply clern compressor o,l to
the new hard ring. Ensure that thc hard ring installation
tool
(P
{:0,1-953)
is clean. Us€ thc hard ring installa'
tion tool to
push
the hrrd ring
(with
the
polished
sur-
face loward the installation tool)
fully
into thc
seal
plat€.
Do
nol pinch
thc
O"ring.
1 This
Side
Toward
Seal
Plate
2. This
Side
Toward
Compressor
Figure 10: Hard rjng Positions
21