Disassembly
and
Reassembly
(Rev.
7, 12/01)
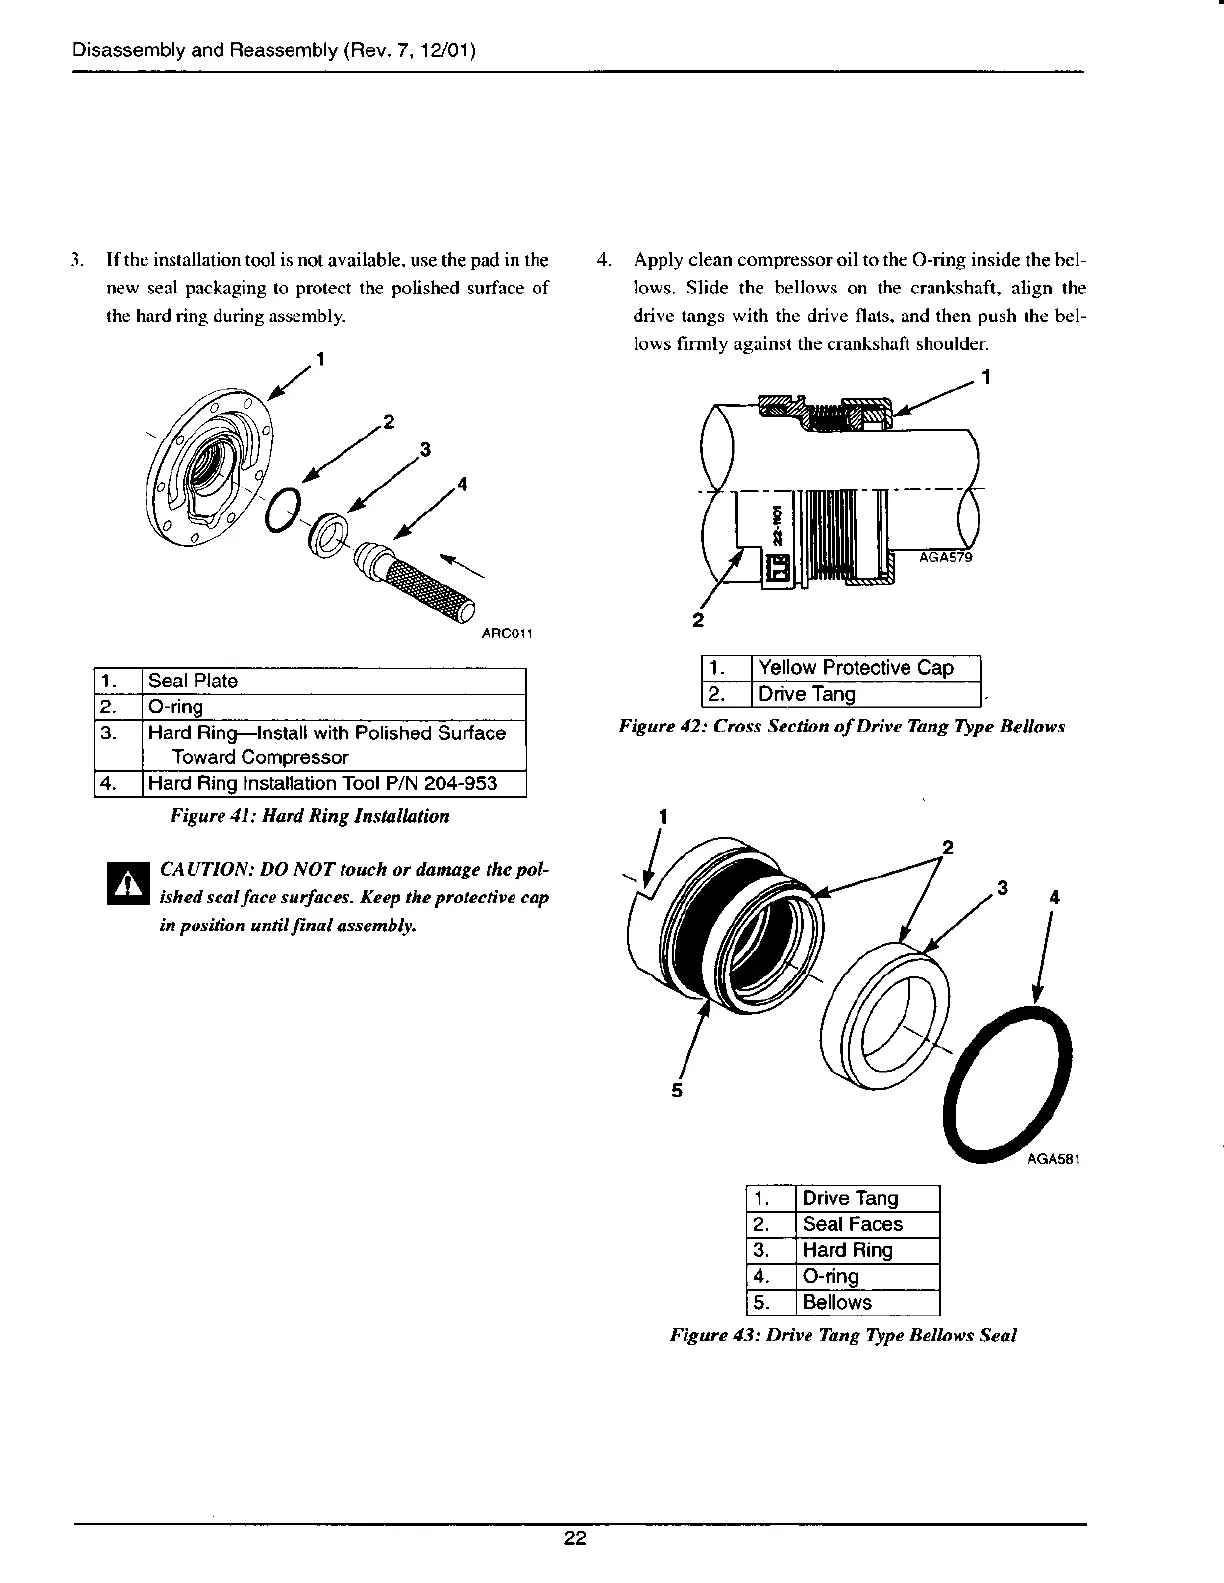
Ifthc installalion tool is not
available. use the
pad in the
new seal
packaging
to
protect
the
polished
surface of
lhe hard ring during assembly.
,,/" "
n//'
-%-
ARCOll
S€al
Plate
2. O-ring
3. Hard Ring-lnstall with Polished
Sudace
Toward Comor€ssor
4. Hard Flino lnstallation Tool P/N 204-953
Figun 1l: Ha Ring
Insit ation
CAUTION: DO NOT touch o. danng. thc
pol
ished scallace suiaces. Keepthe
prctectit'e
cap
in position
until
fnal
assenbly
Apply clean compressoroil tothc O-ring inside
lhe
bcl
lows. Slide lhe bellows on the crankshaft, align rhe
drive tnngs with the drive flais. and then
push
the bel-
lows firmly againsr the crankshafi shoulder
1.
Yellow Protective
Cap
2.
Figurc 42: Cross Scction of Driw Tang
rype
Bcllows
1. Drive Tang
2. Seal Faces
3. Hard Ring
4. O-ring
5.
Bellows
Figuft 43: Drive Tang
rype
Belloes
Seal