Disassembly
and Reassembly
(Rev.
7, 12101)
CONNECTING BOD,
PISTON AND
SLEEVE
Removal
l. Removc rhc cylindcr heads
((see
Cylinder Hcad on
prsc
ll)-),
the discharge
valvc
plares
(lsee
Discharge
Valvc Platcs on page
l:).) nnd the oil sump
and the oil
p'ckup
screen
((see
Oil Sunp
and Oil
Pickup
Scre€n"
on
pagc
13).).
L
Renlole the connecting rod
nuts.
Repai.
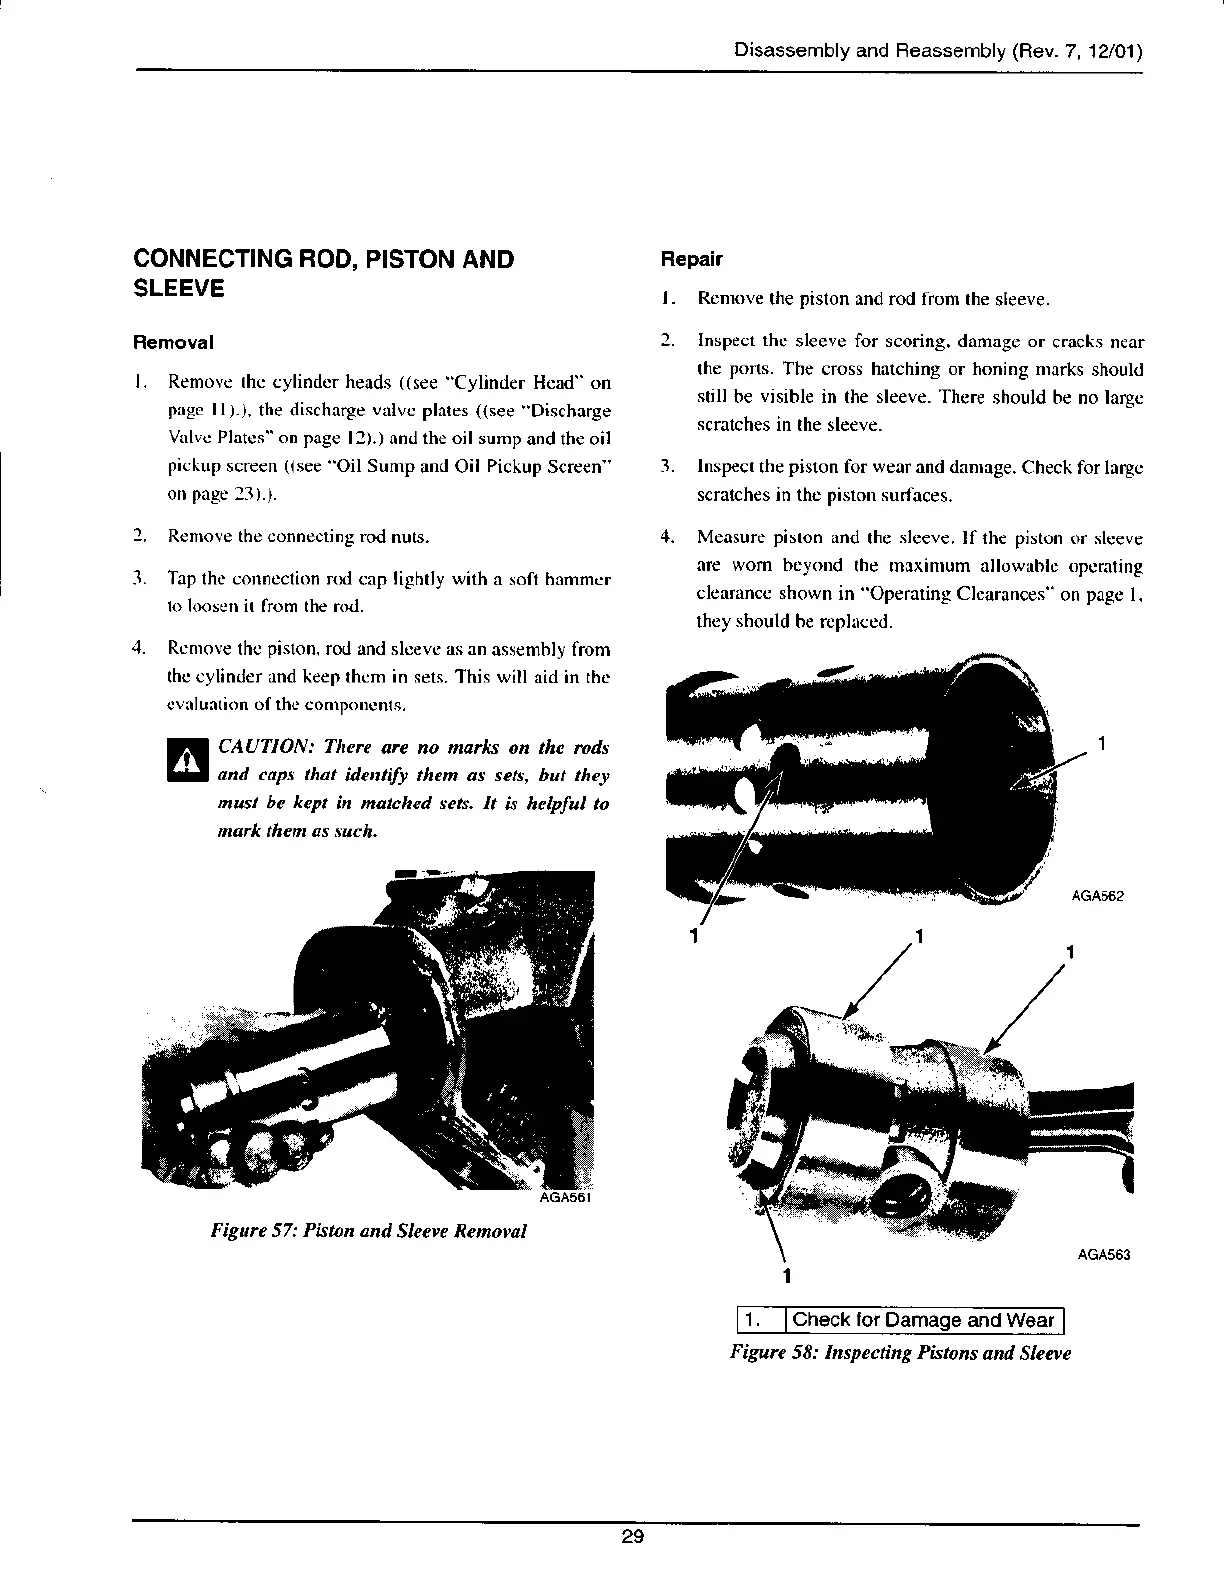
l. Rfnk,\c the pi.lon
d rod rrum the \lceve.
2. Insped thc
sleeve for scoring. danagc or
cracks near
the
pons.
Tbe cross hatching or honing nrarks
should
still
be
visible
in the sleeve. There
should be no large
scralches
in the sleeve.
3. lnspect
the
piston
for wearand dinrrge.
Check for largc
scratches in thc
pislon
surfaces.
4. Measure
pisron
and
the
sleeve.
lf the
piston
or sleeve
nre wom beyoDd
the maximum allowablc opcmring
cleffance shown
in Operaring Clcarances
onpagcl.
they
should
be replrced.
.1. Tap lhc conncction nl
cap
lightly with
a sofi halnmcr
l0 krcsen it arom the rGl.
Rcnrove
lhc
pislon.
rod md slceve as an
ass€mbly from
lhc cylinder and keep thcm in se1s.
This will aid in the
c!irluntion of the compoDcnts.
CAUTION: The.e
arc no marks on the ro^
and cops that
Uetrtdy them as sets. but thc!
nust be
kept
in matchcd se*. It
is helplul k
Figure 57: Pltton and
Sleeve Renowl
1.
lCheck
lor
Figure
58: Inspecting Pistons
and Sleeve
29