Disassembly
and Reassembly
(Rev.
7, 12101)
r:.
t:t.
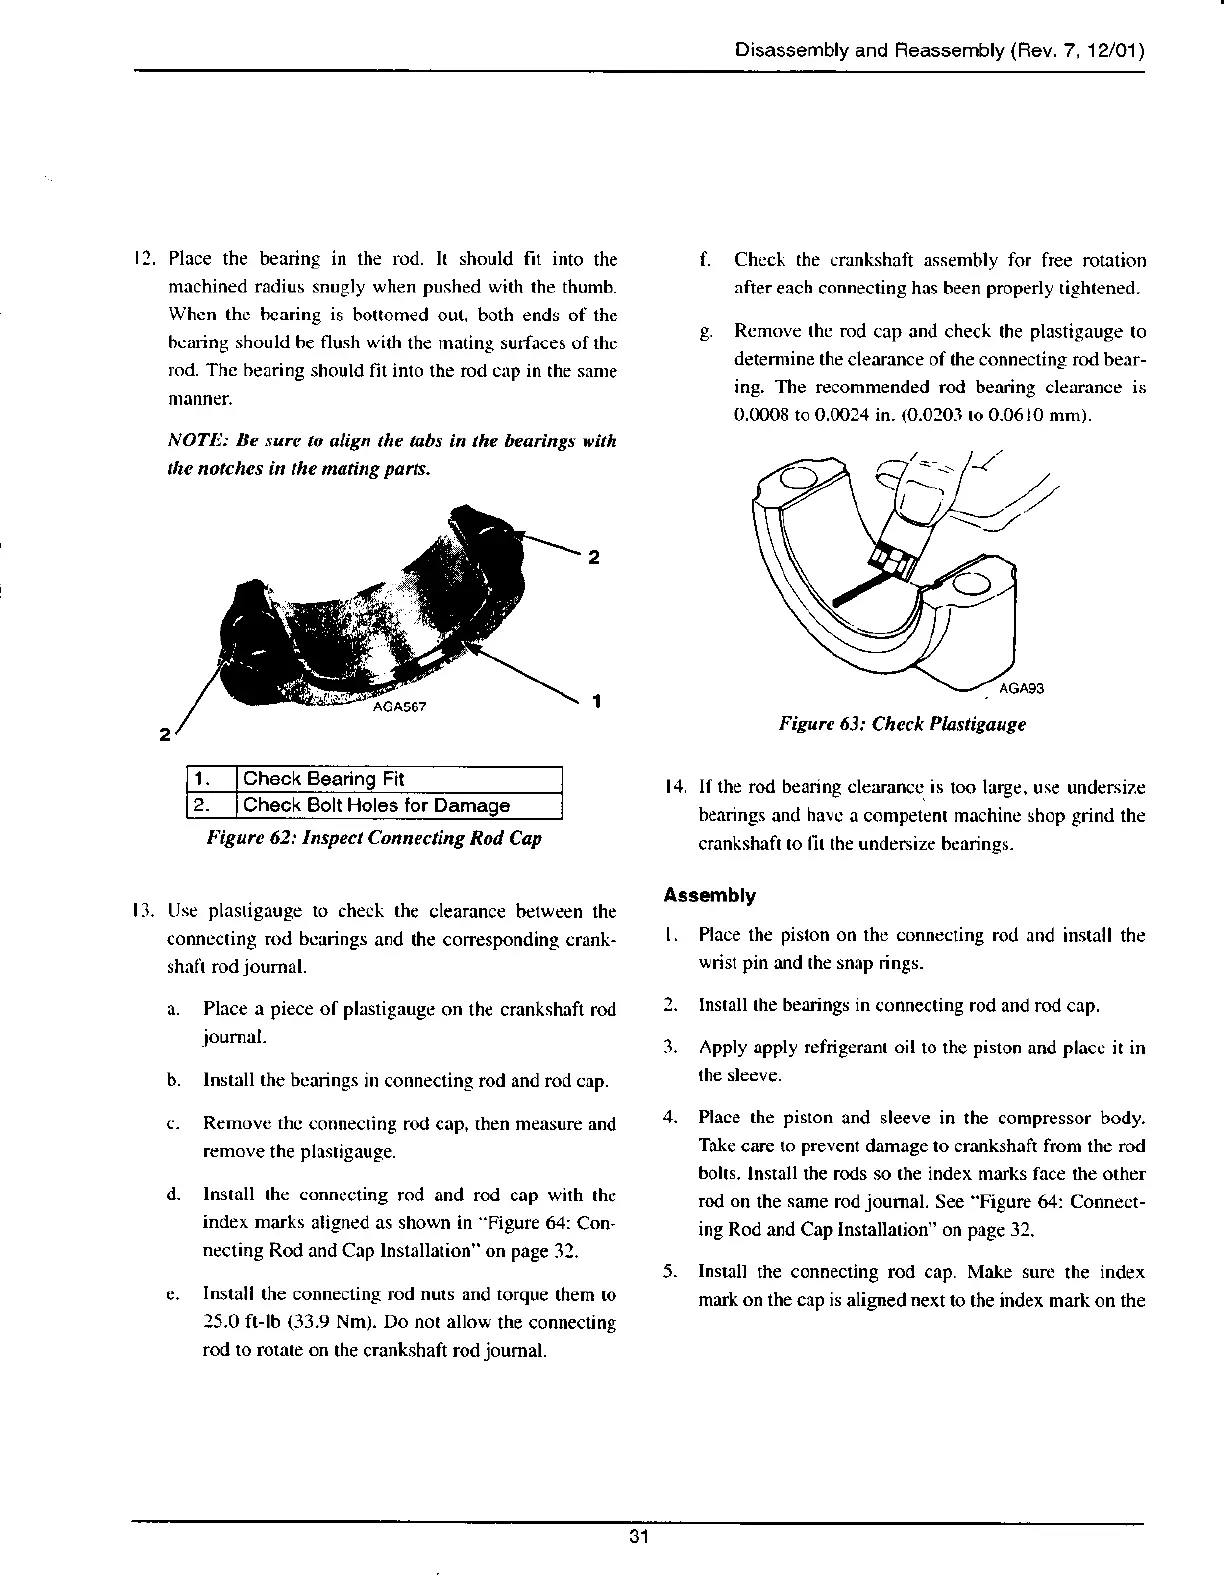
Place the bearing in the rcd. k should fit into
the
rnnchined radius snugly wh€n pushed with
lhe thumb.
Whcn thc b.aring is
bo(omed our both ends of the
bcanng should be flush u,ith
the mating surfn€es ofrhc
rod. The bearing
should fi1inlo the rod cnp in the sanre
NOTL: Be sure
to olign the .tbs in the bearings dth
the notches in the mating
pa
s.
Check the cnnkshaft assembly for
free rotalron
rftereach
connecting has been
properly
righlened.
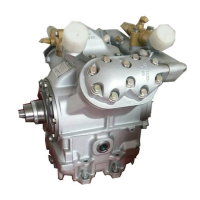
Renove the rcd
cap and check the
plastigauge
ro
detemine
theclearance ofthe connecting rod bear-
ing. Th( Rcommended rod b(xnng.l(Jrin(e n
0.U)08 to 0.0024 in.
(0.0201
ro 0.0610 lnm).
I.
t. Ch6ck Beadnq Fit
2.
Check Bolt Holes lor Damaa€
F-igurc 62: Inspect Connecting
Rod Cap
Fisurc 63:
Chcck
Plastigauge
14. If the rod bearing clcarancc is
loo l
gc,
use undcnrzc
bearings
and
halc
a compelent machine shop
grind
the
crankshaft to lit the undersize bcllrings-
As3embly
L Place the
pislon
on thc connccting rod
and install the
wrisl pin
and the snnp rings.
:. Install rhe bearings in
connecting rod and rod cap.
3. Apply apply refrigernm oil
to lhe
pislon
and
placc
it in
4. Place the
piston
and sleeve in lhe compressor body.
Take
care to
prevent
damage lo crankshaft from the rod
bolts.
lnstall the rods so the index marks face the other
rod on
the
same
rod
joumal.
See
"Figure
6.1: Connect-
ing Rod and Cap Installarion" on
page
32.
5.
Insrall
the connecting rod crp. M*e sure
lhe
index
mark on the c:tp is
aligned
next
to the index mark on the
tise
plasrigauge
ro check the
clearanc€ between the
connecting rod bcrrings
and the conesponding crmk-
a. Place a
piece
ot plasrigrugc
on th€ crankshafl rod
b. lnstrll th€
bcarings irr conne€ting rod and rod cap.
c- Rcmovc thc
connecting rod cap, rhen measure and
rcmove
the
plastigauge.
d- lnstall rhe connecting
rod and rod cap wirh rhc
index marks
aligned as shown in Figure 64:
Con,
necting
Rod and Cnp lnslallarion" on page
31.
e.
Install
the connecling rod nuts and iorque
them ro
15.0 ft-lb
(33.9
Nm). Do not allow
th€ connecting
rod to rorate on
the crankshaft rod
joumal.