10 Preventive Maintenance Kit 2270105
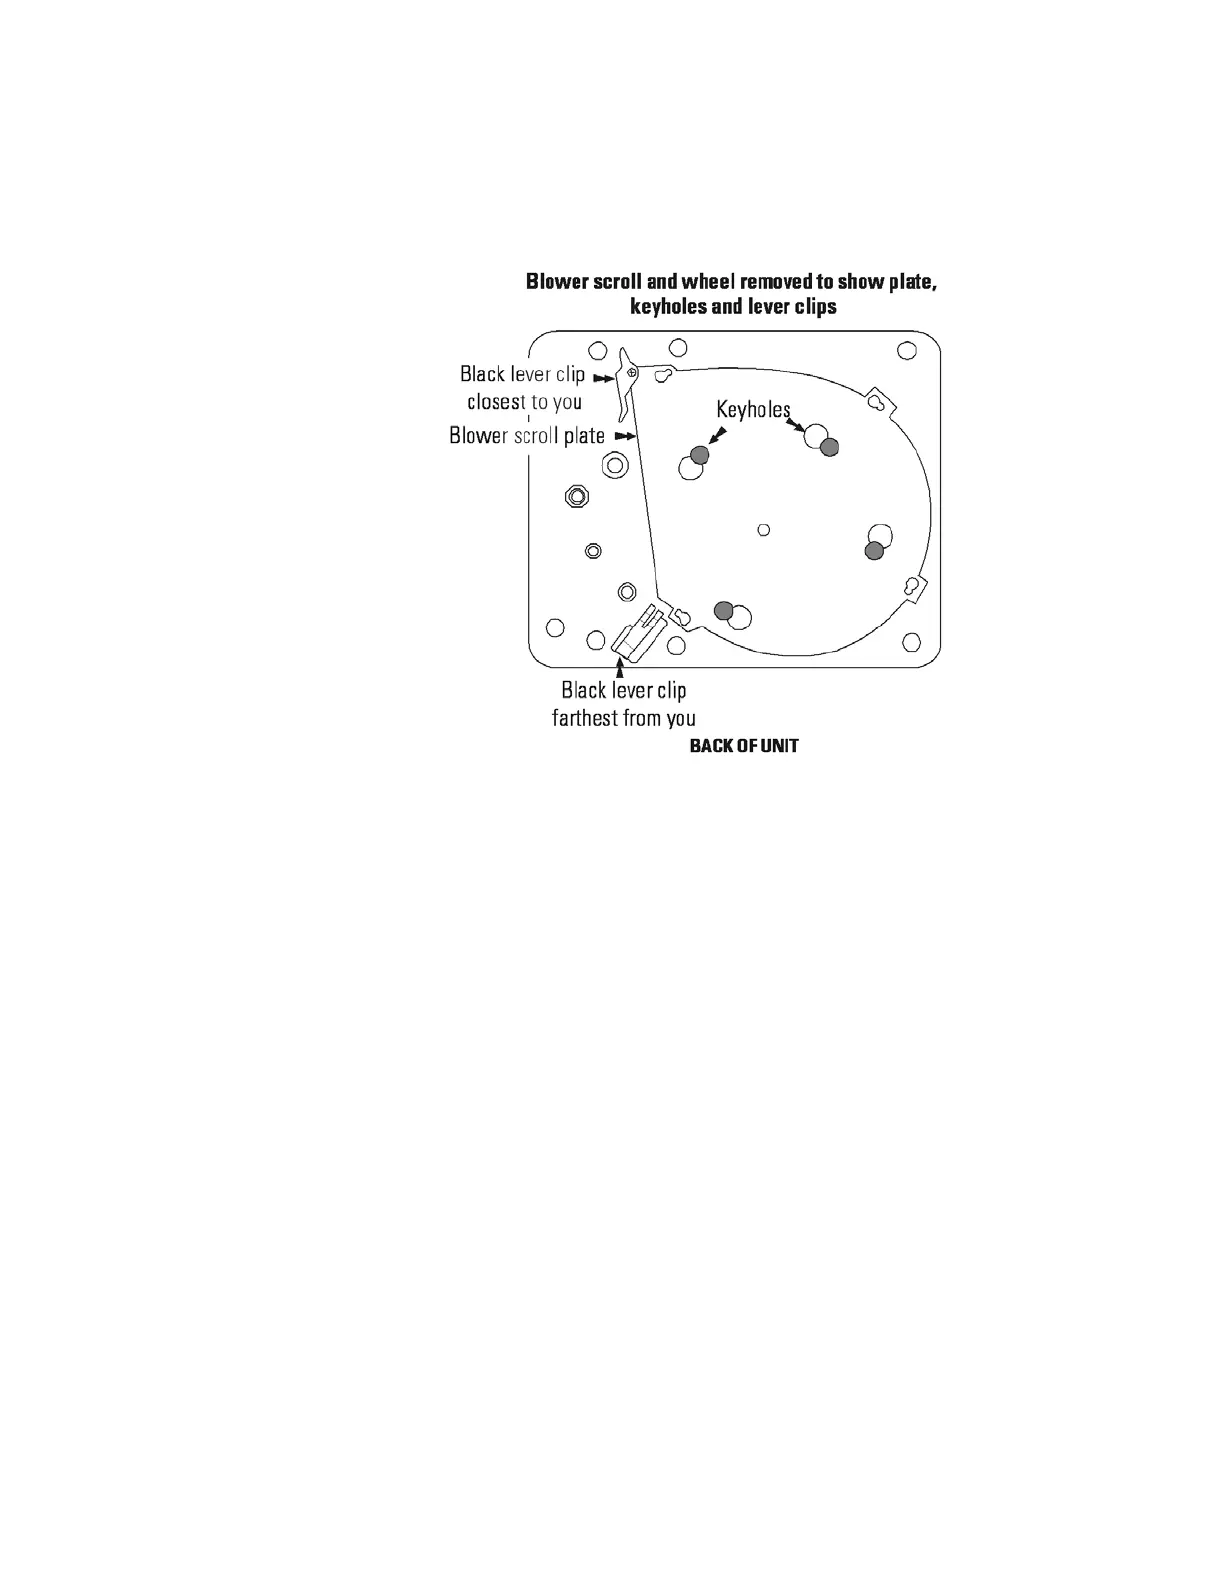
10. Remove the blower scroll plate by first pushing the black lever clip
farthest from you toward the chamber ceiling. Then turn the blower
scroll plate to the left to disengage it from the alignment keyholes
(Figure 11).
11. Remove and discard the white Teflon washer from the motor shaft.
12. Remove the 6 nuts from the blower and disengage the blower plate
from the top of the unit. There may be suction build-up on the blower
plate gasket. Support the blower plate during this process. Do not
allow it to hang from any wiring, especially the temperature sensor.
13. Remove the blower plate gasket and install the new one.
14. Re-install the blower plate, using the 6 nuts. When aligning with the
mounting holes, all wiring and tubing must be pushed up into the hole
behind the plate to prevent them from being cut or pinched.
15. Install the new white Teflon washer onto the motor shaft, halfway
between the shoulder on the motor shaft and the chamber ceiling.
16. Install the blower scroll plate by aligning it with the larger end of the
keyholes and turning it to the left to lock it on. Pull the black lever
clip farthest from you downward from the ceiling.
Installation - Release 5,
Series II (continued)
Figure 11. Underside View of Chamber Ceiling
 Loading...