4 Preventive Maintenance Kit 2270105
13. Replace the grommets in the top duct with new ones provided in the
kit.
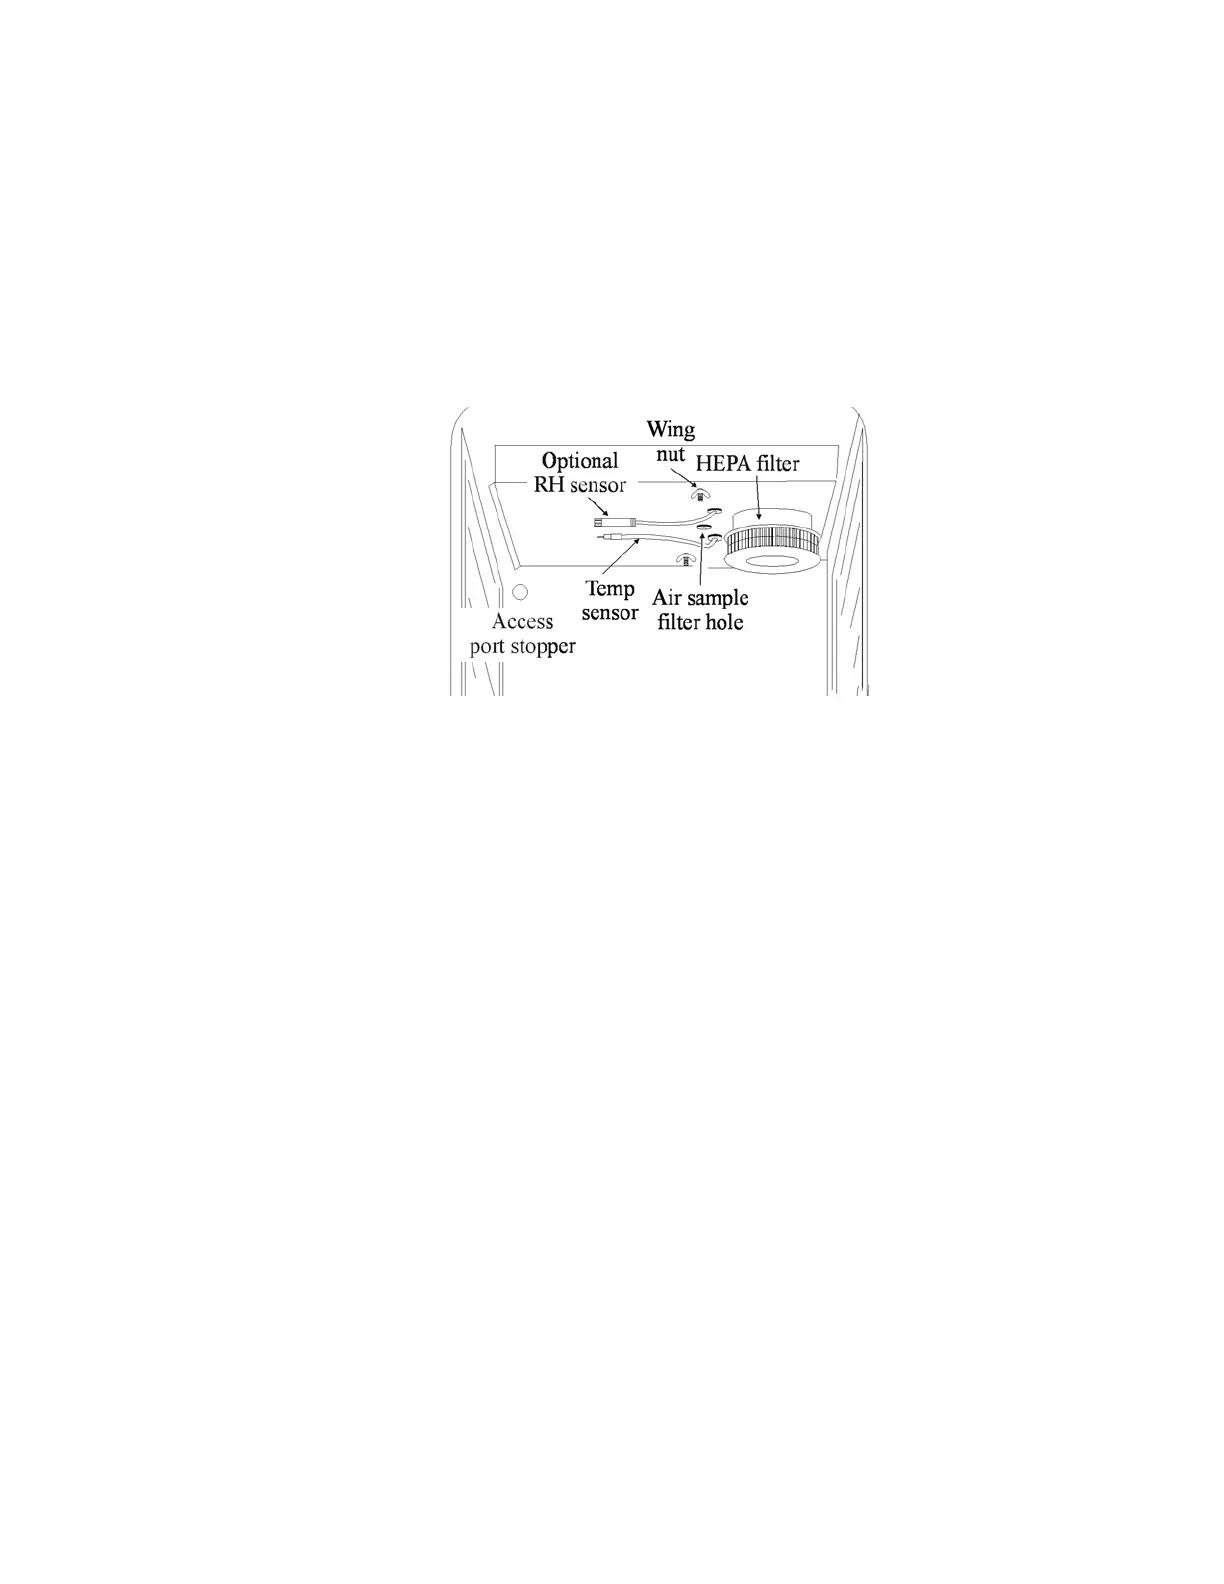
14. Install the top duct by feeding the temperature sensor (and RH sensor,
if applicable) through the appropriate grommet in the top duct as it is
raised to the chamber ceiling. Be careful not to pull the grommet itself
through the duct. Locate the mounting studs, blower scroll and air
sample filter into the appropriate holes in the duct. Install the wingnuts
to secure the duct (Figure 4).
15. Carefully pull the temperature sensor (and RH sensor, if applicable)
down until it can be fastened into the corresponding clip(s) on the top
duct.
16. Install the new access port stopper.
17. Install the shelves and side duct sheets.
18. Install the new HEPA filter.
19. Plug the incubator in and turn the power switch on. Allow the unit to
run empty for 24 hours, then return to service.
Installation - Release 1
through 3 (continued)
Figure 4. Assembled and Secured with Wingnuts
 Loading...