Dionex AXP/AXP-MS Manual
5. Remove the snap ring from the groove on the old piston and place
it into the groove on the new piston.
6. Place a small amount of high quality grease on the back end of the
metal base of the piston assembly. Grasp the metal base of the
piston assembly near the front so that you avoid exerting any
pressure perpendicular to the length of the piston, and gently slide
it into the pump housing.
7. Gently slide the spring over the piston assembly and back into the
pump housing. Carefully align the retainer and gently push it
straight in against the spring force until the retainer is against the
housing. If misalignment with the piston occurs, wiggle while
pushing the retainer to align the piston and retainer.
8. Hold the retainer flush against the housing with your thumb. Insert
and tighten the Phillips head screws. Do not allow the spring
pressure to force the retainer away from the housing. Check that
there are no gaps between the retainer and the housing.
9. Attach the pump head as described in Section 5.2.5.
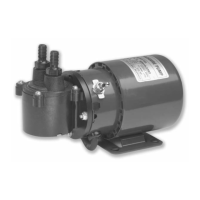
5.2.5 Replacing the Pump Head
1. Gently place the diaphragm, with the center hub protruding toward
you, onto the piston. Push the diaphragm all the way back into the
recess and against the metal base of the piston. Do not exert
pressure perpendicular to the length of the piston, as this may
break the piston.
2. Carefully align the flush housing and gently slide it into place on
the pump. Make sure the inlet valve is on the bottom and the outlet
valve is on the top. Insert the O ring into its groove.
3. Line up the pump head and carefully slide it into place. Make sure
the inlet valve is on the bottom and the outlet valve is on the top.
Do not force the pump head into place.
4. Fingertighten both knurled nuts. To tighten firmly, alternately turn
nuts one-quarter turn while gently wiggling the pump head to
center it.
5. Reattach the inlet and outlet lines. Change the flushing solution.
23
 Loading...