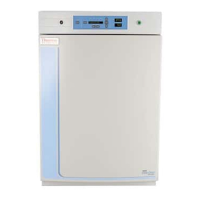
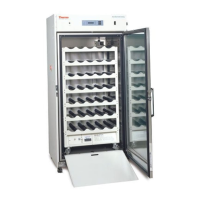
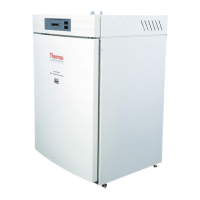
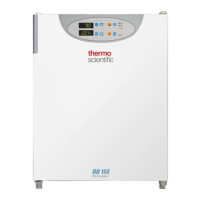
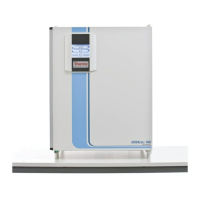
The Lab-Line Compact Low Cost Incubators are designed for biochemical, bacteriological, and hematological studies, providing a controlled environment for growing microorganisms and for studying chick and invertebrate embryos. These incubators are available in various models, including 100, 100IDE, 100JPN, 100-5JPN, 101, 105, 106, 120, 120JPN, 120-5JPN, 121, 125, 126, 150, 150JPN, and 152. Models 105, 106, 125, and 126 feature an acrylic outer door, as do the Educational Incubator models 150, 150JPN, and 152, which are specifically intended for egg incubation and not for clinical purposes.
The incubators are constructed with specially designed heaters to eliminate the hazards associated with open-wire internal heaters. A pilot light indicates when the heaters are active. The chamber walls are made of solid, corrosion-resistant aluminum, insulated with 1-inch (2.5cm) fiberglass to ensure even heat distribution. The exteriors are made of powder-coated, durable, heavy-gauge steel, making the units easy to clean and maintain. Temperature control is managed by a bimetallic thermostat.
Technical Specifications:
Usage Features:
- Installation: The unit should be placed on a level table or bench, away from drafts and wide ambient temperature variations, and near a power supply matching the unit's nameplate requirements. Adequate clearance around the unit is needed for free air convection. The incubator door opens from the left side.
- Thermometer Installation: The thermometer holder also functions as a vent. The grommet is placed in the hole at the top of the holder, and the thermometer is pushed through until 3 inches (including the bulb) extend. The holder is then pushed into the vent on top of the cabinet until about 1/4 inch is exposed, with the bulb extending about 2 inches into the chamber. The holder's prongs may need to be squeezed for easier installation.
- Shelf Installation: 100 series units include one fixed shelf. 120 series units come with two aluminum shelves, one fixed to the bottom and one placed on top. 150 series units have two removable, non-adjustable, perforated aluminum shelves.
- Electrical Requirements:
- 120 VAC models are supplied with a 3-wire line cord and require a 3-prong grounded outlet. If an extension cord is used, it must also be 3-wire grounded. If a 2-prong outlet is present, a qualified electrician must replace it with a grounded type.
- 240 VAC and 100 VAC models are furnished with the plug removed due to varying worldwide plug configurations. Users must install a plug conforming to local codes and requirements. Any installed plug must be a 3-prong grounded type, rated for the unit's load, and the green ground wire must be secured to the plug ground terminal.
- NOTE: The unit should be disconnected when not in use.
- Start-Up:
- Plug the cordset into an outlet and turn the power switch ON. The thermostat knob (lower right-hand side) is rotated clockwise to increase temperature and counterclockwise to decrease it. The status lamp illuminates when heaters are energized.
- Allow one hour for the chamber temperature to stabilize, then check the thermometer.
- Repeat steps 1 and 2 until the desired setting is achieved.
- Load the incubator, ensuring items or specimens are spaced to allow proper air circulation.
- Keep the incubator door closed as much as possible to reduce the risk of fungus growth from airborne organisms.
- Safety Warnings:
- DANGER: Do not use in the presence of flammable or combustible materials, explosive gases, or pressurized/sealed containers, as this may cause fire, explosion, severe injury, or death.
- WARNING: Do not heat any substance above a temperature that causes it to emit toxic fumes, as this may result in severe injury or death.
Maintenance Features:
- Routine Cleaning: Spills should be cleaned immediately. The unit should be unplugged for thorough cleaning between incubation periods. The chamber interior and shelves can be cleaned with mild detergent or soap and water. Abrasives or metallic scouring pads should not be used on any part of the unit. The viewing door (if acrylic) should be cleaned with a soft damp cloth and a regular window cleaning solution, avoiding scratching the plastic.
- Repairs and Servicing:
- Always unplug the unit from its outlet before servicing.
- The thermostat is easily accessible inside the chamber.
- The heater is located under the chamber floor. To access it, turn the incubator upside down, remove 4 screws from the bottom of the cabinet, lift out the bottom and insulation, disconnect heater leads, and remove 2 nuts holding the heater to the floor.
- NOTE: Do not attempt to service or repair a Lab-Line product under warranty without consulting your Lab-Line dealer. After the warranty period, consultation is still advised for technically sophisticated or difficult repairs.
- For assistance beyond what the distributor can provide, contact Lab-Line Customer Relations Department. Merchandise should not be returned directly to Lab-Line without prior approval.
- CAUTION: Disconnect the plug from the electrical outlet before attempting any maintenance or repair.
Warranty:
Lab-Line Instruments, Inc. warrants products to be free of defects in materials and workmanship from the date of sale or purchase by the original retail customer (Commencement Date). This warranty explicitly disclaims all other warranties, including design, merchantability, and fitness for a particular purpose.
- Warranty Service: An authorized Lab-Line representative must perform all warranty inspections. For covered defects, Lab-Line will provide free replacement parts. For products sold within the continental United States or Canada, Lab-Line will also provide free labor for 90 days from the Commencement Date.
- Warranty Voidance: The warranty is void if repairs are made by unauthorized parties, if the product is misused (including use inconsistent with operating instructions), mishandled, contaminated, overheated, modified, or altered by any customer or third party, or if replacement parts from unauthorized dealers are used.
- Liability Limitation: Lab-Line is not liable for any direct, indirect, special, incidental, or consequential damages, or for damages resulting from loss of use or profits, arising from the sale, use, or performance of any products, whether based on contract, tort (including negligence), strict liability, or regulatory action.
Warranty Periods for Specific Parts:
- 12 Month Parts Warranty: All Incubators & Ovens (among other categories like Environmental Chambers, Low Temperature B.O.D. Incubators, etc.).
- Lifetime Parts Warranty: Aquabaths (on heaters).