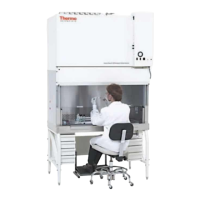
Section 10 - Service
Service to the unit must be performed by qualified
personnel. Recertify the cabinet after servicing.
Before service is to be performed on the cabinet,
the unit must be decontaminated!
10.1 Replacing Blower Motor
a. Reversing the motor wiring (4 ft. models only)
1. On the replacement motor: Disconnect the faston con-
nectors securing the Orange wire to the Brown wire and
Yellow wire to the Purple wire.
2. Reconnect the Orange wire to the Purple wire and the
Yellow wire to the Brown wire.
b. Replacing the motor
1. Turn the unit off and disconnect it from the power
source.
2. Close the window.
3. Open the control panel.
4. Remove the four thumbscrews securing the lamp hous-
ing cover. Remove the cover.
5. Remove the dress panel.
6. Disconnect the window balance cord from one side of
the window.
The balance cord is under extreme tension! Grip
the cord attachment tab securely, disconnect, and
allow the cord to retract slowly toward the top of
the unit to avoid damage to the cord.
7. Remove the access panel.
8. Unfasten the two latches connecting the blower to the
air plenum.
9. Disconnect the motor wiring harness (mate-n-lock).
10. Remove the plenum access panel. Remove the 1/4 nuts
and all threads (2 front, 2 back for 1284/1285)(3 front, 3
back for 1286/1287) securing the panel. Lift and remove
the panel. Remove the supply filter.
Class II, A2 Biological Safety Cabinets_________________________________________________________________Service
10 -1
11. Remove the three bolts toward the front of the cabinet
that connect the blower housing bracket to the top of the
cabinet.
12. Remove the 3 front screws or bolts on the right hand
side of the cabinet that connect the blower housing
bracket to the right hand wall of the cabinet.
13. Slide the blower housing assembly out of the cabinet.
14. Remove the mounting brackets and blower throat from
the existing assembly and install on the replacement
housing.
15. Install the housing assembly in the cabinet and secure.
16. Connect the motor wiring harness at the quick-connect
plug.
Note: After the motor is installed, but before replacing the
plenum access panel, turn the motor on to ensure that
rotation is in the clockwise direction (when viewed from
the motor side of the blower).
17. Replace and assemble the components in reverse order.
10.2 Replacing Filters, All Models
Dispose of the old filters per established laborato-
ry practices. If necessary, consult a bio-safety
officer or other appropriate person.
1. Turn the unit off and disconnect it from the power
source.
2. Close the window.
3. Remove the thumbscrews securing the lamp housing
cover. Remove the cover.
4. Open the control panel.
5. Remove the screws securing the dress panel. Remove
the panel and set it aside.
6. Disconnect the window balance cord from one side of
the window.
The balance cord is under extreme tension! Grip
the cord attachment tab securely, disconnect, and
allow the cord to retract slowly toward the top of
the unit to avoid damage to the cord.
7. Remove all hex nuts securing the pressure plate.
8. Pry the pressure plate loose from the gasket and set it to
the side.
9. Pull the Velcro boot loose from the exhaust filter
plenum.