Do you have a question about the Thermo LabSystems Multiskan EX and is the answer not in the manual?
Manual detailing operational procedures for the Multiskan RC instrument.
Manual detailing operational procedures for the Multiskan MS instrument.
Procedures for testing and adjusting the Multiskan RC instrument.
List of all spare parts for Multiskan RC, MS, and EX models.
Detailed optical parameters and specifications of the instrument.
List of available optional accessories and configurations for Multiskan RC.
Graphical symbols indicating instrument power status.
Standard markings for potential hazards and risks.
Step-by-step guide for unpacking the instrument.
Guidelines for instrument placement and environment.
Instructions for the physical installation of the instrument.
Detailed procedure for installing the instrument lamp.
Procedures for safely transporting the instrument for service.
Identification of components on the rear panel.
Overview of the instrument's functional description.
Explanation of the instrument's measurement principles.
Description of the instrument's light source.
Explanation of the chopper wheel's role in the optical system.
Description of the semi-transparent mirror's function.
Description of interference filter and fibre bundle components.
Procedure and optics for agglutination measurements.
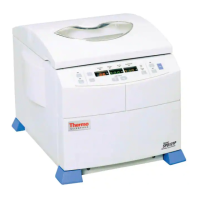
Diagram illustrating the physical layout of the Multiskan RC.
Initial steps and procedures for operating the instrument.
Explanation of the instrument's status LED colors and meanings.
Core commands for instrument control and configuration.
Commands for measuring and data transfer operations.
Commands for instrument settings, time, and status.
Standard messages indicating command execution status.
Format of data transferred for P and PM commands.
Error codes for commands, modules, and chopper speed issues.
Error codes for filter status and light level problems.
Error codes for operational failures and positioning issues.
Procedures for instrument maintenance and routine cleaning.
Detailed steps for cleaning optical system components.
Procedure for disinfecting the instrument.
Procedure for replacing filters in the filterwheel.
Procedure for replacing the instrument lamp.
Procedure for replacing instrument fuses.
Troubleshooting for power and data transfer problems.
Troubleshooting guide for plate and filter related errors.
Troubleshooting for light, chopper, and pinhole errors.
Physical specifications including weight and overall dimensions.
Specifications for power supply and operating environment.
Key performance metrics: accuracy, precision, and linearity.
Details on installation categories and pollution degrees for safety.
Instrument compliance with relevant EU directives.
Step-by-step guide for unpacking the instrument.
Steps for installing the instrument's filter wheel.
Procedure for installing the instrument's lamp.
Specifications for the RS-232C interface hardware.
Identification of signals connected to the DB-25 connector.
Configuration options for handshake signals.
Diagrams illustrating computer connection cables.
List of available accessories and their part numbers.
List of spare parts for maintenance and their part numbers.
| Type | Microplate Reader |
|---|---|
| Wavelength Range | 340 - 850 nm |
| Detection Method | Absorbance |
| Plate Formats | 96-well plates |
| Light Source | Tungsten Halogen Lamp |
| Wavelength Accuracy | ±2 nm |
| Bandwidth | 10 nm |
| Detector | Silicon Photodiode |
| Display | LCD |
| Power Requirements | 100-240 V, 50/60 Hz |
| Weight | 8 kg |
| Data Output | RS-232 serial port |
| Absorbance Range | 0 - 4.0 OD |
| Filters | 8-position filter wheel |