__________________________________________________________________________
Installation option 2 – Self-assembled cold room with ventilation grate
1.
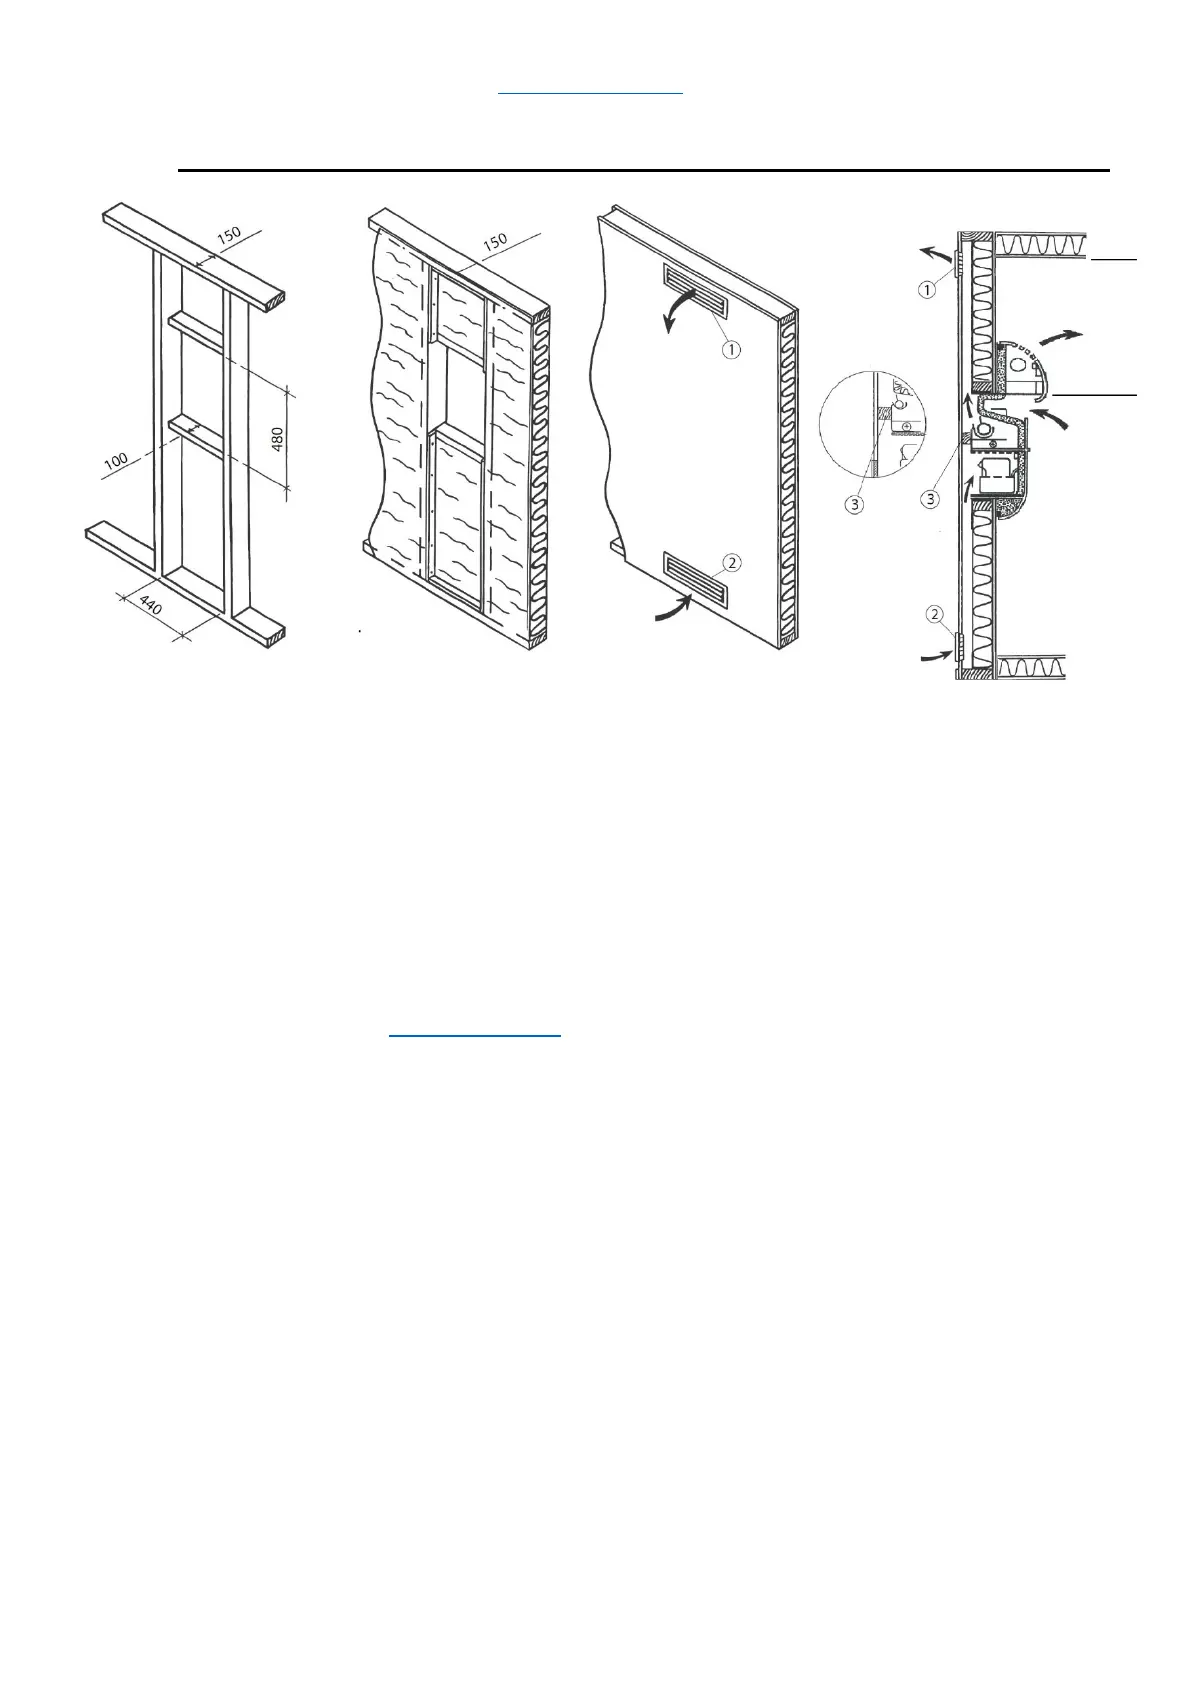
Adapt hole in wall 440x740mm as illustrated. Distance from ceiling to top of light aperture
minimum 310 mm. Minimum air flow 200 cm²
2.
The plug for the mains cable is installed outside the cold room. If it protrudes beyond the
plastic cover, the mains cable must be fastened so that it cannot fall down into the
condenser fan.
3.
Build the cold room in accordance with prevailing laws and regulations. See the
Thermocold website www.thermocold.no
for tips and advice for construction.
4.
Make an air vent above and below the recess in the wall on the outside of the cold room as
illustrated. Min 50x440 mm.
5.
Cut out for the ventilation grates w420xh110 in the wall on the outside of the cold room at the top
and bottom of the air vent.
6.
Adjust the air barrier against the chipboard/plasterboard between the posts. It should be 80 mm
narrower than the thickness of the wall.
7.
Adjust and attach the air seal 250 mm from the bottom of the recess. It should be 8 and screw it
stuck so that it remains pressed between the posts in the air vent. Ref. cross-section figure item 3
8.
Fix the insulating strips around the opening on the inside of the cold room side using staples or tape.
9.
Lift the unit into position from the cooling room side and fasten with screws in each corner.
The gasket should be against the wall, not the cooling unit.
10.
Screw stuck the lower ventilation grate with slats down (2), upper with slats up (1).
11.
Plug in the mains lead and ensure that the unit starts up.
Structure 150mm
Seen from the
outside of the cold
Insulation 100mm
and vapour barrier
Seen from the
outside of the cold
Ventilation grates
installed
horizontally
Fully
Cross-section.
See detail 3