3-7
Chain Installation
DRIVE CHAIN 3.3
1 Make sure the chain tightener and adjuster are clear
rearward in the adjustment slots.
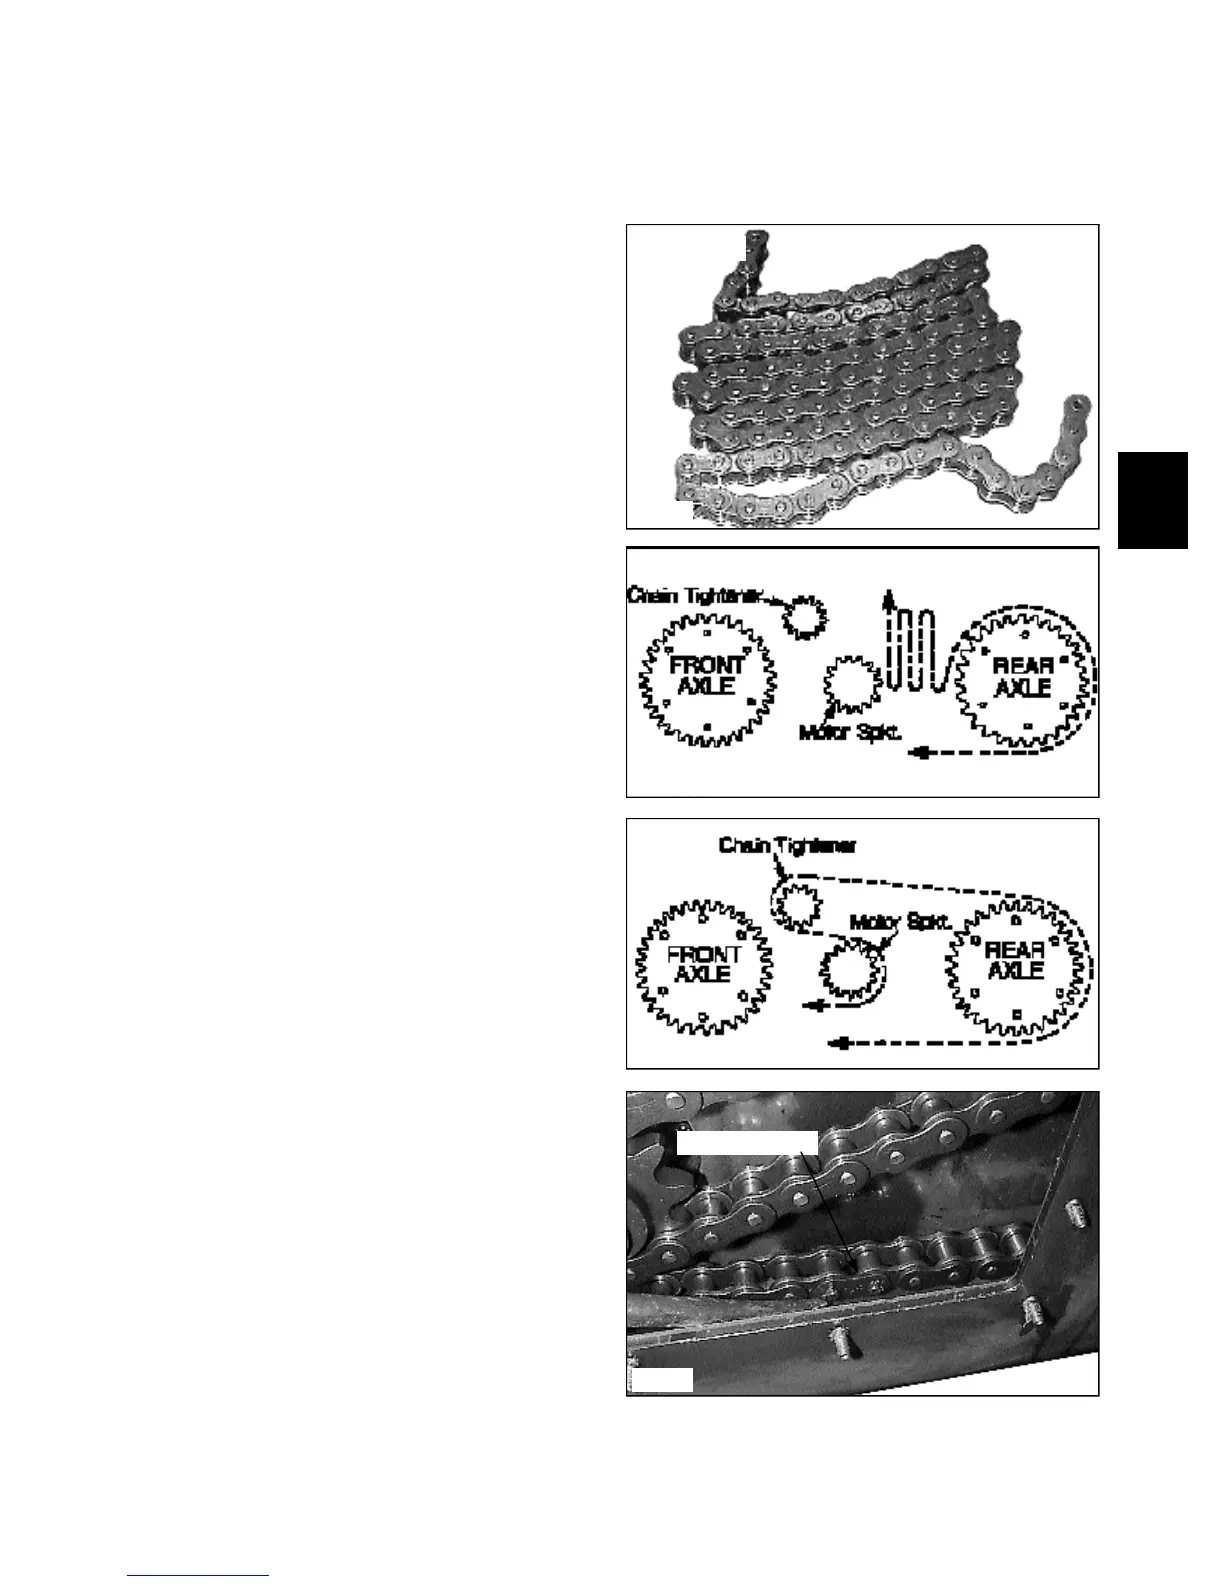
2 Wrap the chain in a “Z” pattern as shown in fig.
C2273.
3 Install the wrapped chain into the final drive housing.
C243
C239
Chain wrap
C2273
C2271
7 Install a new connecting link. (fig. C2271) Place the
connecting link into the chain so the cotter pins face the
inspection cover hole. Bend the ends of the cotter pins at
least 90 º apart.
8 Adjust the chain tension as outlined on page 3-5.
9 Replace the inspection cover using silicone. Do not
over tighten the inspection cover nuts. 18 lbs / ft maxi-
mum. (24.5 nm)
10 Replace the wheels and torque the wheel nuts to 100
to 110 lbs/ft. (136 to 149 nm).
Connecting link
4 Place one end of the chain over the top of the rear
axle sprocket. Rotate the axle and bring the chain along
the bottom of the final drive housing to approximately the
center. (fig. C243)
5 Place the other end of the chain over the top of the
chain tightener sprocket and bring it back around the
drive motor sprocket. (fig. C239)
6 Wrap the chain over the front axle sprocket. Rotate
the axle and chain around the bottom of the final drive
housing until the ends of the chain meet together.