9
C - INSTALLATION
4. Swipe the - badge (red), a long beep conrms
the end of the programming of administration
badges.
2.2.2 Adding one or more user badges:
1. Swipe the badge - (blue), 4 long beeps conrm
activation of programming mode.
2. Swipe all user badges (grey) to be activated,
a short beep conrms, for each badge
presented, that it has been programmed.
3. Once all the badges have been programmed,
wait for 10 seconds. A long beep indicates the
end of the programming process.
2.2.3 Deleting one or more user badges:
1. Swipe the - badge (red), 4 long beeps conrm
activation of programming mode.
2. Swipe all user badges (grey) to be
deactivated, a short beep conrms, for each
badge presented, that it has been cleared of
any programming.
3. Once all the badges have been cleared of any
programming, wait for 10 seconds. A long
beep indicates the end of the programming
process.
2.2.4 Deleting all user badges:
1. Swipe the administrator badge (yellow),
4 short beeps indicate activation of
administration mode.
2. Swipe 1 user badge (grey) that has been pre-
added to the system, a short beep indicates
that all the user badges have been cleared of
any programming.
2.2.5 Use of badges:
To open the electric strike plate, quickly swipe
your pre-programmed user badge (grey) over
the RFID scan area. A short beep indicates the
opening of the electric strike plate.
To initiate the gate motor, hold the badge in front
of the RFID scanning area for 3 seconds. Two
short beeps indicate that the gate is opening.
2.2.6 Replacing a badge
RFID badges do not have predened functions.
It is the programming step that sets the badge’s
function. Badge colours simply enable users to
recognise their function. If a badge is lost, it can
be replaced by any other badge by repeating the
programming step.
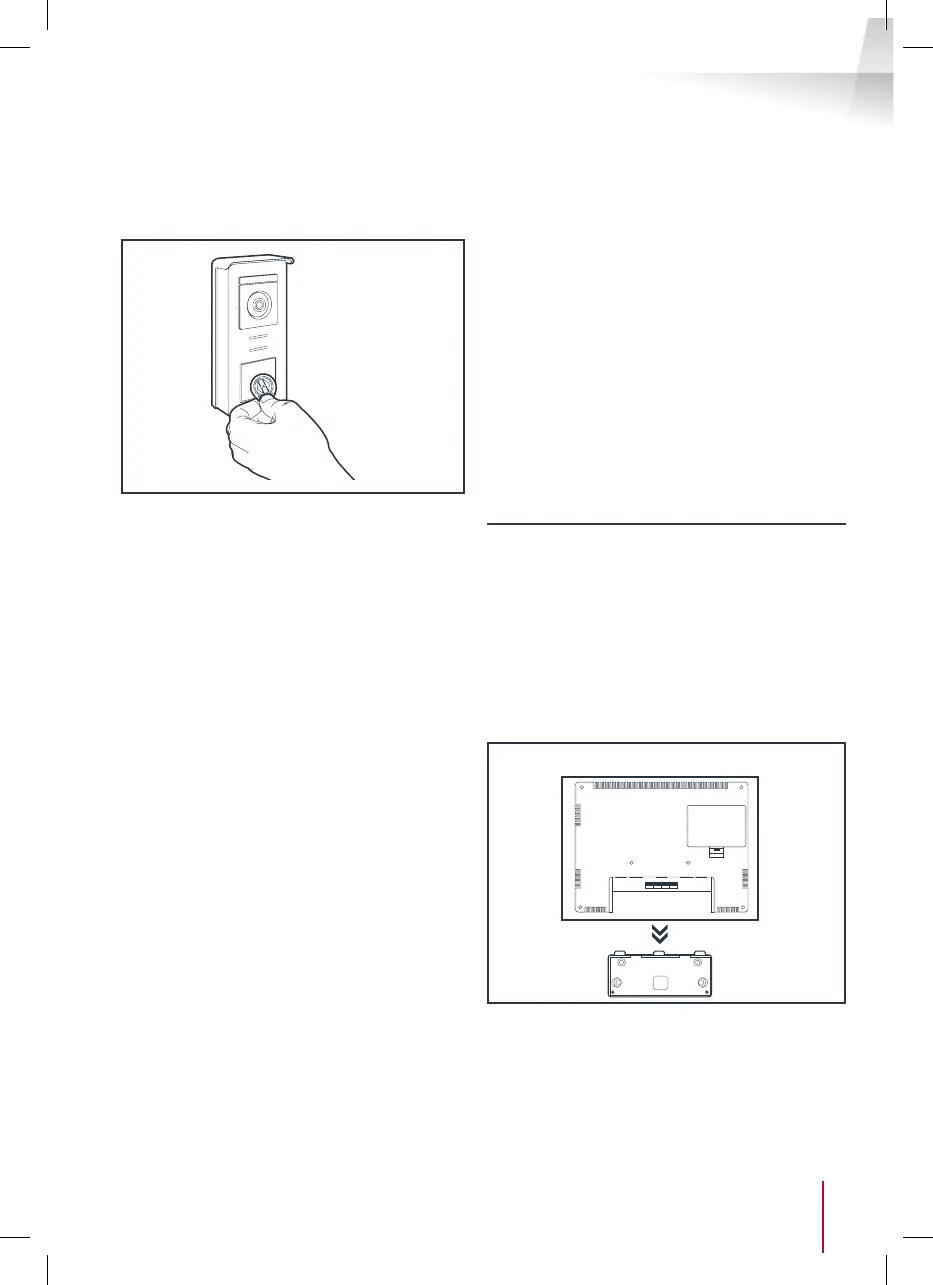
3 - INSTALLING THE INTELLIGENT BRACKET
• The smart stand is magnetically attached to the
back of the monitor. To gain access, please slide
the support down.
• Position the bracket in the chosen location
and check that it is in the optimum position for
connecting the cables.
• If the cables do not emerge directly from the wall,
break off the bottom plastic part.