EasyManua.ls Logo

Thule TB60 User Manual

Thule TB60
3 pages
To Next Page IconTo Next Page
Page #1 background imageLoading...
Page #1 background image
TOP-TRACKS WITH BOLTS
SWEDEN
®
CAR RACK SY
STEMS
PARTS INCLUDED
TOOLS REQUIRED (NOT INCLUDED)
5/16" wrench/
tape measure/
electric drill/
fine tip marker/
safety glasses/
A
B
C
D
E
part/
description/
screw M5 x 40mm/
locking hex nut M5/
self adhesive washer M5/
steel washer M5/
acorn cap/
screw end protector/
7
32
" drill bit/
1
8
" drill bit/
3mm hex key/
silicone sealant/
track/
glissière
vinyl roof protector/
track end cap/
A
B
C
D
E
F
G
H
I
J
K
L
M
12
12
24
12
12
12
1
1
1
1
2
2
4
part
924-0540-20
938-0500-11
853-5367
951-0520-11
853-5364
853-5373
853-5369-02
853-5369-03
853-0947
853-5374
853-5359-03
853-5360-03-97
853-5361
description
part number qty.
A
A B C
D E F
J
K
L
M
G
H
I
B
E
C
D
Place the tracks on the shell, making sure they are parallel and equal distance
from the front edge of the shell.
1
Installation of Top-Tracks™ requires drilling the roof and permamently installing parts.
Only install track on fiberglass shells. Not for use on shells manufactured from any
other material.
Tools and some mechanical skills are required. If concerned about installation, have
tracks installed by professional installer.
Not for off road use.
Do not install if roof has had bodywork.
Do not install on vehicles with sunroofs.
Do not install on vehicles with factory racks.
COMPATIBILITY AND
RESTRICTIONS
Question and Answer IconNeed help?

Do you have a question about the Thule TB60 and is the answer not in the manual?

Thule TB60 Specifications

General IconGeneral
TypeRoof Box
LockableYes
Fits SquareBarYes
Fits AeroBarYes
Fits WingBarYes
Load capacity50 kg
MaterialABS

Summary

Parts Included

Tools Required

Compatibility and Restrictions

Installation Steps

Marking Track Holes

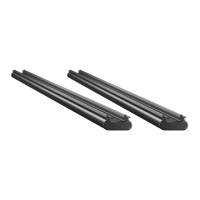
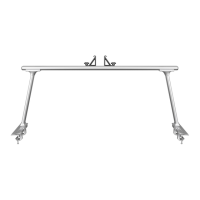
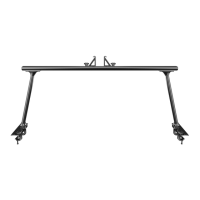
Mark the end hole and subsequent holes on the track using a fine tip marker.

Drilling Pilot Holes

Drill pilot holes in the center of the marks using the supplied 3/8" drill bit.

Drilling Final Holes

Drill holes into the pilot holes using the supplied 7/32" drill bit and clear debris.

Attaching Washers to Track

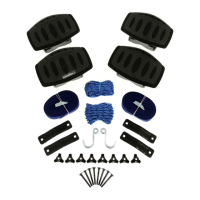
Apply self-adhesive washers to the bottom of the track, aligning with drilled holes.

Applying Silicone Sealant

Apply silicone sealant into each drilled hole in the roof.

Positioning and Securing Track

Position track over holes with end caps, install screws at front and rear.

Securing Remaining Holes

Apply self-adhesive washers to remaining screws and install into holes.

Inside Shell Fastening

Place steel washer and locking hex nut onto screws inside the shell.

Tightening Screws

Tighten all screws using a 5/16" wrench and 3mm hex key; two people needed.

Finishing Installation Options

Attach screw end protectors or cut excess bolt and add acorn caps.
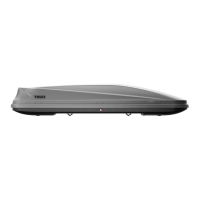
Related product manuals