25
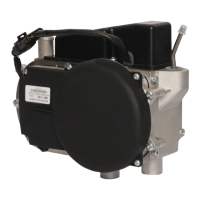
When the pre-heater is installed on a
vehicle after repair, it must be checked
for correct operation with and without
the vehicle engine running.
Connect the pre-heater to the power
source, the fuel tank and the liquid
circuit. Remove air from the fuel system
and the liquid circuit.
Using the control panel, set the pre-
heater operation duration to 20 min.
Start the pre-heater. Check whether the
pre-heater operates correctly in every
mode displayed on the panel (for more
information on operation modes, see
the operating manual).
Check the pre-heater for abnormal
noises during operation. Check the
security of the clamps (no coolant leaks
are allowed).
When a fault occurs during the pre-
heater launch or operation and the
pre-heater shuts down, a malfunction
code appears on the control panel. See
the meaning of the code in the operat-
ing manual. Repair the fault and repeat
the test.
15.1 The manufacturer’s warranty is only
valid if the user observes the rules for
operation of the pre-heater specied in
the operating manual.
15.2 Every pre-heater repaired by a
company authorized by the manufac-
turer must have an entry in the warranty
certicate indicating a description of
the maintenance, the replacement of
units, and parts and bearing a stamp of
the organization performing the main-
tenance.
15.3 Warranty does not apply to the
control panel, the control unit, the heat-
er, and the fuel pump with evidence of
repair attempts.
During the repair operation marked
with a * (replacement of circulation
pump, fans, Binar heater, water heat
exchanger, solenoid valve) – THE
COOLANT SHOULD NOT BE DRAINED!
USE CLAMPS TO PINCH OFF THE
HOSES!
During the replacement operation
marked with ** (Timberline tank
replacement) 2 gallons of the coolant
will need to be drained so that the
tank will be empty during removal
and installation.
14. Pre-heater Check
after Installation
15. Manufacturer’s
Warranty