3
Caution:
Lamps are hot and should be allowed to cool a
minimum of 15 minutes before handling.
ONLY FOR USE WITH 240 VOLT EQUIPMENT!
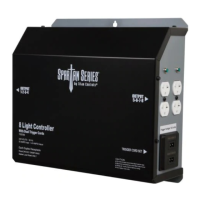
Instructions for Operation
The 8 Light Controller must be installed by a licensed
electrician or you will void your warranty!
DO NOT install this controller by yourself. High voltage
is dangerous!
• Securely mount your 8 Light Controller.
• A UL listed 50 Amp circuit breaker must be installed in this application.
• Remove front panel of controller
• Connect your incoming 240 volt power to the terminal block of the 8 Light Controller.
• Attach the ground wire to the “Grounding Lug” of the 8 Light Controller.
• Verify that all your wiring connections are tight and that no loose wires are exposed.
• Plug your ballasts into the universal outlets on the right and left side of the 8 Light
Controller.
• Securely attach the front panel of the 8 Light Controller to avoid potential shock or
injury before initiating power to controller.
• Set your timing pattern by pushing 15 minute “trippers” to the outer portion of dial
to set the “ON” time.
• Push 15 minute “trippers” towards inner portion of dial to set the “OFF” time.
• Now adjust the 24 hour timer to the current time of day using the black triangle
to set the current time.
• Select the mode: O: Always off, : Timer on, I : Always on
• Make sure that all wires and cables have been properly secured.
• Activate single phase 240 volts/60Hz. power to the 8 Light Controller.
• When the relays are activated via the external 24 hour timer, you will hear a “CLUNK”
sound and your lights will come “ON”.
• Your 8 Light Controller will now control your lights at the desired settings until the
power is defeated.