Titan Dynamics
Titan Dynamics Webpage
Visit our Facebook page
Join our Discord server
Page
20
of
28
4.4: Bed Adhesion and warping
When printing tall parts like this and other models require, having good print adhesion to
the bed is a necessity. Ideally you will print each part without any extra aids, however
this may not be possible for many, especially those printing without an enclosure for
their printer. A full brim can be used but this will typically have mixed results. If it works
for you, use a glue stick on the print surface to improve adhesion. Cura also has a plugin
that can be used to help with bed adhesion and to avoid warping.
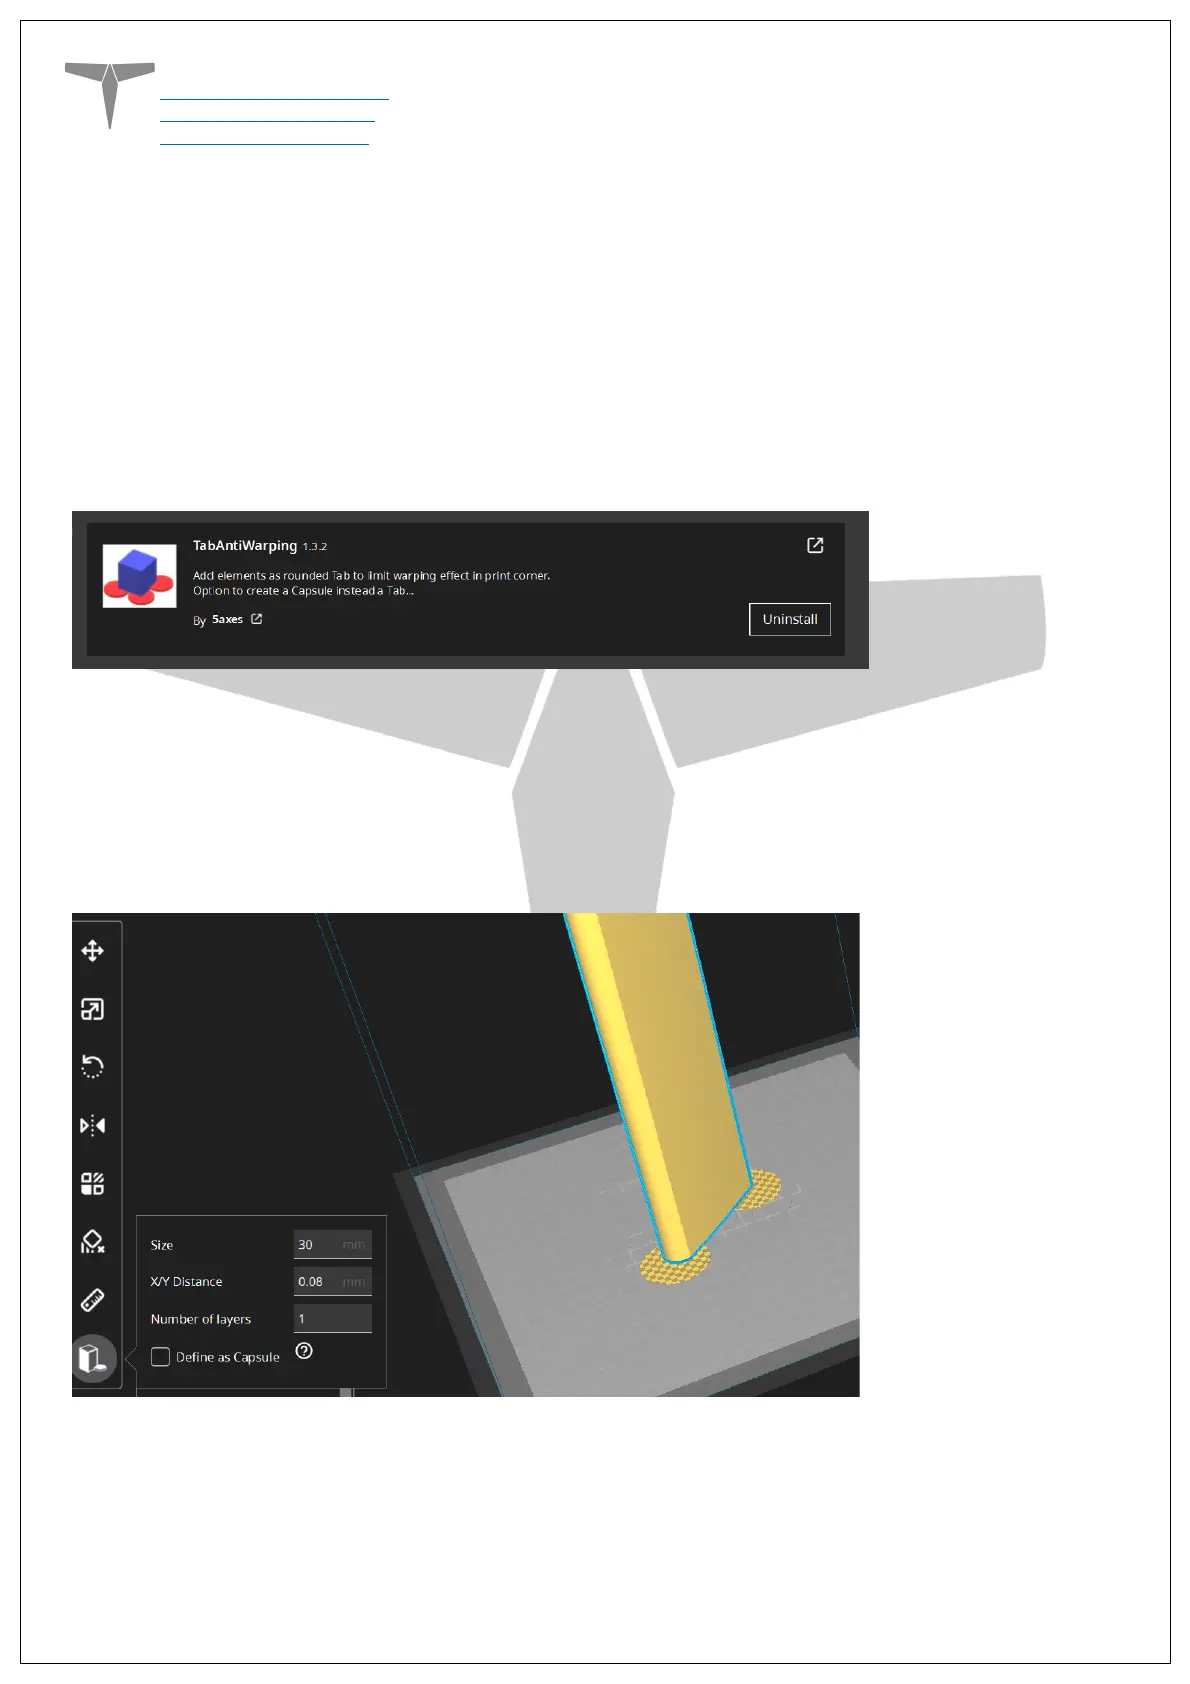
Cura Marketplace: TabAntiWarping Plugin.
When installed, use the new icon at the bottom of the left menu to choose tab diameter
and thickness, then click on the model to add a tab at each point you think is at risk of
warping or poor adhesion (typically parts with low surface area in contact with the print
surface in relation to their height). These new tabs can now be moved around to fine
tune their position using the normal move controls on Cura.
Once completed, be careful when removing these tabs from the print as they are quite
strong and can damage the bottom of your part if not removed carefully. Re-open any
holes the tab may have filled on the bottom of the print.
If you find these hard to remove from the print bed, select the “Define as Capsule” option.
This makes the edge of the tabs raised, so you can get a scraper underneath them.