18
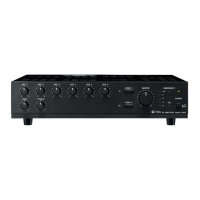
Step 1. Fix the optional guide rail YA-706 loosely to the rack frame.
Front left frame
Rear left frame
Plain washer
(supplied with the YA-706)
Bind head taptite screw type B4 x 10
(supplied with the YA-706)
YA-706
(option)
Note
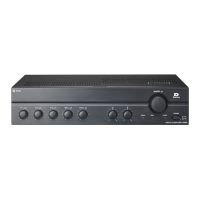
To install the YA-706, use its second front hole
and rearmost hole as shown at right.
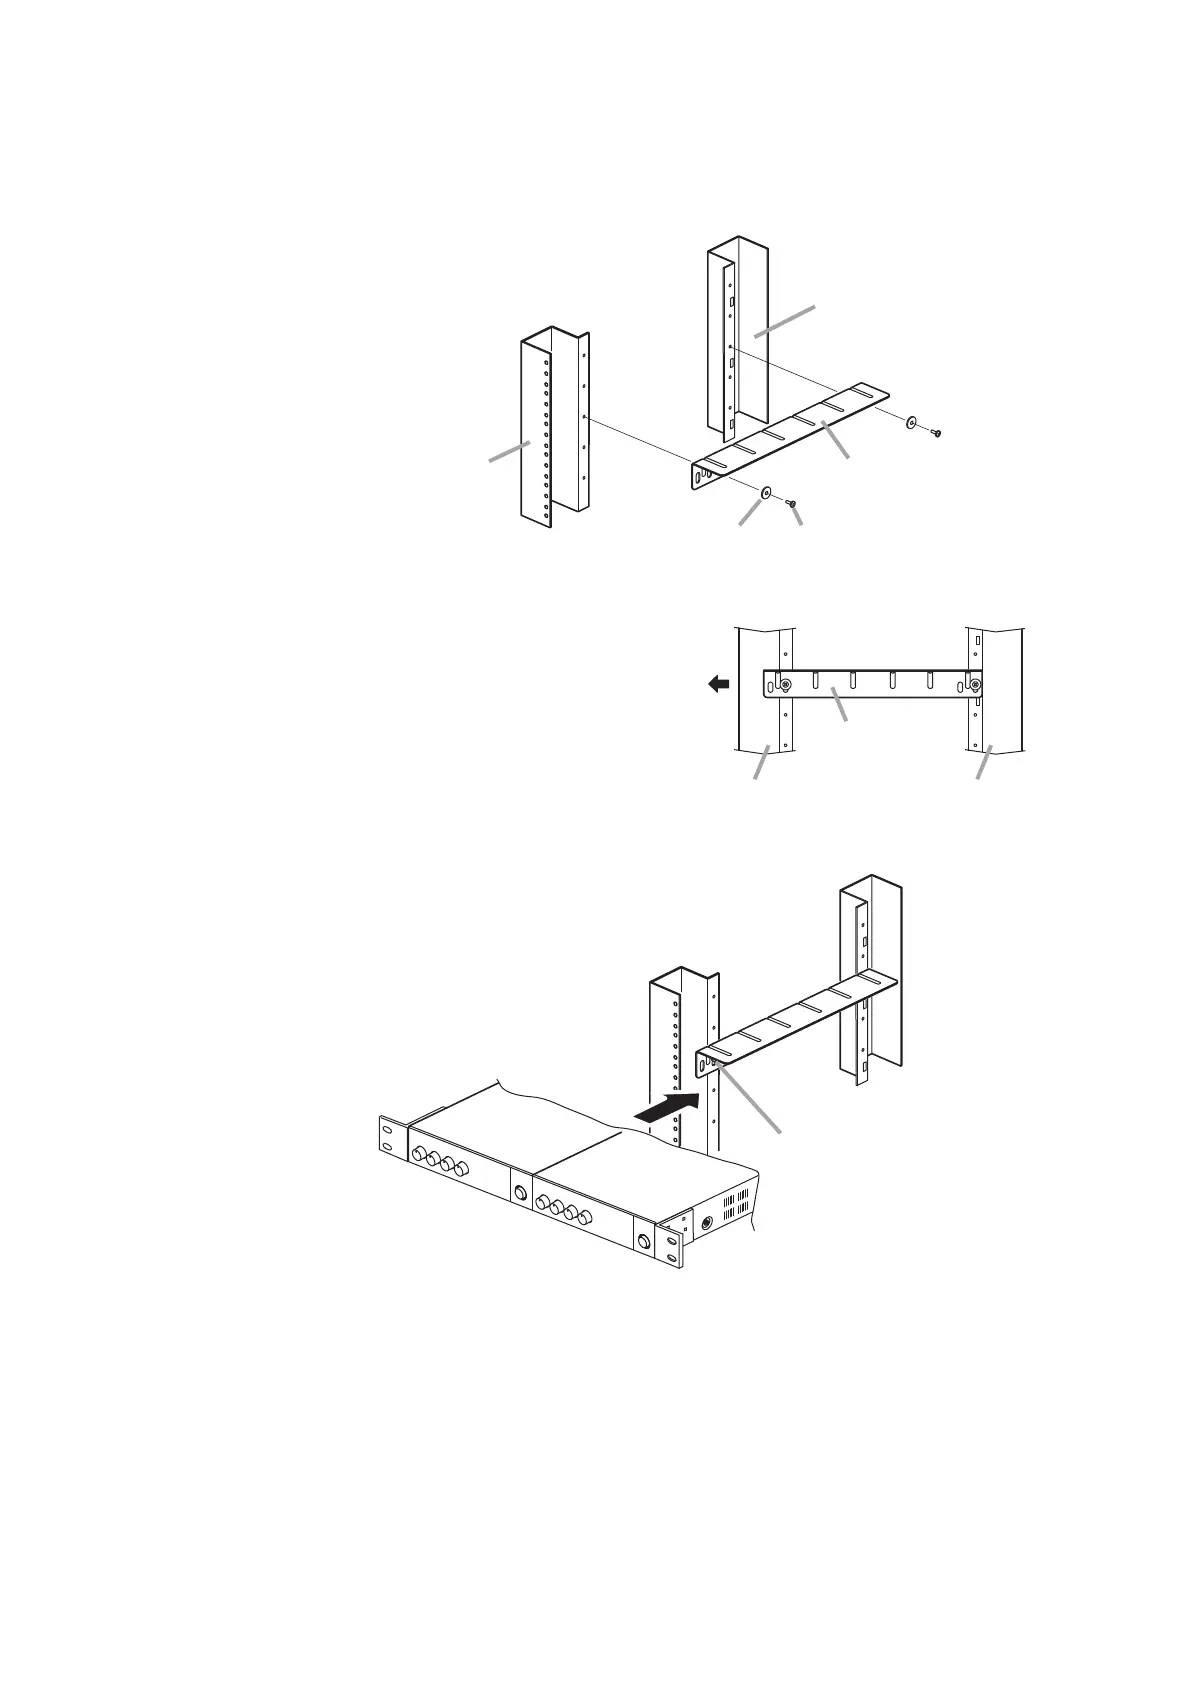
Step 2. Place the component on the loosely tted YA-706, then secure
it to the rack with the supplied rack mounting screws.
YA-706
Rear frameFront frame
Front
Bind head taptite screw type B4 x 10
Note
Tighten the screws after securing
the component to the rack.
Component
Component
Note
The gures below show the way to install the YA-706 to the left side of the rack.
Follow the same procedure for installation to the right side.
 Loading...