7
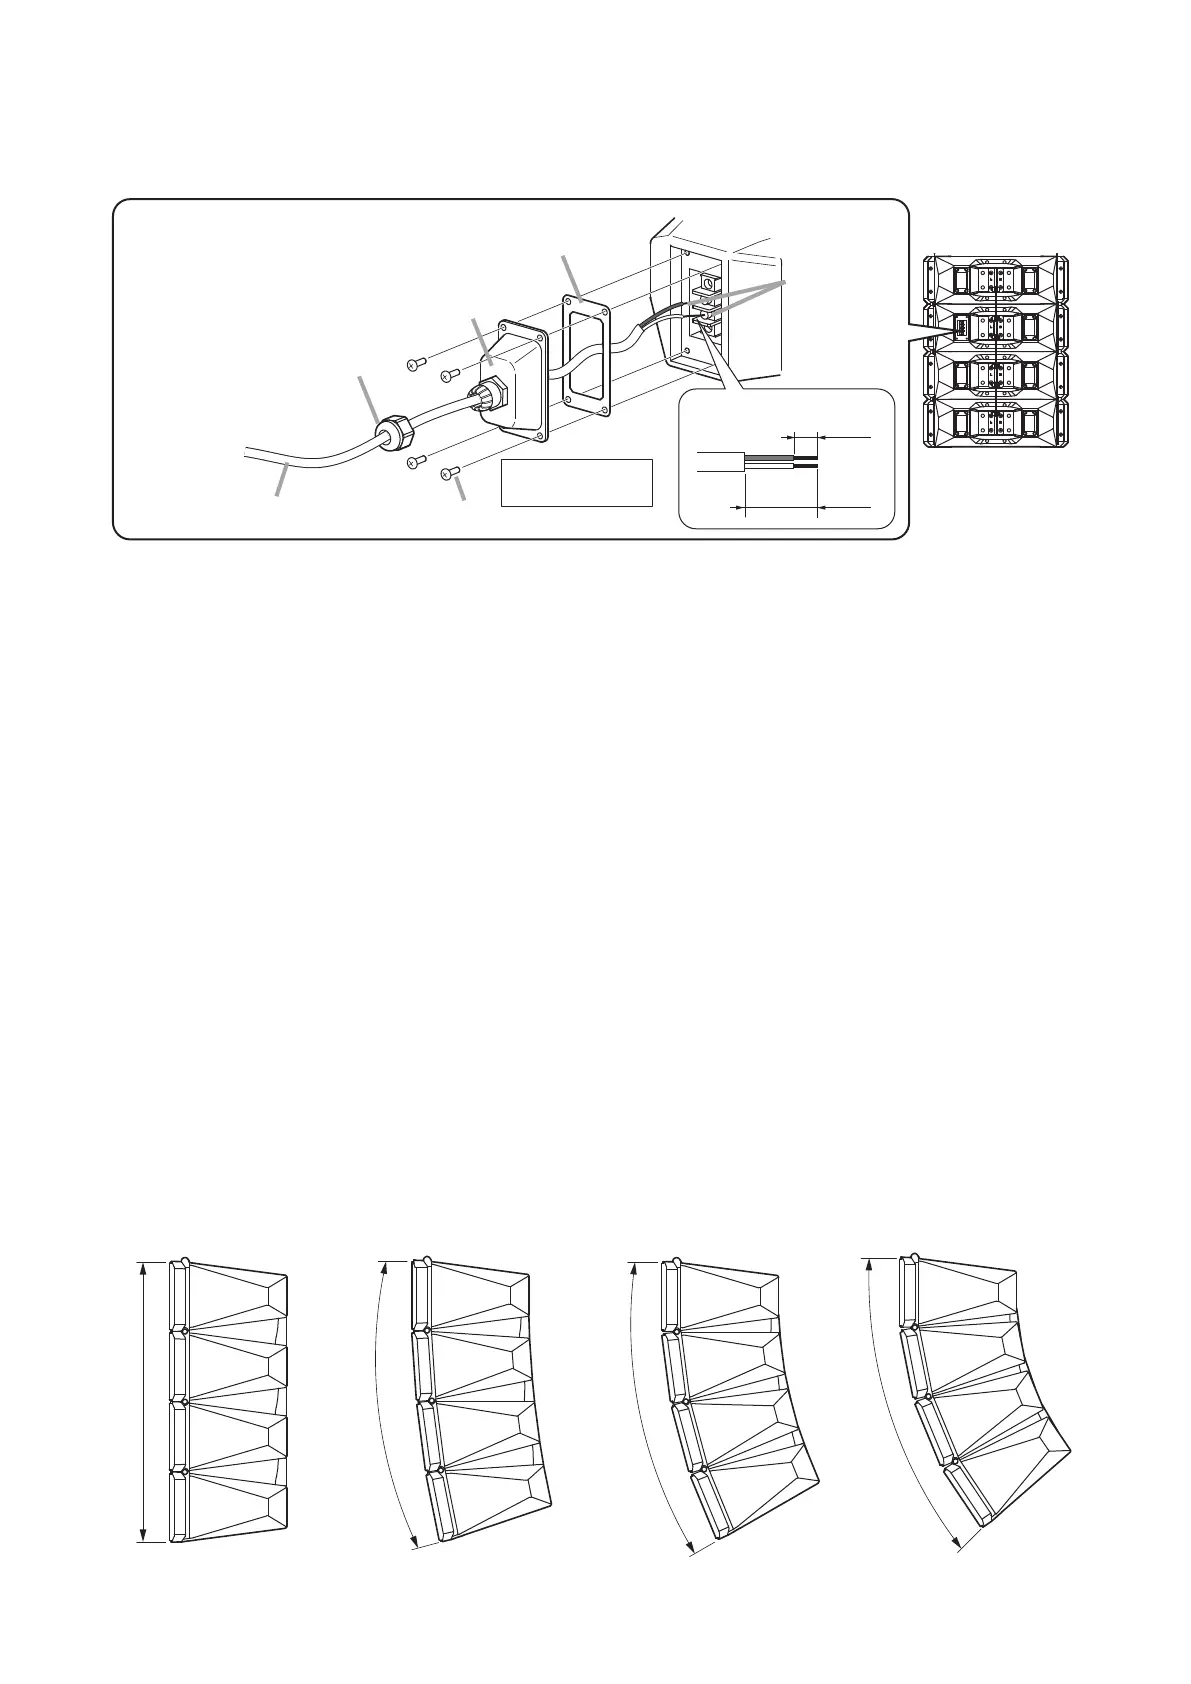
6.2. HX-7B-WP and HX-7W-WP
Connect the speaker cable to the screw terminal using the supplied terminal cover and rubber gasket.
HX-7B-WP/7W-WP
Rear
Input terminal
Terminal cover (accessory)
Rubber gasket (accessory)
2
2
3
Bushing*
*
4
Tapping screw 4 x 12 (accessory)
Speaker cable
1
Screwed onto the Terminal
cover at the factory.
30 mm
(1.18")
10 mm
(0.39")
[Stripped conductor]
White
(–)
Black
(+)
Tightening torque:
1.2 N·m
Notes
• Separatelypreparethespeakercablewithadiameterof6–10mm(0.24–0.39"),whichwilltthecable
bushing.
• Toensurewaterproofcapabilities,rmlymounttheterminalcovertothespeakerandtightenthebushingon
the cover. Also be sure to insert the rubber gasket between the terminal cover and the speaker.
Step 1. Feed the speaker cable through the bushing, terminal cover, and rubber gasket, then connect the cable
to the input terminal.
Step 2. Attach the rubber gasket and terminal cover to the speaker.
Attach the cover while pulling the cable so that it is not entangled inside the terminal cover.
Step 3. Hold the terminal cover tightly to the speaker using the supplied screws.
Step 4. Tighten the bushing.
Note
Aftertighteningthebushingbyhand,useawrenchtofurthertightenitanother90º(1/4-turn)orso.
Notethatpartscanbedamagedbyover-tightening.
7. SETTING THE SPEAKER’S DIRECTIVITY ANGLE MODE
The speaker’s directivity angle mode is factory-preset to 0° mode, but this mode can be changed to 15º mode,
30° mode, 45° mode, or 60° mode. (See p. 8 and 9.)
For 60° mode setting, an optional bracket is required. (See p. 9.)
[0° mode (factory-preset)]
0°
15°
[15° mode]
30°
[30° mode]
45°
[45° mode]