8
7.2. Changing the Directivity Angle to Between 15° and 45° Modes
Beforechanginganglemodes,layoutaprotectivesheet,corrugatedcardboardorothersoftmaterialonaat
surface,andperformallworkonthespeakerwithitsfrontbafefacingdownward.Asthespeakerassemblyis
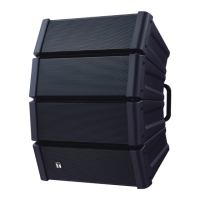
quiteheavy,itisrecommendedthatatleasttwopersonsbeinvolvedinthemodicationwork.Asanexample,
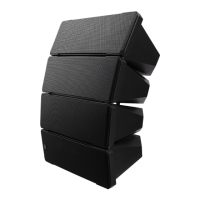
theHX-7Seriesspeakersshowninthegurebelowarearrangedinadirectionthatexposesthespeaker’sleft-
side protection covers.
7.1. When Using the Directivity Angle at 0° Mode
Leavethepositionsoftheboltsholdingtherearanglebarsunchangedastheirdefault.
However, be sure to retighten all the bolts with the designated tightening torque to secure the rear angle bars.
Tighten the bolts securely, as instructed below.
Failure to follow instructions precisely could result in a falling speaker
and potential personal injury.
• Ensurethatallboltsaresecurelyinsertedasfarastheirthreadsgo,
then securely fasten each bolt with a nut.
• Tightenalltheboltswiththedesignatedtighteningtorque.
For tightening, use a Phillips screwdriver, or open- or box-end wrench.
WARNING
Rear angle bar
Fulcrum for
angle adjustment
Angle adjustment
hole
Rear bracket
Protection cover
Step 1. Remove one nut and bolt for each rear angle bar (as
indicatedbytheblackarrowinthegureatright).
Notes
• The nut and bolt indicated by the white arrowbecome
the fulcrum for angle adjustment. Since the rear angle
bar can be moved at the fulcrum with the nut and bolt
assembled there, do not loosen or detach.
• Do not change the fulcrum position. If changed, the
directivityanglemodewillnotassumeitsspeciedvalue.
Step 2. Align the hole in the rear angle bar (disconnected in Step
1 above) with the desired directivity angle mode position,
then reinsert the bolt in the bracket and bar, and securely
tighten the bolt with a nut.
Rear angle bar
Do not remove. Remove.
1
Angle adjustment holes
Rear bracket
0° mode
15° mode
30° mode
45° mode
Tightening torque:
3 N·m
Rear angle bar Rear bracket
Tightening torque: 3 N·m
 Loading...