5
Plug the orange cord into the wall outlet. (From Step 3)
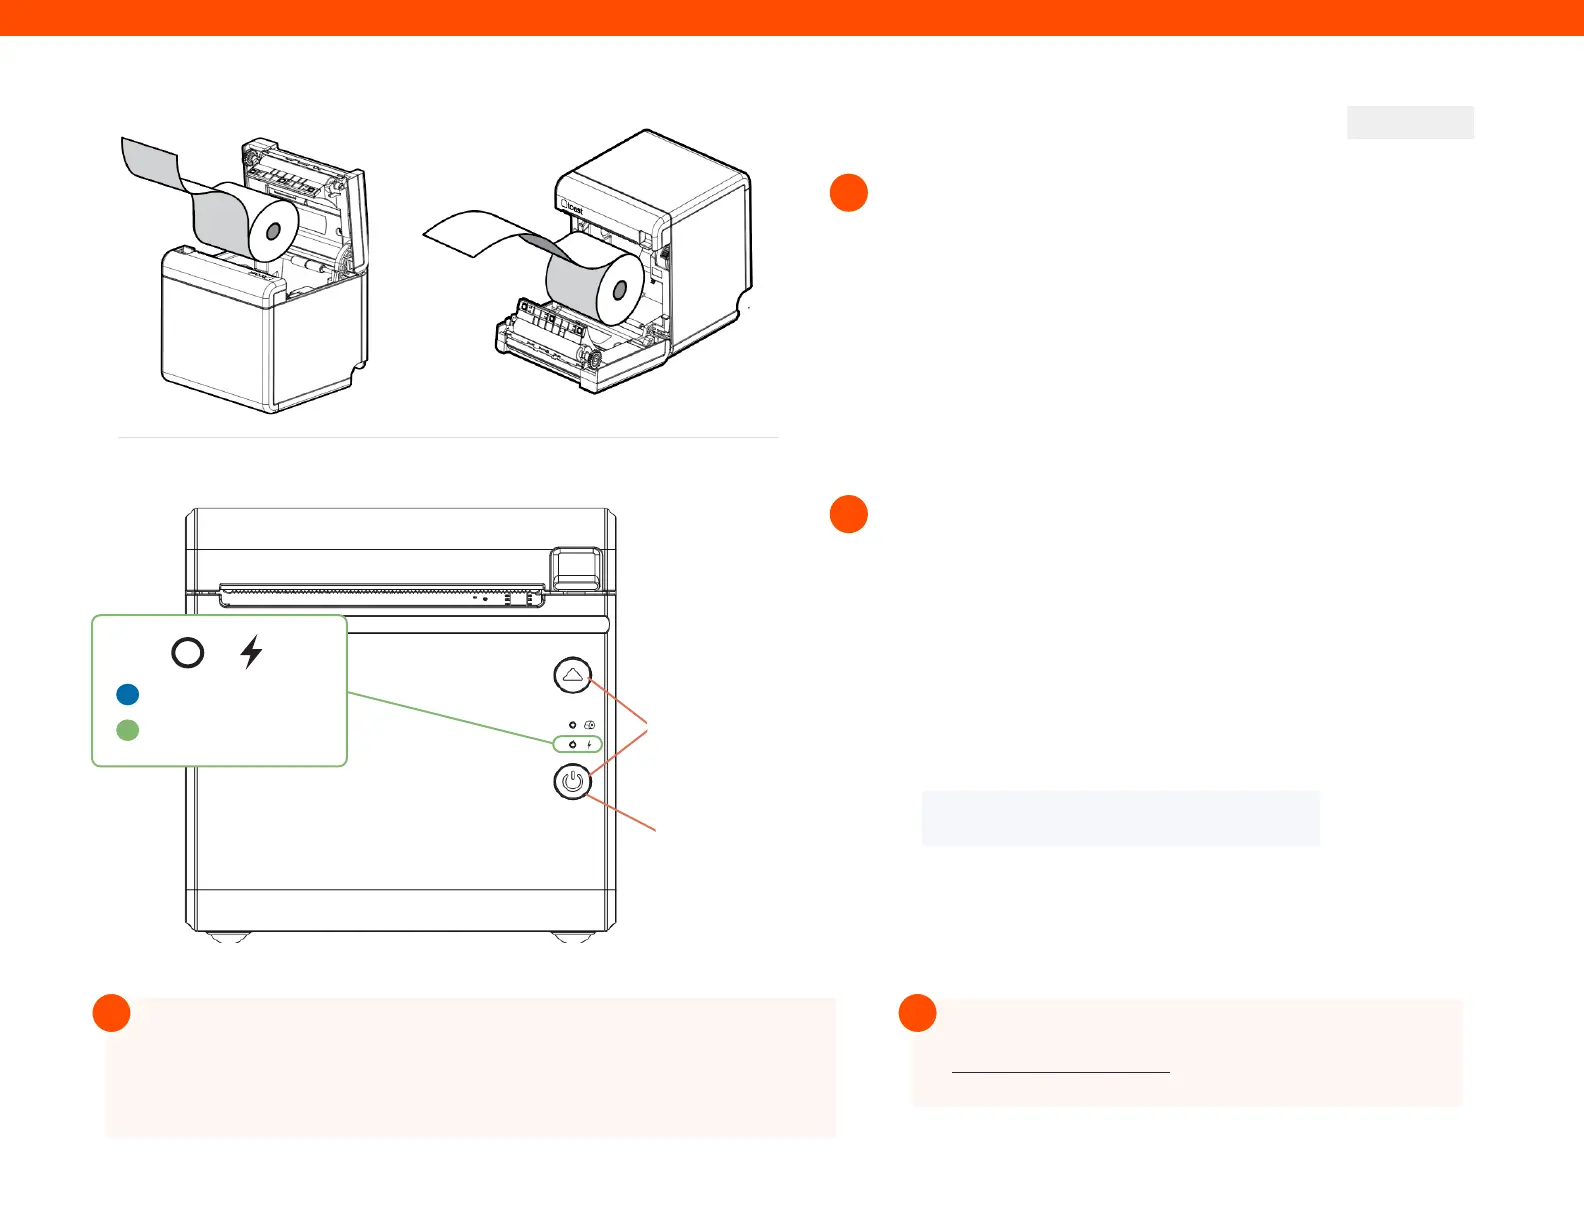
Then, hold the power button until the LED is blue. This
puts the printer into Sleep mode so you can configure it.
Hold the Feed button and the Power button at the same
time, then release the Power button. Your Toast Printer
will print out the printer’s test form and the blue LED will
turn green.
On the test form there will be an IP Address
(ex.192.168.192.169). The IP Address number will be used
to configure your Toast Printer in the Toast back-end.
B
A
C
B
A
Toast Flex + Toast Printer
CONTINUED
Next, it’s time to load the printer paper! To do this:
6
7
Configure your Toast Printer to start working! To do this:
Pull the latch on the front of the Toast Printer
and open the cover.
Insert the full size roll of 80 mm thermal
paper. The paper should exit on the opposite
side of the cover. See the images to the left
on how to position the paper correctly.
Close the Toast Printer cover.
NOTE
This step must be completed.
After configuring your Toast Printer, the LED will be blue if the printer
is in Sleep mode. This happens if the printer is turned o or unplugged.
To power it back on, hold the Power button until the LED turns green.
For more information on this process, check out the
Creating a New Printer article in Toast Central.
Configure Toast Printer
Step 7b
Feed Button
Power Button
Step 7a
Green = Ready to print
Blue = Sleep Mode
Step 6b
Load Paper
C
Step 6B
Step 7B
Step 7C
! !