4) Finally,
press
each leg
firmly
into
the
ground
while
watching
the
plumb
bob
and
tripod
head.
5)
Next, loosen the tripod screw slightly
and
slide the
instrument
on
top
of
the
tripod
head,
if
further
adjustment is required
to
position
the
plumb
bob
directly
over the
point.
Then, tighten the
tripod
screw.
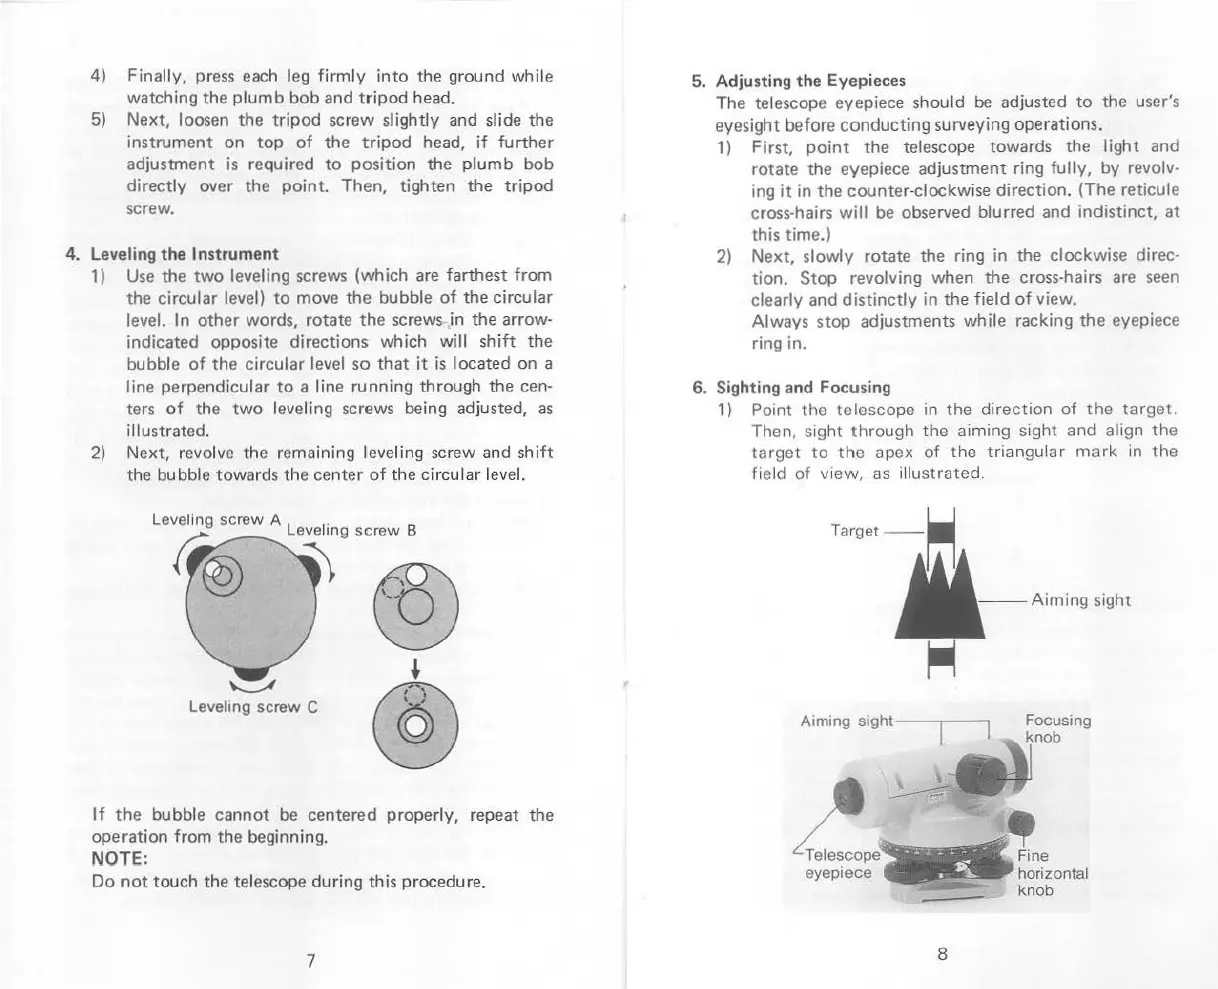
4. Leveling the
Instrument
1)
Use
the
two
leveling screws
(which
are
farthest
from
the
circular
level)
to
move
the
bubble
of
the
circular
level.
In
other words, rotate
the
screwS-
in
the arrow-
indicated opposite
directions
which
will
shift
the
bubble
of
the
circular
level so
that
it
is
locat
ed on a
line perpendicular
to
a line running through the cen-
ters
of
the
two
leveling screws being adjusted,
as
illustrated.
2)
Next,
revolve the remaining leveling screw and
shift
the bubble towards the center
of
the circular level.
Leveling screw C
If
the
bubble cannot be centered
properly,
repeat the
operation
from
the beginning.
NOTE:
Do
not
touch the telescope
during
this
procedure.
7
5. Adjusting the Eyepieces
The
telescope eyepiece should
be
adjusted
to
the user's
eyesight before conducting surveying operations.
1)
First,
point
the telescope towards the
light
and
rotate the eyepiece adjustment ring
fully,
by
revolv·
ing
it
in
the
counter
-clockwise direction. (The reticule
cross-hairs
will
be observed blurred and
indistinct,
at
this time.)
2)
Next,
slowly
rotate the ring
in
the clockwise direc·
tion.
Stop
revolving when
the
cross-hairs are
seen
clearly and
distinctly
in
the
field
of
view.
Always stop adjustments while racking
the
eyepiece
ring in.
6.
Sighting and Focusing
1) Point
the
telescope
in
the
direction
of
the
target
.
Then, sight
through
the
aiming
sight and align
the
target
to
the
apex
of
the
triangular
mark
in
the
field
of
view,
as illustrated.
Aiming
sight
Aiming
sight-
-.---
-,
Focusing
~~
eyepiece
8