35
Changing the Filter & RO Membrane Cartridges (PRE, RO, POST)
(Refer to Installation)
Removal
1. Pre-fill new cartridges with WOW RO water.
2. Open the RO faucet for a glass of water and close.
3. Turn off the System Feed Valve and wait for 20 seconds.
4. If the system is connected to an refrigerator/icemaker, close the Isolation Valve to that con-
nection. Re-open the RO faucet.
5. The system has now been depressurized for a safe removal of the cartridges.
6. Towels should be placed under the system first.
7. Remove the cartridges with a clockwise upward twist.
Replacement
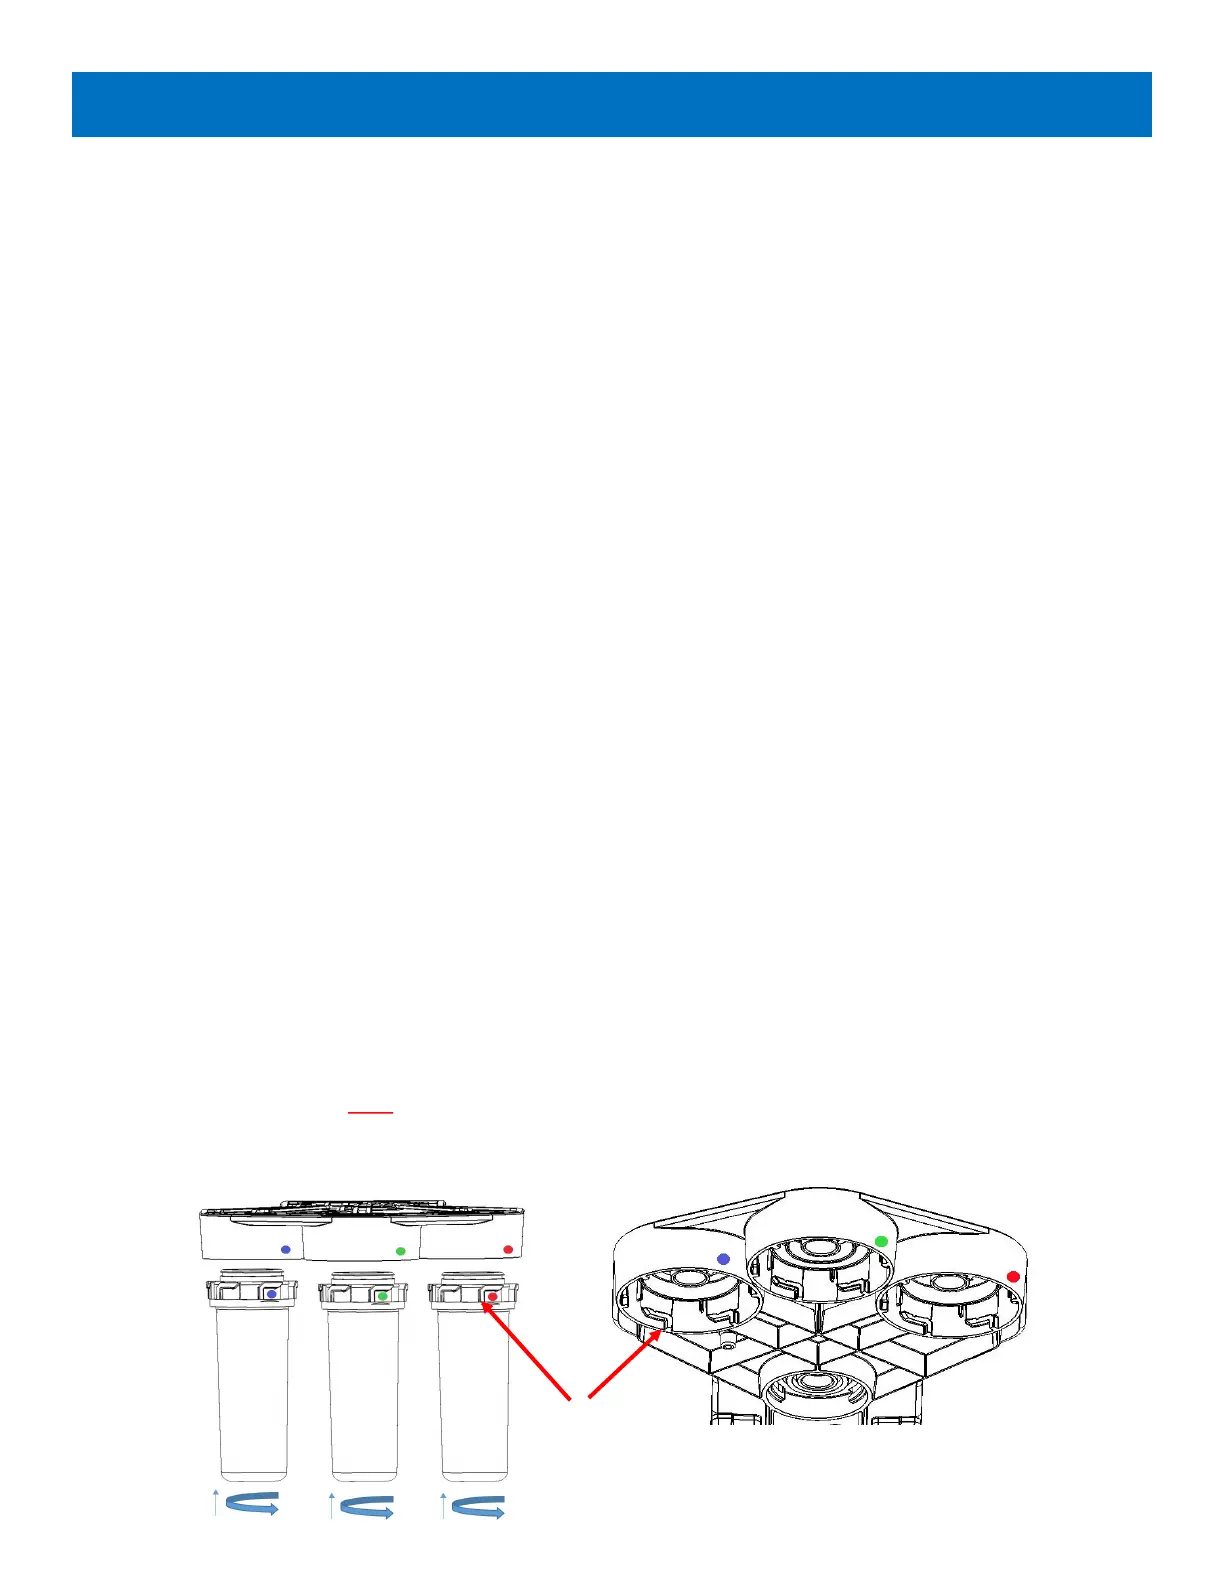
1. Remove red cap from the top of filter cartridges.
2. With a black permanent marker, write the date on each filter to track replacement time. For
filter life, (See Page 33) and log filter change date on Page 43).
3. Attach the post-filter in the labeled POST position, the RO membrane in the labeled RO posi
tion, and the pre-filter in the labeled PRE position, with a twisng counter clockwise upward
moon unl the colored dots are aligned (See Figure 15).
4. Turn the system feed on.
5. Open the RO faucet to a solid ow and close. Do this a couple of mes to expel any added air
from lter change.
6. Turn on the refrigerator/icemaker valve and bleed air by operang the water dispenser or ice
cube maker.
Note: Make sure your cartridges are inserted completely !
Changing Filters
Figure 15: Changing Filter & RO Membrane Cartridges
Stop Tabs
POST
POST
PRE
PRE RO
RO
POST
RO
PRE
 Loading...