9
Installation Steps and Start-Up Procedures
Warning: Installaon of this appliance must conform with state and local plumbing codes,
laws, regulaons, and the instrucons provided with this appliance. Failure to install as in-
structed will void the product warranty.
Pre-Installaon Checklist
• Look under the sink to idenfy where the system will rest.
• To idenfy hot from cold, turn on hot water at the sink unl hot water is owing. Touch
pipes below and mark cold from hot.
• Idenfy desired locaon for the new faucet and mark sink for drilled hole, unless hole is
pre-exisng.
• Review tool kit supplies needed (Table 1).
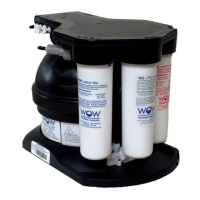
• Open box and conrm 3 lter cartridges (PRE, POST & RO), 1 RO system (tank & manifold)
and installaon kit (if purchased *).
* If installaon kit is not purchased, you will need:
3— 4’ x 1/4” tubing
1— 3/8” Drain saddle (sized for air-gap or non air-gap)
1— 3/8” tubing if air-gap is desired
1— Primary Shut-O Valve
1— 1/4” WOW RO Emergency Shut-O Valve
1— Faucet with appropriate connector to 1/4” tubing
Step 1
Recommended Tool List Professional Installers “Must Have” Tool List
Relton drill 1-1/4” assembly (HST-20)
(porcelain sinks)
2 pressure gauges adapted to 1/4” tube
Greenlee 1/2” to 1-1/4” punch
(stainless steel sinks)
Conducvity or TDS meter
1” to 1-1/4” Carbide drill bit or hole saw Tubing cuer or sharp knife
7/16” open-end wrench
1/2” open-end wrench
9/16” open-end wrench
5/8” open-end wrench
Medium-sized (#2) Phillips screwdriver
Table 1:
Recommended Tool List
NOTICE:
Installaon of this system must include
air gap in drain pathway, regardless of
applicaon or faucet type
 Loading...