2.1 INSTALLATION
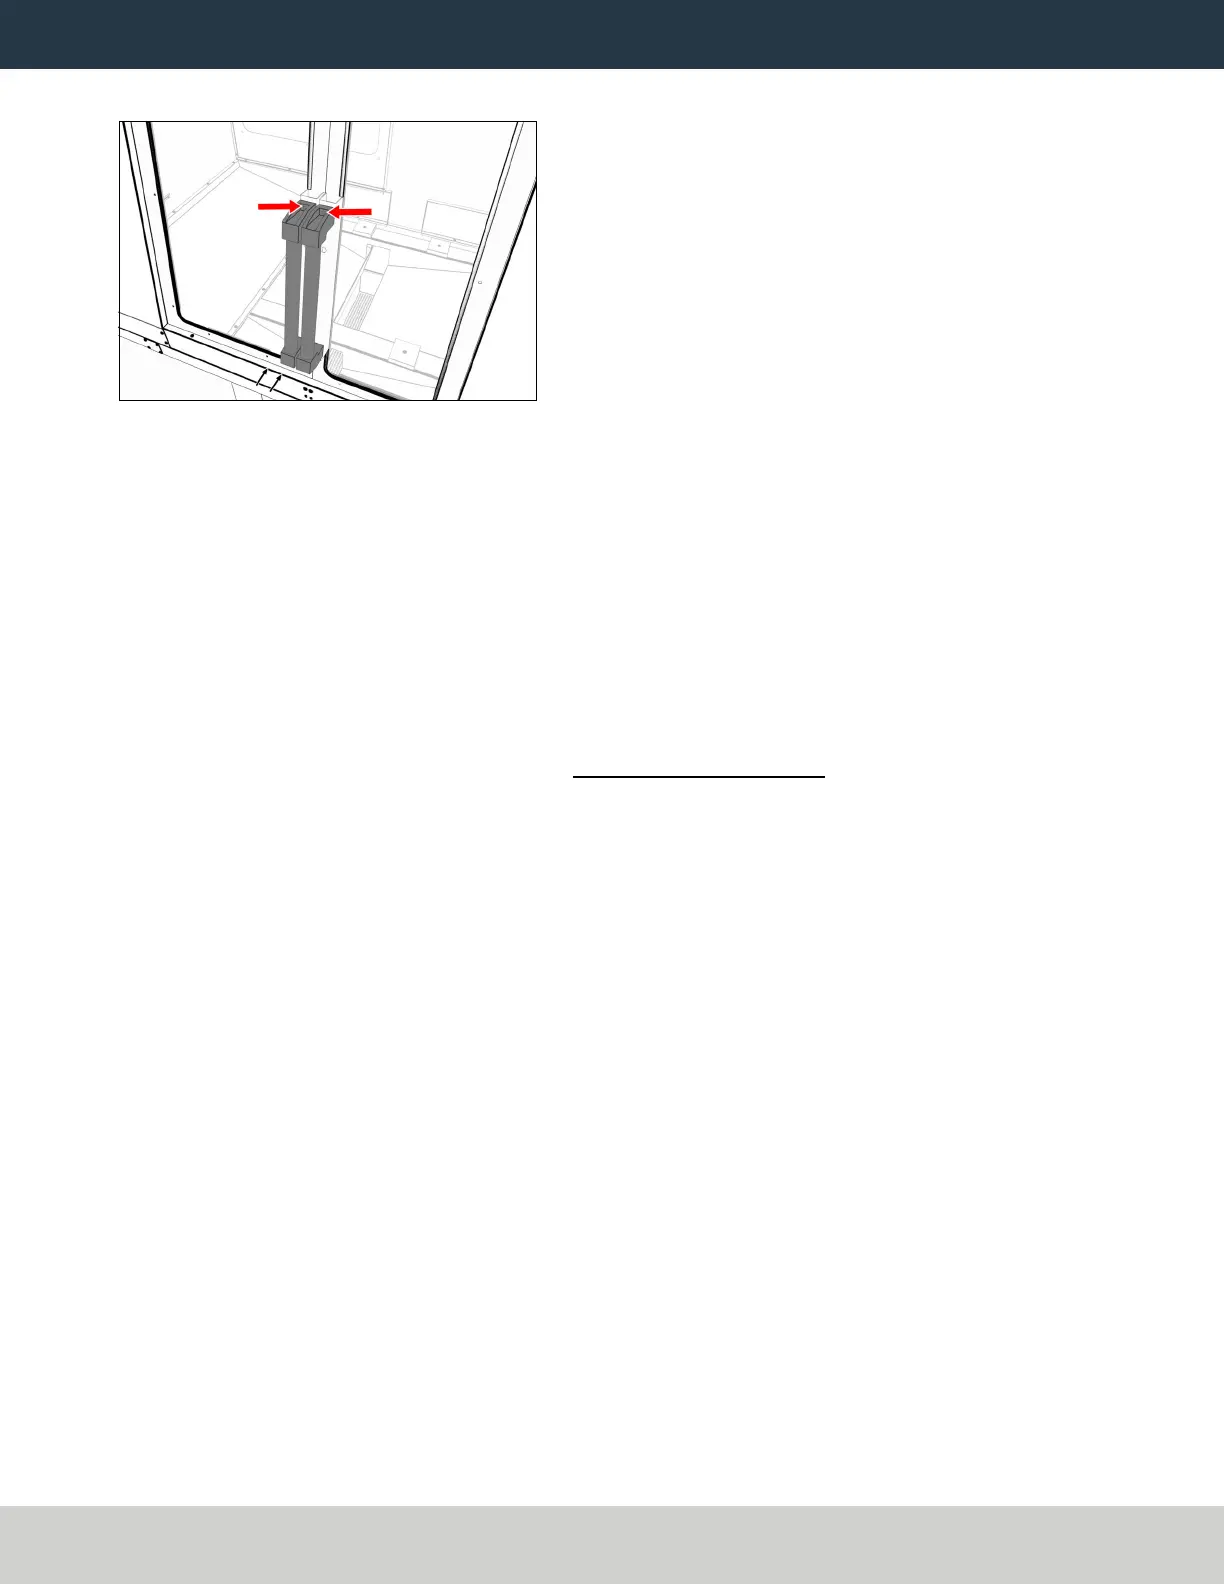
6. Attach the handles to both front doors with two sets of two M8 x 1.25 - 20 screws and two sets of two M8 flat washers.
Figure 2-28: Both front door handles attached to the enclosure.
7. Push one square tube plug into the bottom of each door handle.
Install the Door Latch
1. Attach the door latch strike plate on the left front door with a Phillips screwdriver and two M3 screws.
2. Attach the door latch in the pocket on the right door with two M3 screws.
2.1.4 Install the Floodlights
1. Use a multimeter to verify the ground connection of both floodlights:
a. Measure the resistance between the floodlight's power connector ground pin (the middle pin on the three-prong connector) and the
floodlight's bracket screw.
b. Read the OHMS value that displays. The value should be less than 5 OHMS. If the value is greater than 5 OHMS, don't install the floodlight.
Create a support ticket with Tormach Technical Support at tormach.atlassian.net/servicedesk for guidance on how to proceed.
2. Position one floodlight over the opening on the right top panel. Take care not to drop the light through the opening into the enclosure.
Page 17
©Tormach® 2022
Specifications subject to change without notice.
tormach.com
TD10536: Installation Guide: 770M Enclosure (0522A)
 Loading...