2.1 INSTALLATION
2.1 INSTALLATION
Complete the following steps in the order listed:
2.1.1 Install the Enclosure Panels 3
2.1.2 Install the Linear Rails 13
2.1.3 Install the Front Doors 15
2.1.4 Install the Floodlights 17
2.1.5 Install the Side Windows 18
2.1.6 Install the Access Panel 19
2.1.7 Install the Stainless Steel Wear Guard 20
2.1.8 Use the Maintenance Labels 22
2.1.1 Install the Enclosure Panels
Tip! To install the enclosure panels, work from the left to the right of the machine.
To make it easier to install all components, don't install the side windows until later in the procedure.
Keep all screws one quarter-turn loose while installing the enclosure panels. This makes aligning panels easier. Once you're done installing
the enclosure, fully tighten all screws.
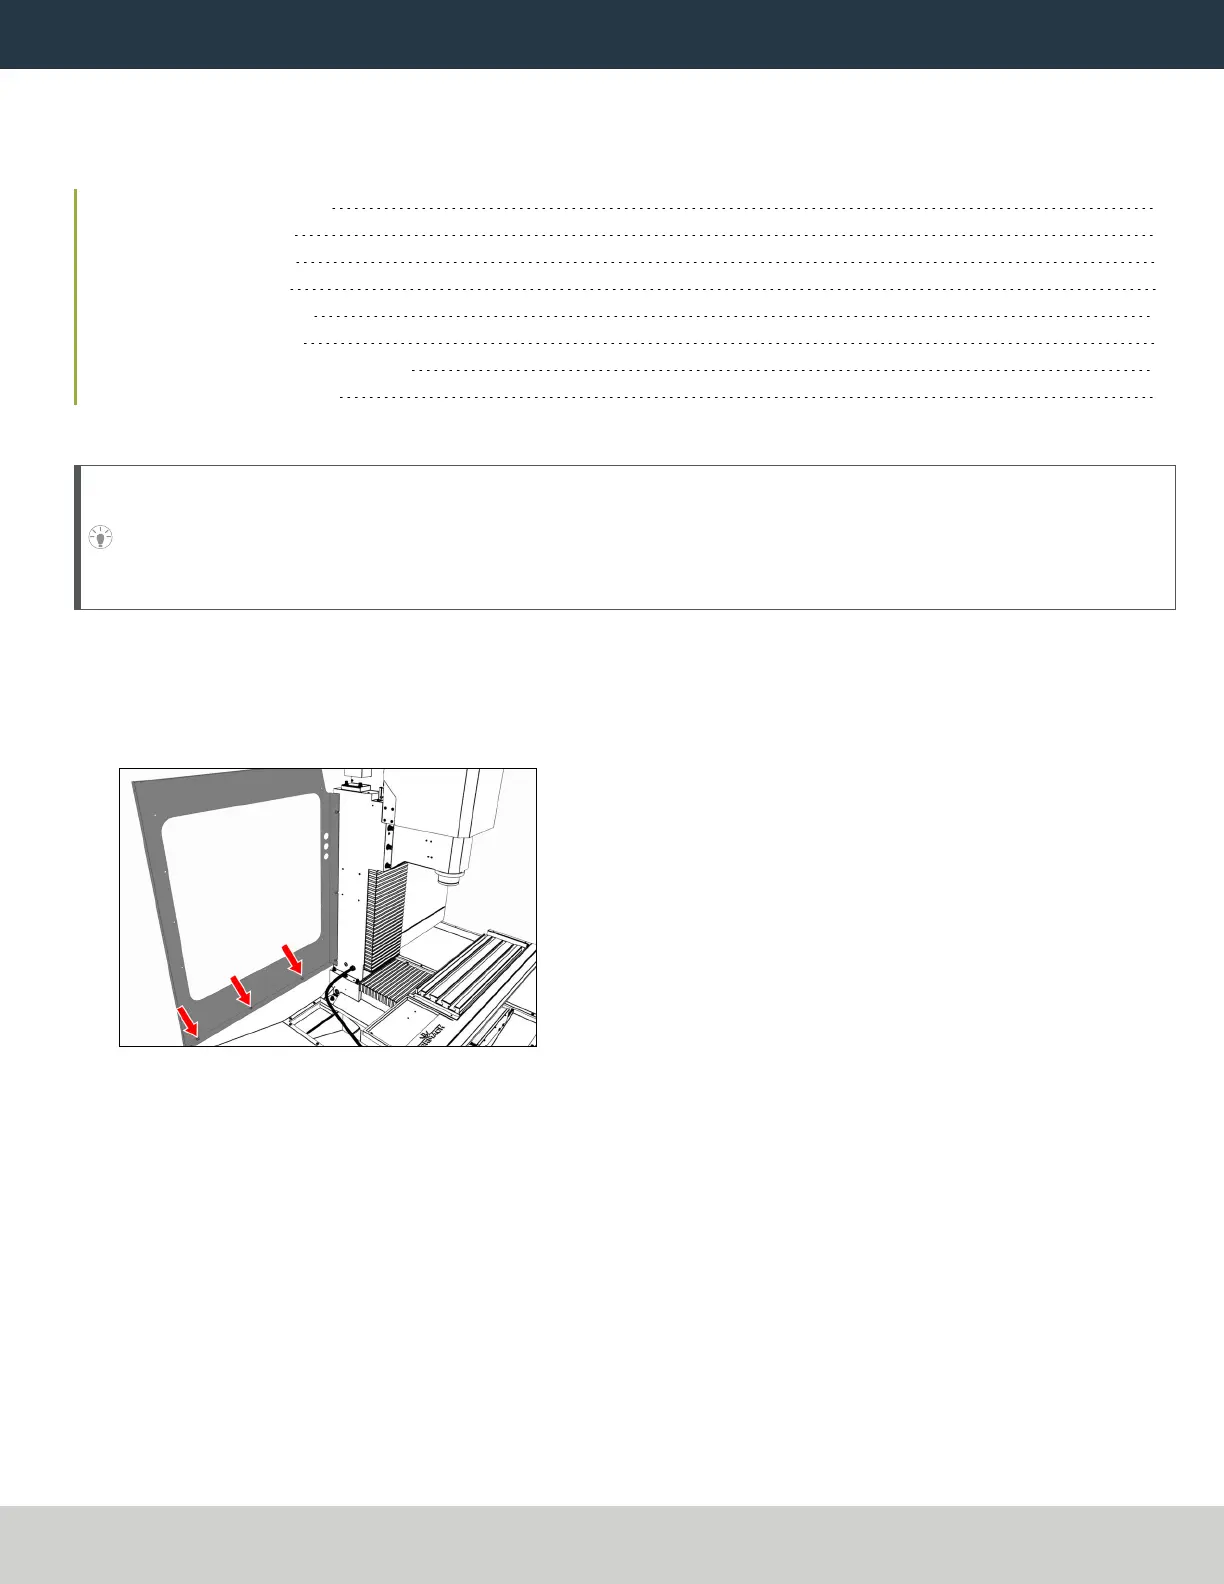
Install the Left Rear Panel
1. Attach the column cover to the machine column with three M6 × 1.0 - 12 screws.
2. Attach the left rear panel to the column cover with four M5 × 0.8 - 10 screws.
3. Attach the left rear panel to the left chip pan with three M6 × 1.0 - 12 screws.
Figure 2-1: Left rear panel attached to the left chip pan.
Page 3
©Tormach® 2022
Specifications subject to change without notice.
tormach.com
TD10536: Installation Guide: 770M Enclosure (0522A)
 Loading...