2.1 INSTALLATION
Install the Enclosure Splice Plate
1. Find the three installed M5 × 0.8 - 10 screws on the right side of the electrical cabinet.
2. Remove and set aside the three M5 × 0.8 - 10 screws.
3. Attach the right rear side panel to the electrical cabinet with the three M5 × 0.8 - 10 screws that you set aside in Step 2.
Install the Right Rear Panel
1. Find the three installed M5 × 0.8 - 10 screws along the top of the electrical cabinet.
2. Remove and set aside the three M5 × 0.8 - 10 screws.
3. Attach the right rear top panel to the electrical cabinet with the three M5 × 0.8 - 10 screws that you set aside in Step 2.
Install the Right Side Panel
1. Attach the right side panel to the enclosure splice plate with four M5 × 0.8 - 10 screws.
2. Attach the right side panel to the right chip pan with four M6 × 1.0 - 12 screws.
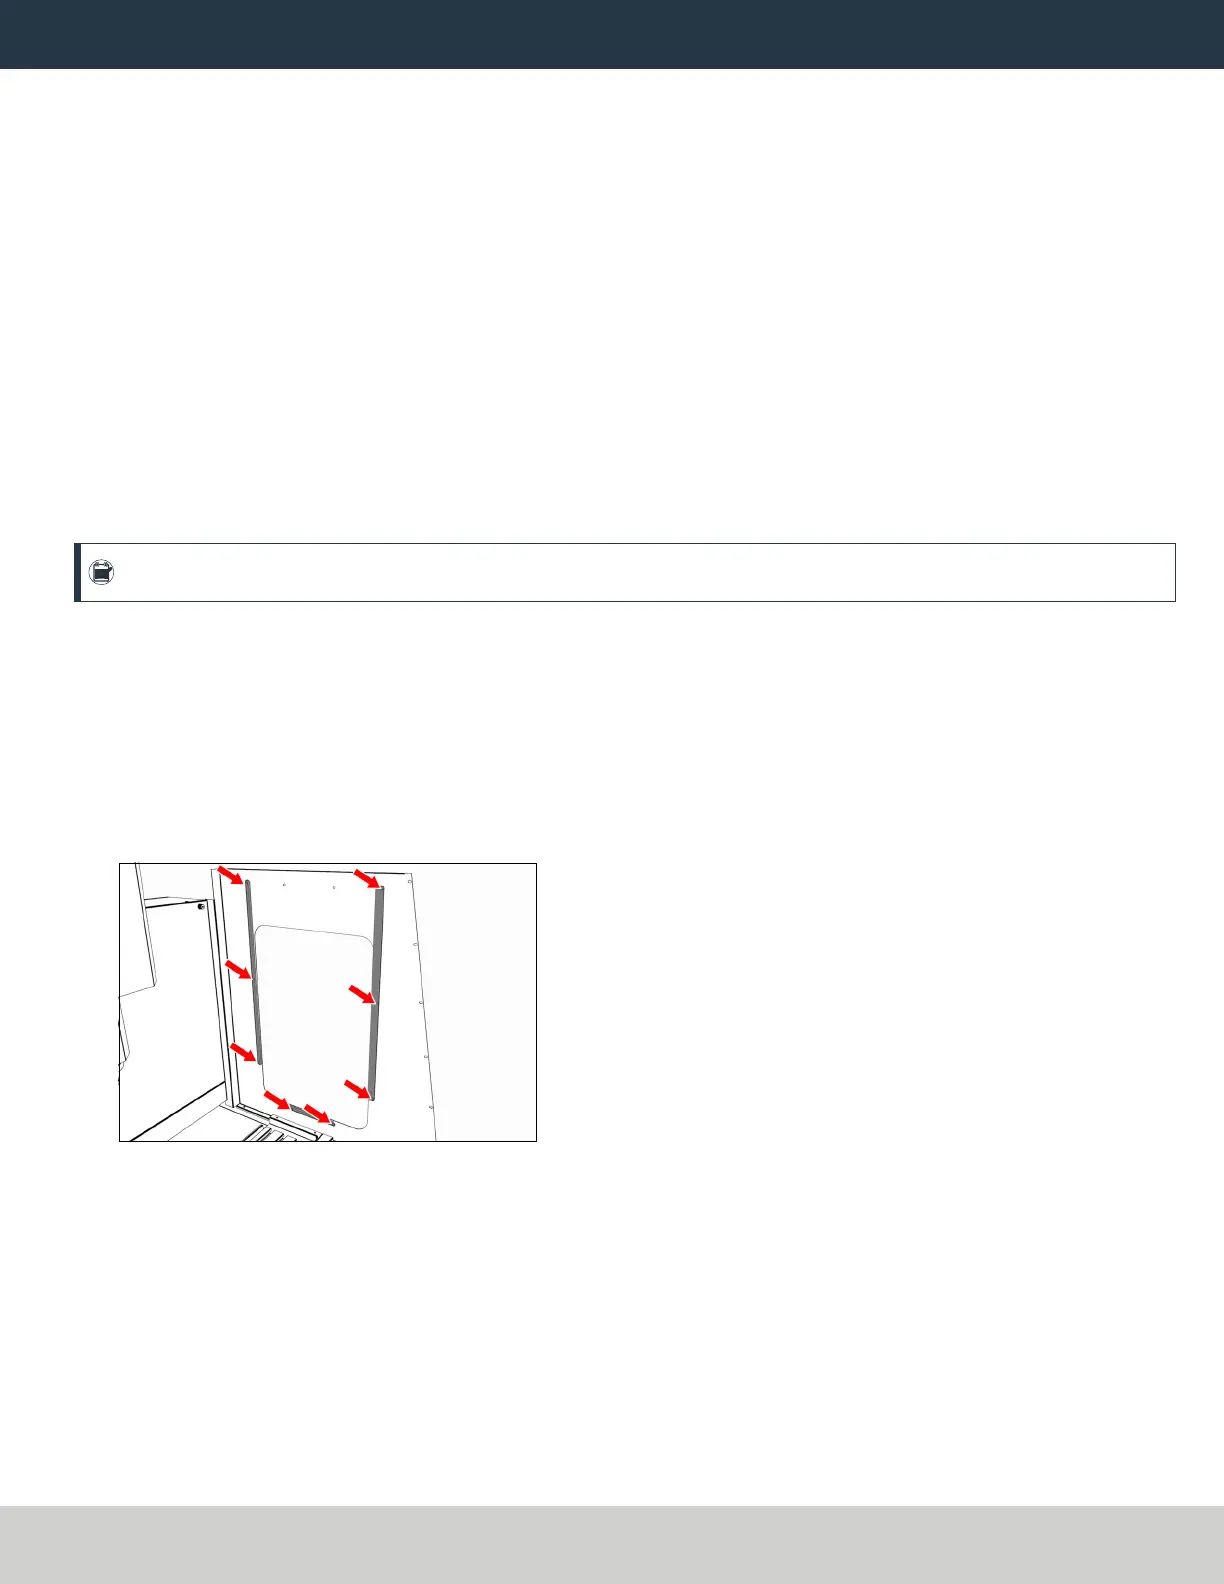
Install the Right Side Window Retainers
Note: To make it easier to install all components, don't install the side windows yet. Wait until later in the procedure.
1. Push a strip of rubber window trim on to the edges of:
l Two vertical window retainers
l One horizontal window retainer
When finished, use shears or a knife to cut the excess trim.
2. Loosely install two vertical window retainers on both sides of the right side panel's window opening with two sets of three M5 × 0.8 - 10
screws.
Don't fully tighten the screws. Leaving the window retainers loose makes it easier to install the side windows.
3. Loosely attach one horizontal window retainer to the bottom of the right side panel's window opening with two M5 × 0.8 - 10 screws.
Figure 2-7: Side window retainers attached to the right side panel.
Page 7
©Tormach® 2022
Specifications subject to change without notice.
tormach.com
TD10536: Installation Guide: 770M Enclosure (0522A)
 Loading...