Brush cleaning
Disassemble the brush and clean it
with a water jet (for the
disassembly see “BRUSH
DISASSEMBLY/ASSEMBLY”).
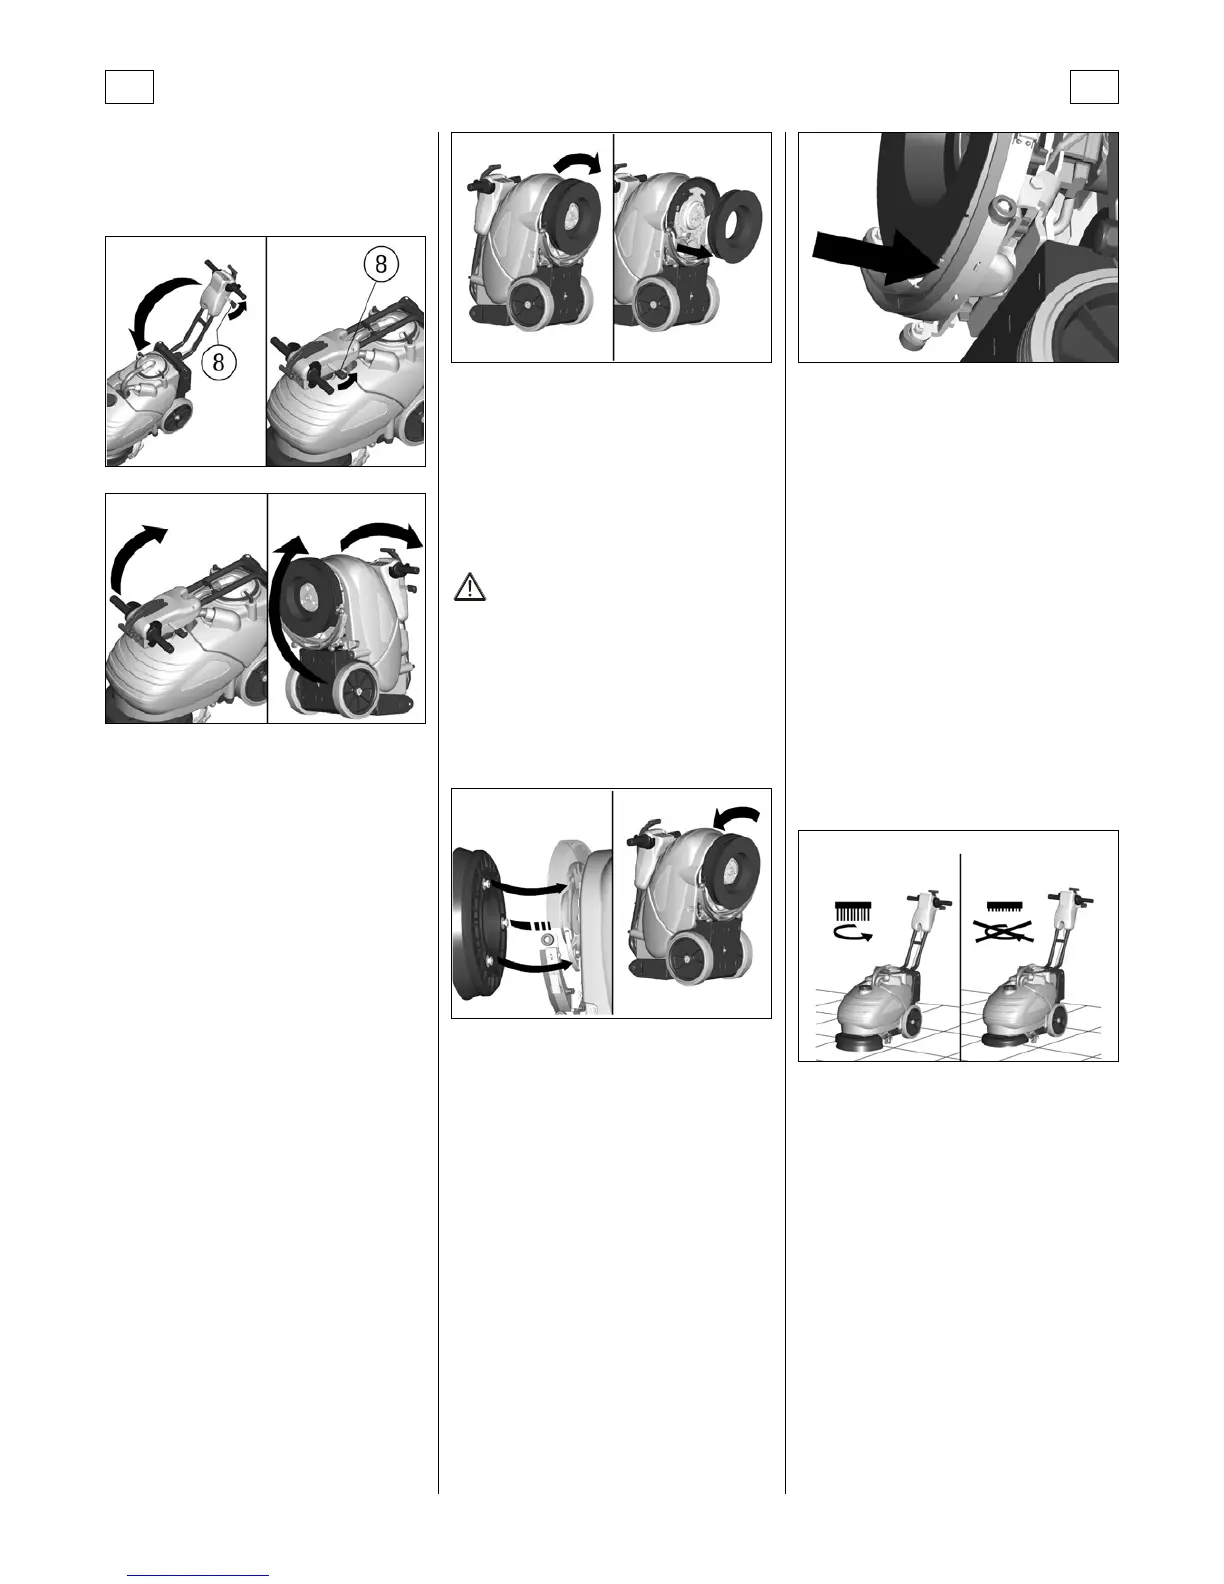
Brush disassembly/assembly
1. Tip the machine over backwards
(see under “POSITIONING OF
THE MACHINE FOR
MAINTENANCE AND
PARKING") paying attention to
remember to switch off the main
switch and to empty the tanks
before tipping over the machine.
2. With the machine in this
position rotate the brush
clockwise, as indicated in the
figure, until it is released from the
seats of the brush holder plate.
3. To reassemble the brush, insert
the coupling buttons on the brush
into the slots of the brush holder
plate and rotate counterclockwise
until it locks.
ATTENTION:
The handling of the brushes operation
must be carried out using suitable
gloves to protect both mechanically
from contact with the bristles and the
chemical risk of contact with
dangerous solutions.
Squeegee cleaning
Keeping the squeegee clean
guarantees the best drying action.
1. Tip over the machine backwards
(see under “POSITIONING OF
THE MACHINE FOR
MAINTENANCE AND
PARKING") paying attention to
remember to switch off the main
switch and to empty the tanks
before tipping over the machine.
2. With the machine in this
position clean the internal part of
the squeegee inlet, eliminating dirt
build up, and clean the squeegee
rubbers.
ORDINARY MAINTENANCE
Brush wear Control device
A safety device stops the brush
motor when the brush reaches a
low bristle level of about 10mm
such that a good cleaning result is
not guaranteed and to prevent floor
damages.
To restore the working
functionality of the machine it is
necessary to replace the brush (see
under “BRUSH
DISASSEMBLY/ASSEMBLY”).
Brush replacement
The brush has to be replaced when
the control device brush wear
intervenes. It is possible to use
other brush types, depending on
the type and dirt of the floor to be
cleaned (see under
“RECOMMENDED BRUSHES”).
Disassemble the old brush and
replace it with a new one (see
under “BRUSH
DISASSEMBLY/ASSEMBLY").