1
InstallingandAdjustingthe
Handle
Partsneededforthisprocedure:
1Handle
4
Cabletie
InstallingtheHandle
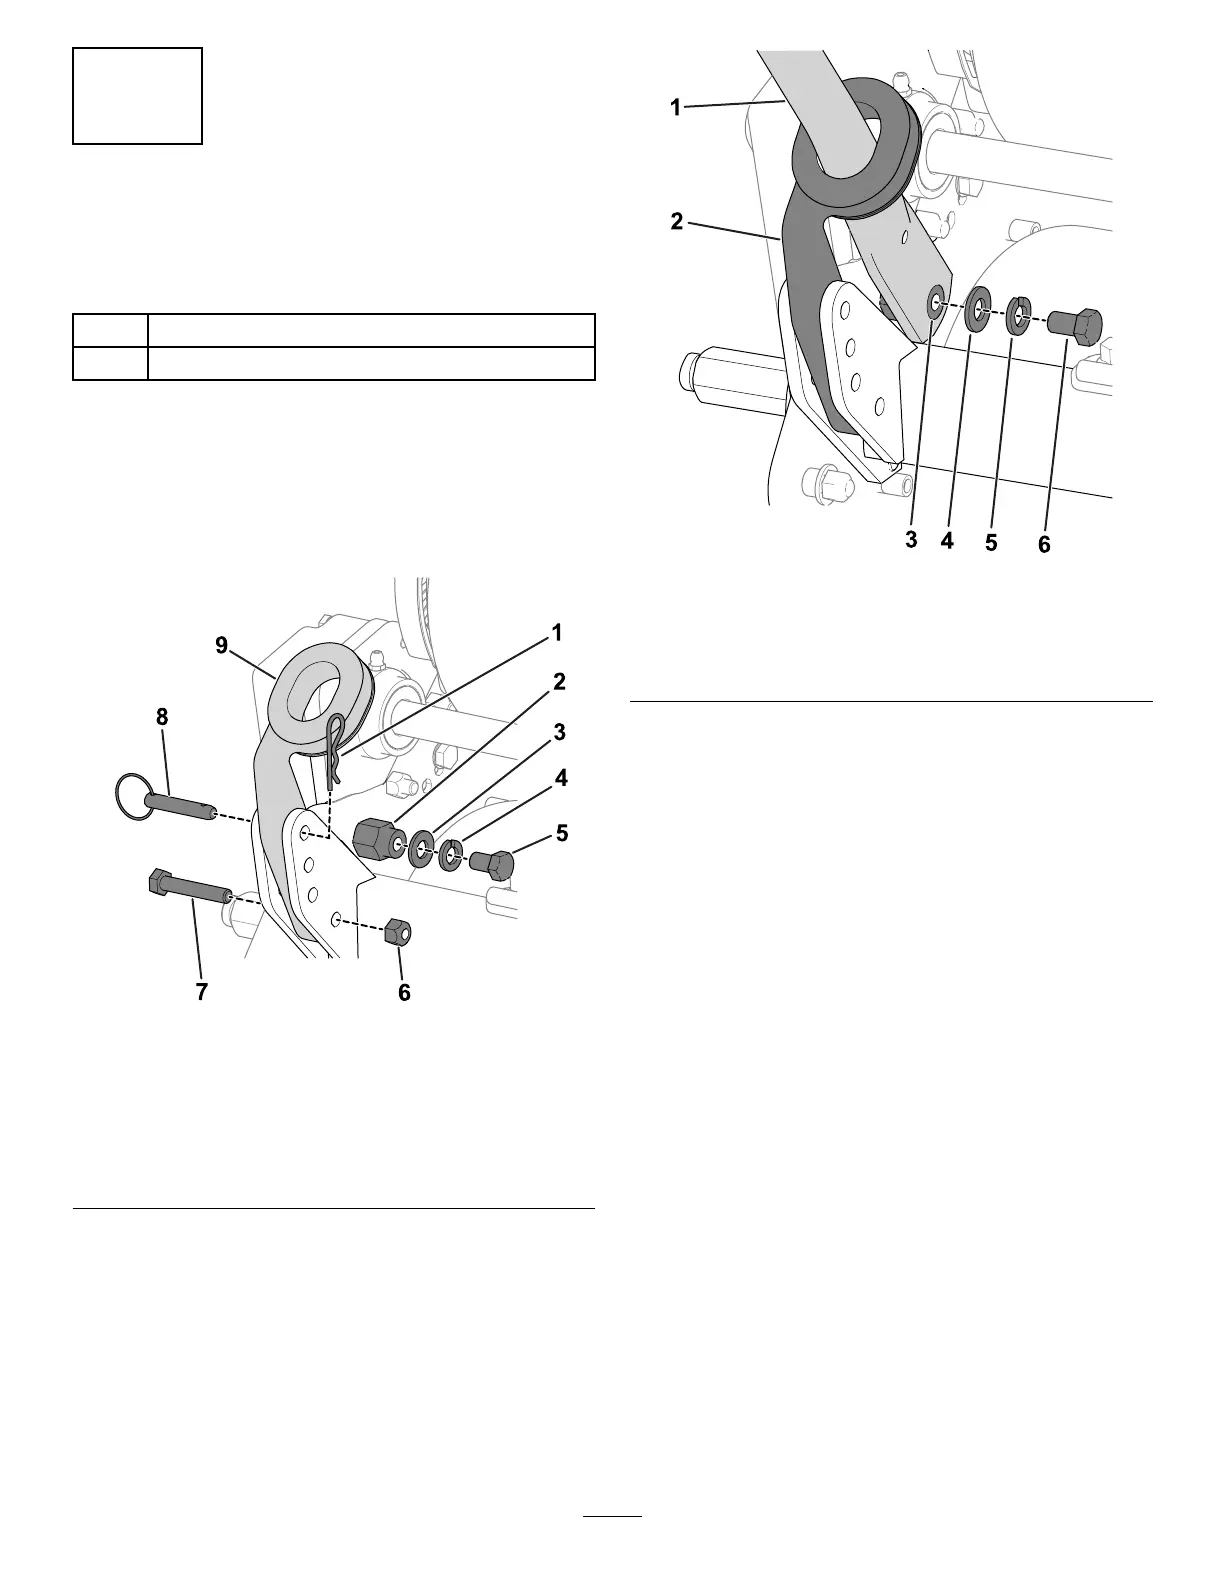
1.Removethebolts(5/16inch),locknuts,ring
pins,andhairpincottersthatsecurethebottom
ofthehandlearmstoeachsideofthemachine
(Figure3).
g240399
Figure3
1.Hairpincotter6.Locknut
2.Mountingpin
7.Bolt(5/16inch)
3.Washer8.Ringpin
4.Lockwasher9.Handlearm
5.Bolt(3/8inch)
2.Removethebolts(3/8inch),washers,andlock
washersfromthemountingpinsoneachsideof
themachine(Figure3).
3.Insertthehandleendsthroughtheholesin
thehandlearmsandaligntheholeswiththe
mountingpins(Figure3).
4.Squeezethehandleendsinwardandinstall
themonthemountingpins(Figure4).
g240404
Figure4
1.Handle4.Washer
2.Handlearm5.Lockwasher
3.Mountingpin
6.Bolt(3/8inch)
5.Securethehandletothemountingpinswiththe
bolts(3/8inch),washers,andlockwashersthat
youpreviouslyremoved(Figure4).
6.Usethebolts(5/16inch),locknuts,hairpin
cotters,andringpinsthatyoupreviously
removedtosecurethehandlearmstotherear
oftheframe(Figure3).
7.Securethecablesandwireharnesstothe
handlewiththecableties(Figure5).
8