7
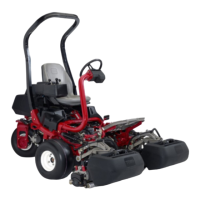
InstallingtheCuttingUnits
Partsneededforthisprocedure:
1
Gaugebar
3
Cuttingunit(obtainfromyourauthorizedT oro
distributor)
3
Grassbasket
3Electric-reel-motorcounterweight
6
Capscrew
3
O-ring
Procedure
1.Preparethecuttingunitsforinstallation;referto
yourcuttingunitOperator’sManual.
2.Applygreasetotheinsidediameterofthedrive
coupler.
3.InstallanO-ringtoeachreelmotorasshown
inFigure9.
g256064
Figure9
4.Installtheelectric-reel-motorcounterweight;
refertoInstallingtheElectricalCounterweights
(page49).
5.Installthecuttingunits;refertoInstallingthe
CuttingUnits(page49).
8
SettingtheClip-Control
Feature
NoPartsRequired
Procedure
Themachinehasaclip-controlfeaturethatvariesthe
speedofthereelswiththespeedofthemachineto
maintainaconstantclip.Thisachievesaconsistent,
highquality-of-cutandauniformafter-cutappearance.
Theclip-controlfeatureisoffbydefault;tocongureit
andturniton,refertoSettingtheClip-ControlFeature
(page21)
9
AddingRearWeight
Partsneededforthisprocedure:
1
WeightKit,PartNo.121-6665(purchaseseparately)
Note:Thiskitisnotrequiredforunitswiththe3wheel
drivekitinstalled.
Procedure
ThisunitcomplieswithENISO5395:2013andANSI
B71.4-2017whenequippedwithWeightKit,PartNo.
121-6665.
Note:Iftheunitisequippedwitha3-WheelDrive
Kit,additionalweightisnotrequiredtomeetENISO
5395:2013andANSIB71.4-2017.
15