12
1526
21
Figure
18
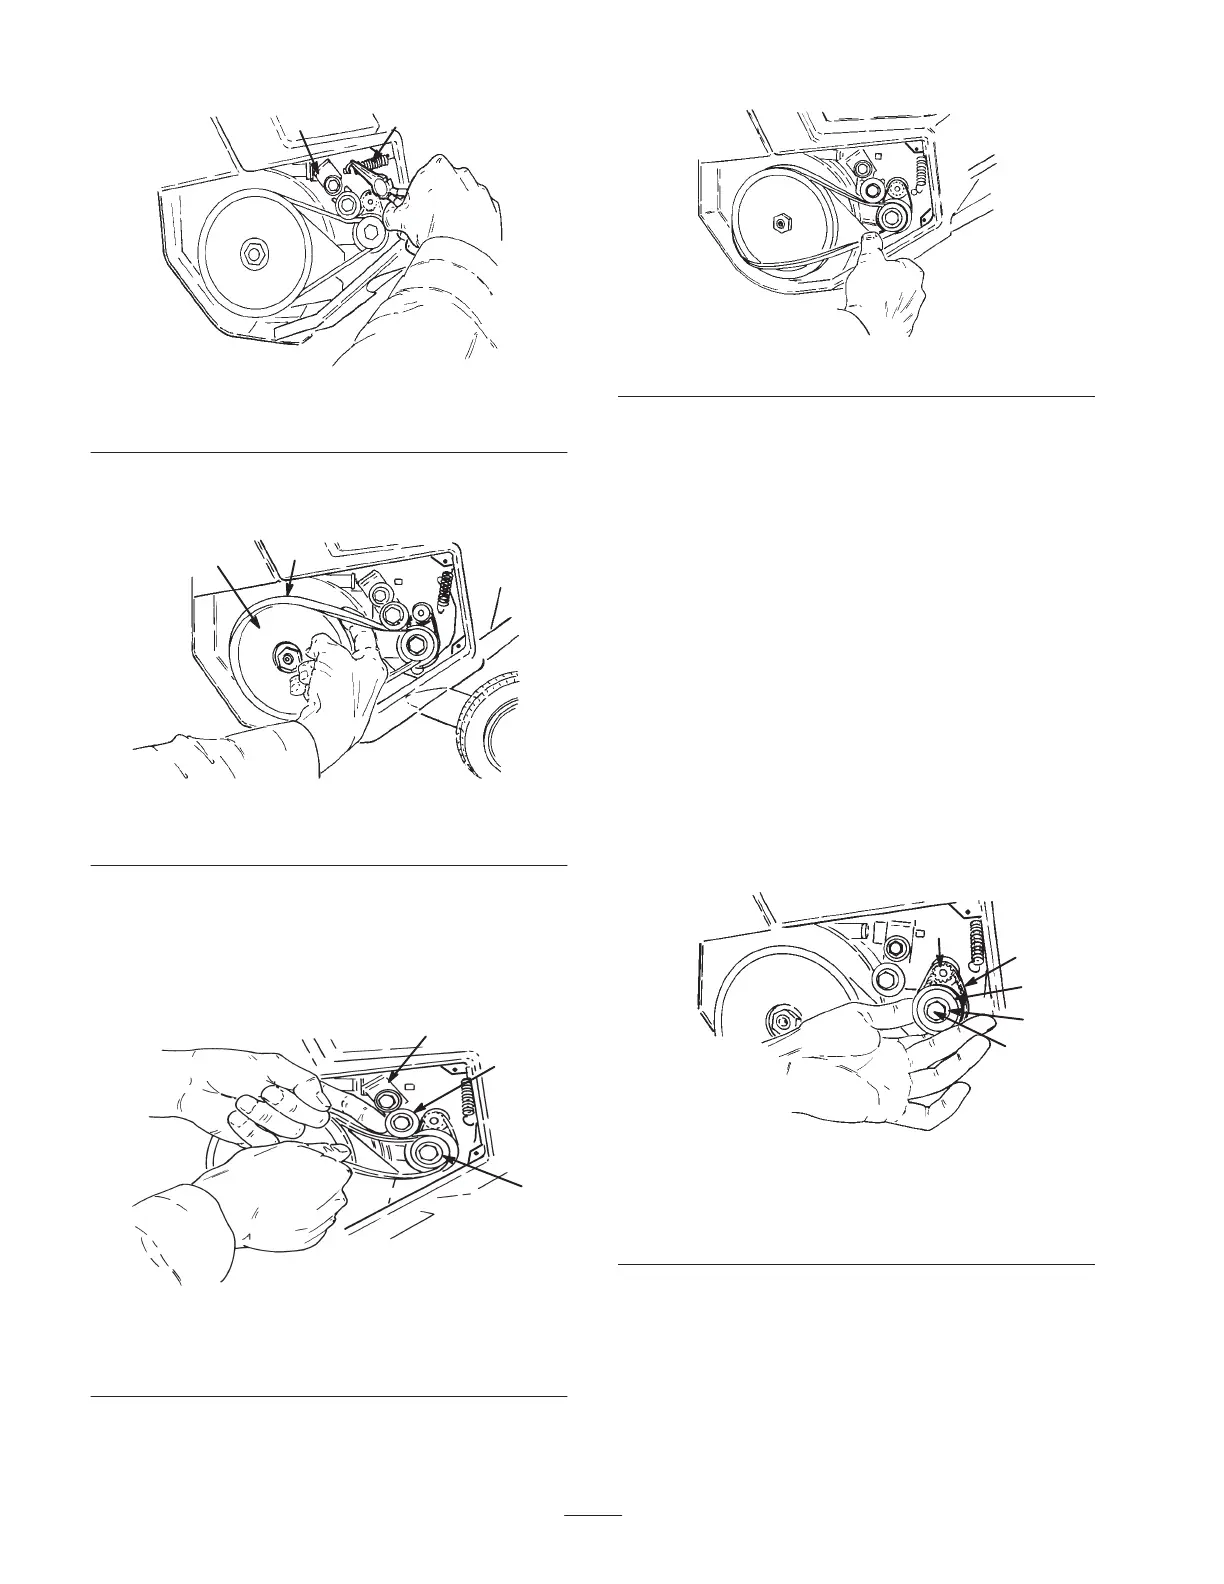
1. Idler
spring
2.
Idler arm
3. Rotate
the rotor with your left hand while sliding the
belt of
f the lar
ge pulley with your right hand (Fig. 19).
1527
1
2
Figure
19
1. Large
pulley
2. Belt
4. Slip
the new belt over the small pulley
. Lift up the
idler arm and slip the belt under the idler pulley
(Fig. 20). Rotate the rotor with your left hand while
sliding the belt onto the lar
ge pulley with your right
hand (Fig. 21).
1528
2
3
1
Figure
20
1. Idler
arm
2.
Idler pulley
3.
Small pulley
1529
Figure
21
5. Assemble
the idler spring, making sure the idler pulley
rides on the belt.
6.
Install the left side cover and the skid with the three
screws.
Replacing
the Small Belt
1. Remove
the screws that secure the left
side plate and
the skid to the snowthrower frame (Fig. 15). Remove
the side plate and the skid.
2.
Remove the lar
ge belt by slowly sliding it off the small
pulley (Fig. 19). Refer to steps 2 and 3 of
Replacing
the Lar
ge Belt
on page 1
1.
3.
Remove the small pulley bolt (left hand thread) by
turning the bolt clockwise.
4.
Remove the two washers and the small pulley (Fig.
22).
1530
1
2
3
4
5
Figure
22
1. Bolt
(left hand thread)
2. Washers
3.
Small pulley
4.
Small belt
5.
Motor shaft pulley
5. Remove
and discard the small belt (Fig. 22).
6.
Slide two washers onto the bolt and insert the bolt
through the small pulley
.
Note:
The bolt must ride on bearings in the small
pulley.
7.
Place the new belt on the small pulley
.
 Loading...