7
2. Insert
a rubber washer between the deflector and the
dischar
ge chute while maintaining the hole alignment
(Fig. 5).
3.
Secure the deflector to the dischar
ge chute with two
5/16–18 carriage bolts, metal washers, and locknuts.
Note:
Make sure the square shoulders on the carriage
bolts align with the inside square on the discharge chute.
Position the metal washers to the outside of the deflector
as shown in Figure 4.
Do not overtighten the bolts.
Before
Starting
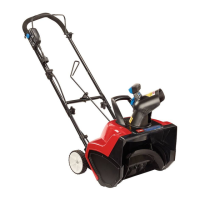
Unlocking
the Snowthrower
1. To
unlock the snowthrower
, push the key into the hole
(Fig. 6). While holding the key down, turn the key
counterclockwise. The interlock tab rotates away from
the prongs, allowing the extension cord to be plugged
in (Fig. 6). Do not attempt to remove the key when it
is in the unlocked position.
Note:
The interlock tab is a safety device that prevents
an unauthorized person from using the snowthrower
.
1540
LOCKED
UNLOCKED
1
2
Figure
6
1. Key 2. Interlock
tab
Securing
the Power Supply
Cord
For
safe and ef
ficient use of your appliance, use only a
UL-listed extension cord recommended for outdoor use.
Refer to the
Extension Cor
d Chart
that follows.
Extension
Cord Chart
If length of extension cord is
less than or equal to:
100 ft. 150 ft.
Assure wire size gauge
(A.W
.G.) in cord is:
16 14
Note:
Do not use an extension cord longer than 150 feet.
POTENTIAL HAZARD
•
Contact with water while operating the
snowthr
ower can cause electric shock.
WHA
T CAN HAPPEN
•
Electric shock can cause injury or death.
HOW T
O A
V
OID THE HAZARD
•
Don’t handle the plug or the appliance with wet
hands or while standing in water
.
•
Use only a UL-listed extension cord
r
ecommended for outdoor cold weather use.
Refer to the
Extension Cord Chart
on page 7.
1535
1
Figure
7
1. Extension
cord
 Loading...