10
• If there are more than 12,7 cm of leaves on lawn,
set the front wheels one or two notches higher
than the rear wheels. This makes it easier to feed
leaves under mower deck.
• Walk at a slower mowing speed if leaves are not
being cut up finely enough to be hidden down in
the grass.
• If you cut up a lot of oak leaves, you might want
to add lime to your grass in the spring. Lime
reduces the acidity of oak leaves.
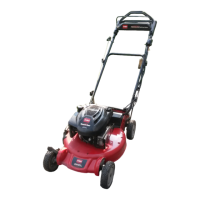
Operation
Operating
T
ips
1. CHECK OIL LEVEL—Maintain oil level
between ADD and FULL marks as shown on
dipstick (Fig. 7).
2. BEFORE EACH MOWING—Ensure
self–propelled drive and control bar functions
properly. When control bar is released, engine
and self-propelled drive are designed to stop.
Starting,
Stopping And
Self-propelling
1. CONTROLS—Key switch (electric start model),
throttle, ground speed control, control bar and
recoil starter are on upper handle (Fig. 9).
Note: The engine requires a warm-up period
of one minute to several minutes,
depending on the temperature.
2. Push spark plug wire onto spark plug (Fig. 10).
3. Move ground speed control to
(FAST)
position.
4. Push primer three (3) times (Fig. 8). Wait about
two (2) seconds between each push.
Note: Do not use primer to restart a warm
engine after a short shutdown.
However, cool weather may require
priming to be repeated.
5. KEY–LECTRIC STARTING—Turn key to
(START) and release when engine begins
running. When engine starts, regulate engine
speed as desired. If the battery’s charge is too
weak to start the engine, the engine can be
started with the recoil starter (Fig. 9). Allow the
engine to warm-up. During warm-up, the
equipment can be operated.
6. MANUAL STARTING—Squeeze control bar
against handle. Pull recoil starter out until
positive engagement results; then pull vigorously
to start the engine. When engine starts, regulate
engine speed as desired.
7. GROUND SPEED (Fig. 9)—The mower has
three ground speeds: number “1” is slow, “2” is
medium, and “3” is a fast walking pace. Move
ground speed control to desired setting. Ground
speed can be varied by incr
easing or
decreasing distance between control bar and
handle. Lower control bar to slow mower when
making a turn, maneuvering, or if mower is
moving too fast for you. If you lower control bar
too far, the mower will stop self-propelling.
Squeeze control bar closer to handle to increase
ground speed. When control bar is tight against
handle, mower will self-propel at maximum
ground speed. The control bar does not have to
be squeezed tight against the handle to
self-propel. Move ground speed control to
when using the mower for trimming and
whenever leaving mower.
8. WHEEL TRACTION OPERATION
(Fig. 11)—Move control bar to the RUN/SHIFT
position. Move ground speed control to desired
setting and raise control bar to the DRIVE
position to self-propel.
IMPORTANT: Do not shift speeds while
control bar is in the DRIVE position; the
transmission could become damaged and
cause shifting problems. To change ground