Do you have a question about the Toro 20058 and is the answer not in the manual?
Warning about chemicals in engine exhaust known to cause cancer and reproductive harm.
Warning about engine not being equipped with a spark arrester muffler for California use.
General safety information for operating the lawn mower safely.
Explains the safety alert symbol and its purpose for hazard warnings.
Instructions on how to mow safely across the face of slopes.
Be aware of uneven terrain and hidden objects when mowing on slopes.
Avoid mowing on wet grass or excessively steep slopes for safety.
Do not mow near drop-offs, ditches, or embankments to maintain balance.
Keep children out of the mowing area and supervised by another adult.
Be alert for children and turn off the mower if one enters the area.
Never allow children to operate the lawn mower.
Use extra care around blind corners to spot children.
Instructions for safe handling of gasoline to prevent fire and explosion hazards.
Indicates the blade is identified as a part from the original machine manufacturer.
Technical specifications and model details for the battery charger.
Summarizes critical safety warnings like mowing across slopes and keeping children away.
Instructions for installing the blade control bar into the upper handle.
Instructions for assembling and unfolding the mower handle safely.
Ensure cables are not damaged or pinched when assembling the handle.
Install and tighten handle knobs securely on the outside of the handle.
Rotate the handle rearward as shown in the figure.
Remove and clean the dipstick before checking the oil level.
Slowly pour oil into the fill tube until it reaches the Full line on the dipstick.
Change engine oil after first 5 hours and then yearly.
Install the dipstick securely after checking the oil level.
Fuse must be installed for electric starter or battery charging to function.
Unclip and remove the battery cover to access the fuse.
Install the 40-amp fuse into the fuse holder.
Install the battery cover after installing the fuse.
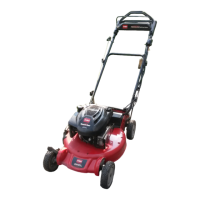
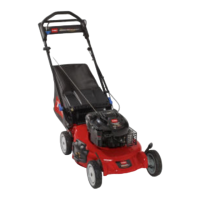
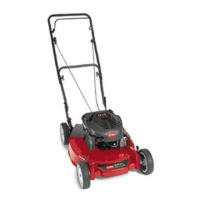
Identifies key components and parts of the Toro lawn mower.
Instructions for safely filling the fuel tank with gasoline.
Place container/mower on ground before filling to prevent static charge.
Fill tank outdoors when cold, wipe spills, no smoking/flames.
Store gasoline in an approved container out of reach of children.
Use fresh unleaded regular gasoline from a name-brand station.
Add fuel stabilizer to fuel less than 30 days old for easier starting.
Remove and clean the dipstick before checking the oil level.
Check the oil level against the Add/Full marks on the dipstick.
Install the dipstick securely after checking the oil level.
Warning about potential contact with the moving blade during cutting height adjustment.
Adjust cutting height by setting all four wheels to the same height.
Remove lower handle knobs to detach brackets from handle ends.
Insert bolts through handle bracket holes to set desired handle height.
Install and tighten lower handle knobs to secure the handle height.
Push the ignition toggle switch to the "On" position.
Firmly push the primer button 3 times for starting.
Start the engine by pulling the recoil starter.
Pull the recoil starter at the engine to start it.
If the mower doesn't start, re-prime and try again or contact dealer.
Firmly push the primer button 3 times for starting.
Start the engine using the ignition key or recoil starter.
Turn the ignition key to Start, then release when engine starts.
Walk with hands on handle; mower will keep pace automatically.
Push the ignition toggle switch to the Stop position.
Remove the ignition key when leaving the mower.
Turn the ignition key to the Off position.
Remove the ignition key when leaving the mower.
Pull the control bar lock back to prepare for engagement.
Pull the blade control bar to the handle to engage the blade.
Hold the blade control bar against the handle to keep the blade engaged.
Release the blade control bar to disengage the blade.
Check that the blade stops within 3 seconds of releasing the control bar.
Use the grass bag to test if the blade brake clutch is engaging properly.
Ensure the bag deflates, indicating the blade stopped rotating.
Use a newspaper ball to test blade stopping if not using the grass bag.
If newspaper is shredded, the blade did not stop properly; contact dealer.
Remove grass bag or side discharge chute before recycling clippings.
Ensure the rear discharge plug is in place before recycling clippings.
A worn bag can throw debris, causing injury; replace if damaged.
Remove side discharge chute before bagging clippings.
Warning that the blade is sharp and can cause serious injury.
Raise and hold up the rear door to install the grass bag.
Remove grass bag and insert rear discharge plug before side-discharging.
Ensure rear discharge plug is in place before side-discharging clippings.
Warning that the blade is sharp and can cause serious injury.
Unlock the side discharge door to install the chute.
Lock the side discharge door after removing the chute.
General advice for mowing, including clearing debris and handling mower impact.
Clear the area of sticks, stones, wire, and branches before mowing.
Avoid striking solid objects with the blade; do not deliberately mow over objects.
Stop engine, disconnect spark plug wire, and check for damage if mower strikes object.
Install a new blade before the season or replace when necessary for best performance.
Guidelines for cutting grass, including height, speed, and conditions.
Cut only about a third of the grass blade at a time for best results.
Mow tall grass at highest setting, walk slower, then re-mow at lower setting.
Mow only dry grass or leaves; wet conditions can cause plugging.
Wet grass/leaves can cause injury from slipping; mow only in dry conditions.
Alternate mowing direction for even fertilization.
Tips to improve lawn appearance include blade sharpness, pace, and height.
Set front wheels one notch lower than rear wheels for better results.
Techniques for cutting leaves to ensure fine clippings.
Ensure half the lawn shows through cut leaf cover; multiple passes may be needed.
Raise front wheel height higher than rear for thick leaf layers.
Slow mowing speed if leaves are not cut finely enough.
Provides a schedule for routine maintenance tasks based on service intervals.
Refers user to the engine owner's manual for additional maintenance procedures.
Steps to safely prepare the mower before performing any maintenance.
Stop the engine and wait for all moving parts to stop before starting maintenance.
Disconnect the spark plug wire from the spark plug before maintenance.
Precautions for tipping the mower, including draining fuel and air filter position.
Reconnect the spark plug wire after maintenance is complete.
Perform pre-maintenance procedures before replacing the air filter.
Use a screwdriver to open the air filter cover.
Replace the old air filter with a new one.
Install the air filter cover after replacing the filter.
Run the engine briefly to warm the oil for better flow and contaminant removal.
Perform pre-maintenance procedures before changing the engine oil.
Remove the dipstick to prepare for draining the engine oil.
Tip the mower onto its side to drain used oil through the fill tube.
Pour new oil into the fill tube until it reaches the Full line on the dipstick.
Install the dipstick securely after adding new engine oil.
Dispose of used engine oil properly at a local recycling center.
Battery components contain lead, known to cause cancer and reproductive harm. Wash hands.
Charge battery 24 hours initially, then monthly; charge in sheltered area at room temp.
Connect the charger to the mower wire harness located below the ignition key.
Replace a blown fuse with a 40-amp plug-in type fuse.
Wipe the grease fittings inside the rear wheels with a clean rag.
Apply 2-3 pumps of grease to each fitting using a grease gun.
A torque wrench is needed for proper blade installation; contact dealer if uncomfortable.
Examine the blade for damage or dullness; replace or sharpen as needed.
Warning about blade sharpness and potential for serious personal injury.
Wear gloves when servicing the blade for protection.
Disconnect spark plug wire before blade replacement.
Tip the mower onto its side with the air filter up for blade replacement.
Remove the blade nuts and stiffener holding the blade.
Remove the old blade from the mower.
Install the new blade onto the mower.
Reinstall the stiffener that was previously removed.
Install blade nuts and torque them to 15-27 ft-lb (20-37 N·m).
Disconnect spark plug wire before cleaning the clutch shield.
Tip mower onto side with air filter up for cleaning the clutch shield.
Remove blade nuts and stiffener to access the clutch shield.
Wear eye protection when cleaning the mower.
Stay in the operating position when the engine is running during cleaning.
Do not allow bystanders in the area while cleaning.
Clean the mower soon after mowing for best results.
Lower the mower to its lowest cutting height setting for cleaning.
Move the mower onto a flat paved surface for cleaning.
Attach a garden hose to the washout port on the mower housing.
Turn on the water supply connected to the hose.
Start the engine to run until no more clippings exit the housing.
Stop the engine after the housing is cleared.
Shut off water and disconnect the garden hose.
Run the engine for a few minutes to dry the mower housing.
Warning about gasoline vapors exploding; do not store near open flame.
Do not store gasoline for more than 30 days.
Do not store the mower in an enclosure near an open flame.
Allow the engine to cool completely before storing the mower.
Add fuel stabilizer to the fuel during the last refueling of the year.
Run the mower until the engine stops from running out of fuel.
Prime the engine and start it again to ensure fuel is consumed.
Allow the engine to run until it stops again, ensuring the fuel system is dry.
Warning about accidental starting if key is bumped while folding handle; remove key first.
Always remove the ignition key before folding the handle.
Remove the lower handle knobs to fold the handle.
Detach the lower handle brackets from the lower end of both handle sides.
Rotate the handle forward as shown.
Route cables to the outside of the handle knobs when folding the upper handle.
Remove spark plug and spin engine to blow out excess oil.
Install and torque the spark plug to 15 ft-lb (20 N·m).
Charge the battery (model 20058 only) after removing from storage.
Connect the wire to the spark plug.
Details warranty coverage for Toro engines and walk mowers.
Lists covered products (mowers, accessories, batteries) and their warranty periods.
Steps to follow for obtaining warranty service for Toro products.
Contact an authorized dealer to arrange for warranty service.
Bring product and proof of purchase to the service dealer.
Contact Toro Customer Care if dissatisfied with dealer service.
Outlines owner's responsibilities for maintaining the Toro engine.
Maintain the Toro engine according to the maintenance schedule in the manual.
Record all maintenance activities in the manual's chart and keep proof of purchase.
Lists items and conditions that are not covered by the Toro warranty.
Excludes normal maintenance like spark plugs, filters, and adjustments.
General terms for warranty repairs, liability, and legal rights.
All warranty repairs must be performed by an Authorized Toro Service Dealer.
Toro is not liable for indirect, incidental, or consequential damages.
Some states may not allow exclusion of damages, giving you specific legal rights.
Chart to record maintenance for the starting guarantee.
Details warranty periods for Toro products used for residential and commercial purposes.
Lists covered products and their warranty periods under Total Coverage.
Specific warranty terms for Toro walk power mowers used commercially.
45-day limited warranty for engine and unit for commercial use.
Steps to obtain warranty service for Toro products under total coverage.
Contact an authorized dealer for warranty service arrangements.
Bring product and sales receipt to the service dealer for warranty.
Contact Toro Customer Care if dissatisfied with service dealer's assistance.
Owner must maintain the Toro product per the operator's manual.
Maintain the Toro product according to the maintenance procedures in the Operator's Manual.
Lists items and conditions not covered by the Total Coverage Guarantee.
Excludes costs of regular maintenance parts like filters, fuel, and spark plugs.
Excludes parts altered, misused, or damaged due to accidents or lack of maintenance.
Excludes repairs due to improper fuel, contaminants, or failure to prepare for non-use.
Excludes repairs due to improper battery care or failure to prepare for non-use.
Pickup and delivery charges are not covered by the warranty.
Check the Operator's Manual for correct starting procedures if you have difficulty.
General conditions for warranty repairs and liability.
All repairs must be performed by an Authorized Toro Service Dealer using approved parts.
Toro is not liable for indirect, incidental, or consequential damages.
State laws may provide additional rights not covered by these exclusions.
Instructions for customers outside the US/Canada to obtain warranty information.
Contact your Toro Distributor (Dealer) for guarantee policies in your country.
| Brand | Toro |
|---|---|
| Model | 20058 |
| Category | Lawn Mower |
| Language | English |