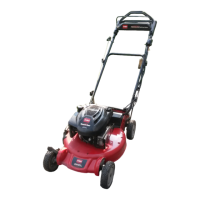
Figure 53
1. Blade nuts 4. Blade driver
2. Stiffener 5. Disk
3. Blade 6. Blade brake clutch shield
4. R emo v e the blade ( Figure 53 ).
5. R emo v e the blade dri v er and disk ( Figure 53 ).
6. R emo v e the blade brak e clutc h shield ( Figure 53 ).
7. Br ush or blo w out debris from the inside of the shield
and around all the par ts .
8. Install the blade brak e clutc h shield that y ou previously
remo v ed.
9. Install the blade dri v er that y ou previously remo v ed.
10. Install the blade and the stiffener that y ou previously
remo v ed ( Figure 53 ).
11. Install the blade n uts and torque them to 15 to 27
ft-lb (20 to 37 N ⋅ m).
Cleaning the Mower
T he mo w er may dislodge material fr om under the
mo w er housing .
• W ear ey e pr otection.
• Stay in the operating position (behind the
handle) when the engine is r unning .
• Do not allo w bystander s in the ar ea.
F or best results , clean the mo w er soon after y ou ha v e
completed mo wing .
1. Lo w er the mo w er to its lo w est cutting height setting .
R efer to Adjusting the Cutting Height.
2. Mo v e the mo w er onto a flat pa v ed surface .
3. Attac h a g arden hose that is connected to a w ater supply
to the w ashout por t on the mo w er housing ( Figure 54 ).
Figure 54
1. Washout port
4. T ur n the w ater on.
5. Star t the engine and r un it until there are no more
clippings that come out from under the mo w er housing .
6. Stop the engine .
7. Shut off the w ater and disconnect the g arden hose from
the mo w er .
8. Star t the engine and r un it for a few min utes to dr y the
housing .
Storage
Store the mo w er in a cool, clean, dr y place .
Preparing the Mower for
Storage
Gasoline v apor s can explode.
• Do not stor e gasoline mor e than 30 days.
• Do not stor e the mo w er in an enclosur e near an
open flame.
• Allo w the engine to cool bef or e storing it.
1. On the last refueling of the year , add fuel stabilizer to
the fuel as directed b y the engine man ufacturer .
2. R un the mo w er until the engine stops from r unning
out of fuel.
3. Prime the engine and star t it ag ain.
4. Allo w the engine to r un until it stops . W hen y ou can no
long er star t the engine , it is sufficiently dr y .
19

 Loading...