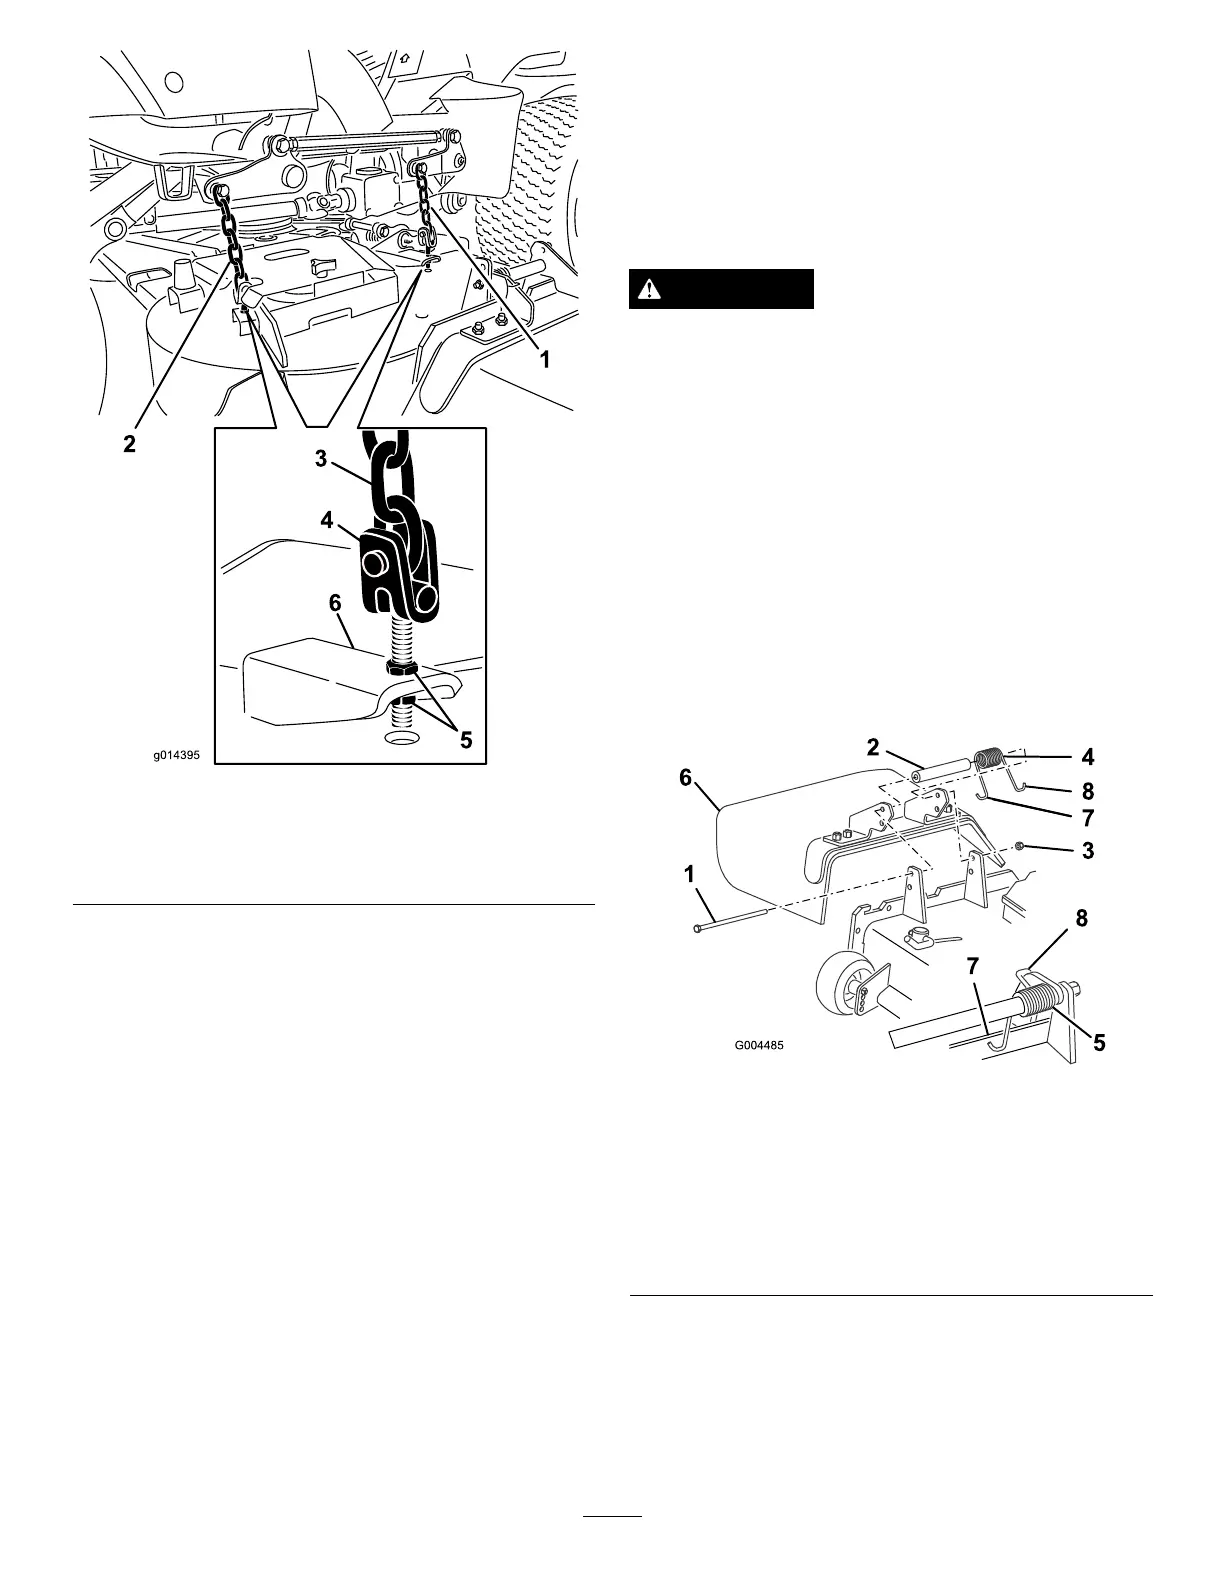
Figure70
1.Frontdeckyokechain4.Yoke
2.Reardeckyokechain5.Jamnut
3.Chain
6.Mowerdeck
AdjustingtheMowerDeck
Pitch
Cuttingunitpitchisthedifferenceinheight-of-cutfromthe
frontofthebladeplanetothebackofthebladeplane.Toro
recommendsabladepitchofapproximately5/16inch(8
mm).Thatisthebackofthebladeplaneis5/16inch(8mm)
higherthanthefront.
1.Positionthemachineonalevelsurfaceontheshop
oor.
2.Setthecuttingunittothedesiredheight-of-cut,move
thethrottlelevertotheSlowposition,stoptheengine,
settheparkingbrake,andremovetheignitionkey.
3.Rotatethecenterbladesothatitpointsstraight
forward.
4.Usingashortruler,measurefromtheoortothefront
tipoftheblade.
5.Rotatethesamebladetiptotherearandmeasurefrom
theoortothetipofthebladeattherearofthedeck.
6.Subtractthefrontdimensionfromthereardimension
tocalculatethebladepitch.
7.Adjustthejamnutssecuringthereardeckyokes/chains
toraisetherearofthedecksothatthebladepitchis
setto5/16inch(8mm)(
Figure70).
ReplacingtheGrassDeector
WARNING
Anuncovereddischargeopeningcouldallowthe
machinetothrowobjectsintheoperator'sor
bystander'sdirectionandresultinseriousinjury.
Also,contactwiththebladecouldoccur.
•Neveroperatethemachinewithoutamulchkit
orgrassdeectorinstalled.
•Makesurethegrassdeectorisinthedown
position.
1.Lowerthecuttingunittotheshopoor,movethe
throttlelevertotheSlowposition,stoptheengine,set
theparkingbrake,andremovetheignitionkey.
2.Removethelocknut,bolt,springandspacerholding
thedeectortothepivotbrackets(
Figure71).Remove
damagedorworngrassdeector.
Figure71
1.Bolt
5.Springinstalled
2.Spacer6.GrassDeector
3.Locknut
7.Lefthandhookendof
spring,placebehinddeck
edgebeforeinstallingbolt
4.Spring8.Righthandhookendof
spring
3.Placethespacerandspringbetweenthereplacement
grassdeectorbrackets(Figure71).Placethelefthand
Jhookendofthespringbehindthedeckedge.
Note:MakesurethelefthandJhookendofthe
springisinstalledbehindthedeckedgebeforeinstalling
theboltasshownin
Figure71.
58